Author Archives: Chestnut Hill Nursery

Yellowjackets: Good Guys or Bad?

When you hear “yellowjacket,” what’s the first thing that comes to mind? A buzzing, stinging insect ruining your outdoor meal or a treasured pollinator of many plants? A yellowjacket is both!

About Yellowjackets

The most commonly found yellowjacket is the Eastern yellowjacket (Vespula maculifrons). The Eastern yellowjacket is a wasp that is 1/2 to 5/8 inch long and is black and yellow striped. The body is curved under and is wider than the head. Yellowjackets do not have any “hairs” such as are found on honeybees and bumblebees.

Yellowjackets are generally ground nesters, however, in some situations, especially in urban areas, they will make their nest above ground such as in hollow walls and attics.

During the spring and summer, the colony population increases from the fertilized solitary queen, who survived the winter, to several thousand. Adult yellowjackets feed protein to the young wasps and larvae while they subsist on sugars. Foraging for food, the wasps cross-pollinate plants while seeking small insects and nectar. Yellowjackets provide a valuable service to humans by consuming numerous insects that eat ornamental and cultivated plants.

On the other hand, yellowjackets are drawn to cookouts, picnic areas and garbage cans. Their sting, unfortunately, is especially painful. Unlike honeybees, which only sting once, wasps can sting numerous times. Some people react severely to the venom and may have problems breathing or other dangerous reactions.

To Minimize Yellowjacket Interactions

Despite their good characteristics, many people prefer to keep yellowjackets away from picnics, play areas and yards. To reduce the possibility of inviting yellowjackets to your outdoor party…

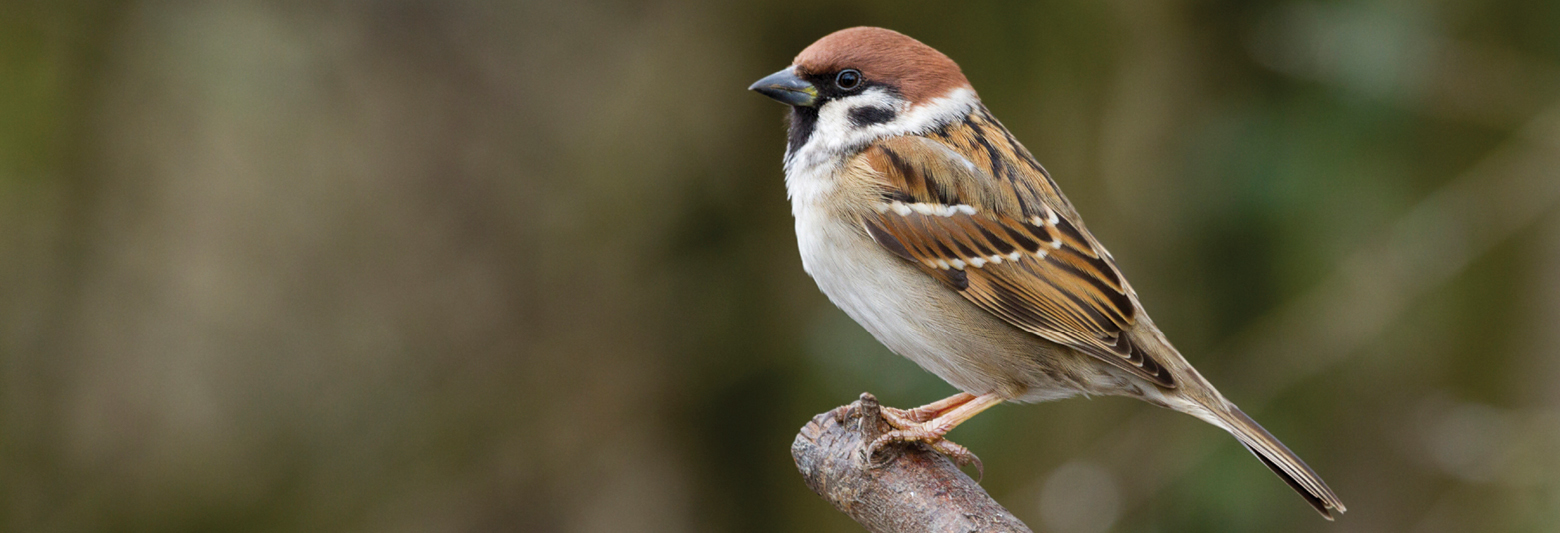
  • Don’t leave moist pet food outside during the summer. Bird seed is fine, but not suet.
  • Keep garbage cans washed. Securely cover all garbage cans and recycling containers. Rinse beer, wine, soft drink and ice cream containers before disposing of them.
  • Keep garbage cans away from entertainment areas, play areas and pathways.
  • If eating outdoors, cover all serving plates and drinking glasses/bottles to prevent yellowjackets from getting into food or drink. When yellowjackets are in the area, be sure to check your food and drink before consuming.
  • Yellowjackets feed on aphids and scale on trees and shrubs. Therefore, spray for these pests in July and August, if needed, to remove that food source.
  • Repair dripping hoses and faucets as the puddles can attract wasps.
  • Wasps enjoy rotting fruit. Harvest tree and cane fruits when ripe. Carefully pick up all fallen fruit (gloves are a good idea!) and dispose of it in a covered container.
  • Wasps create a flight-path from the nest to food sources. Avoid this area. If this is not possible, consider removing the nest.
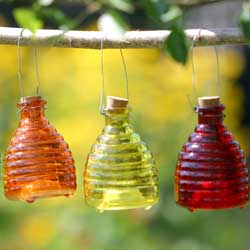
Yellowjacket Traps

To help make your outdoor gatherings more pleasant and safer, yellowjacket traps can be effective. Hang these around the perimeter of your yard if you plan to eat outside, but never hang traps near the food area, as you will only increase the attraction to that area. Some traps are disposable and have the benefit of reducing the sting possibility. Others are “reusable” and must be emptied and refilled with bait. These increase the probability of being stung but can be more affordable in the long term.

Eliminating Yellowjacket Nests

When absolutely necessary, the elimination of a yellowjacket nest should not be undertaken lightly. If it’s early in the season and the nest is visible, a forceful water blast will break it apart. To reduce the chances of being stung, do this during the day while the workers are not home. Wasps return to the colony as dusk. Sometimes the workers will begin rebuilding in the same place. Pesticide sprays can kill wasps, and after the nest is destroyed, spraying the area can discourage rebuilding. If it’s later in the season, the aerial nest may be too large to eliminate safely.

Underground nests are a much bigger challenge to destroy. Because the entrance may be at an angle to the nest, flooding seldom works. Never try to burn a yellowjacket ground nest by pouring kerosene or other flammable liquid into the entrance and lighting it. In addition to many stings, more serious injuries may occur. This also pollutes the soil and a fire can quickly get out of control. If the flight pattern to the entrance creates a serious hardship or is close to a building, it is best to consult with an expert for safe nest elimination.

If the yellowjackets have built their colonies within your house walls or attic, it may also be necessary to contact a professional. Note: if yellowjackets are nesting in your home, do not plug the entrance/exit hole or they may chew the rest of the way into your house! Our experts can offer a professional referral for local wasp removal services or search “Pest Control” for your city on the Internet or in the yellow pages.

Yellowjackets do have their uses, but if you have no use for these stinging insects, there are many ways to eliminate them safely. Using several techniques will be most effective and will minimize the risk of being troubled by wasps again.

wasp-3wasp-1

wasp-2

Green Gardening

Planting a vegetable or flower garden seems like the perfect thing to do when you are looking for ways to adopt a greener, more environmentally-friendly lifestyle. Some traditional gardening practices, however, may not be quite as “green” as you might think. Planning your gardens with the environment in mind and choosing some practices that maintain healthy ecosystems can help you create a truly “green” garden. 

Tips for a Green Garden 

There are easy, effective steps you can take in your garden to go green, including… 

  • Plant local and native species of trees and shrubs which are naturally adapted to the conditions in your area, thus requiring less watering and having natural defenses for local insect pests and plant diseases.
  • Collect rainwater for watering your container gardens and new transplants, and adjust your irrigation schedule to compensate for whenever Mother Nature does the watering for you.
  • Use organic compost and mulch to improve soil health and reduce the need for pesticides and fertilizers. Better yet, make your own compost so you can adjust it to exactly what your plants need while keeping more waste out of landfills.
  • Opt for disease-resistant and pest-resistant plants rather than trying to force plants into an unfriendly area where they will need chemical assistance and extra maintenance to thrive.
  • Try to use natural products instead of chemical fertilizers and pesticides. Use traps, parasites and natural predators such as ladybugs and lacewings. Plants that repel insects – basil, chives, mint, marigolds or mums – mixed in with other plants can help keep pests away.
  • Choose wildlife-friendly plants such as flowerbeds that will attract hummingbirds, butterflies, bees and other pollinators, and don’t be upset to share some of your garden space with other critters.

These are just a few of the simple changes you can make in your gardening practices that will benefit the environment.

Green Products 

More and more “green” products are readily available to help you maintain the natural health of your garden. Before using a product, however, be sure it is suitable for your situation, and follow all application and use instructions. Even organic or eco-friendly products can become toxic contaminants if they are improperly used.

Popular options for green gardening products include… 

  • Dr. Earth contains probiotic beneficial soil microbes, plus ecto- and endo- mycorrhizae which feed the fiber of the living soil by releasing natural organic matter. People and pet safe.
  • Dr. Earth pest controls are organic controls for all of your pest problems, including all types of unwanted or troublesome insects. People and pet safe.
  • Espoma Organic Traditions line of products includes bone meal, kelp meal, garden sulphur, potash and garden lime for helping to improve your soil without artificial chemical compounds.
  • Bonide offers organic fertilizers as well as organic formulas for pest and plant disease control, such as fruit tree sprays.
  • Scotts Organic Choice lawn care products provide more environmentally friendly choices for your yard.

Developing “green” gardening practices benefits you and your family, your garden, your native plants and animals, your water supply – our world, all of us.

SONY DSC

Choosing the Right Flowering Tree

Purchasing a tree for your landscape is an investment that can raise the property value of your home and bring you pleasure, beauty and shade for many years to come. Selecting the proper flowering tree for your enjoyment is easy, just follow these simple guidelines and remember, we are here to help you with any of your gardening questions.

  1. Care
    Study your chosen planting environment carefully. Familiarize yourself with the sun patterns. Will your tree be in full sun, part sun or shade? What about soil type? Is it heavy clay or well-drained loam? Some trees will survive in poor soil, some will not. Is there a water source nearby? Having a clear understanding of your tree’s cultural requirements and characteristics of the site you have chosen will help you make a good match so the tree will thrive.
  2. Size & Form
    Consider the space where you will be planting the tree of your choice. Know the ultimate height and width of the plant that you choose to make certain that it will not outgrow the room you have allotted for it. At the same time, note the growth habits and sizes of nearby trees and shrubs to be sure they don’t crowd one another out in the years to come.
  3. Flowers
    Make note of when you would like your tree to flower. For instance, you don’t want flowers in August if that is when you are traditionally away on vacation. Many flowering trees are available in more than one flower color, depending on the cultivar. Choose the one that works best for you and your taste and looks good with whatever else you will have flowering at the same time.
  4. Other Ornamental Characteristics
    A higher value and more enjoyment is gained by choosing a tree with multiple seasons of interest. Look for a flowering tree that may also have interesting winter bark, persistent fruit or unique leaf coloration so you can enjoy its beauty in every season.
  5. Availability
    Frequently, folks will read about a unique new plant introduction and are disappointed when it is not yet available on the market or does not grow well in their area. To avoid disappointment, choose from our large selection of flowering trees in inventory. We pride ourselves on carrying plants that thrive in our area and can suggest an appropriate substitute for your desired tree.

With just a bit of careful consideration, you can easily choose a flowering tree that you will enjoy for many years to come.

FloweringTree_3

FloweringTree_4

FloweringTree_5

Edible Flowers

Flowers aren’t just for beautiful dining table centerpieces anymore! For all you “foodies” out there, who also love flowers, are you aware that there are numerous blooms that are not only edible but also delicious? Flowers make a striking, colorful, textural and flavorful addition to soups, salads, baked goods and more.

Safety First

There are just a couple of things to keep in mind when experimenting with unfamiliar flowers. Not all flowers are edible and some can be poisonous, even in small tastes. Be certain to clearly identify your flowers and accept no imposters, as some blooms can look very similar. Also, it is best to use flowers that have not been sprayed with chemicals – either fertilizers or pesticides. The best way to avoid both of these issues is to grow your own edible flowers from seed, keeping them conveniently in a kitchen container garden or safely on a deck or patio where there’s no risk of contamination or misidentification.

Favorite Edible Flowers

There are surprising blooms that can be tasty accents to your favorite dishes. For the best flavor and freshness, harvest blooms at their peak early in the day. Younger and older blooms or blooms of different sizes often have subtly different flavors, so be sure to experiment to find your favorites.

  • Bee Balm (Monarda didyma) – Tea-like flavor, flowers in white, pink, red and lavender
  • Borage (Borago officinalis) – Cucumber-like taste, flowers in lavender, purple and blue
  • Calendula (Calendula officianalis) – Peppery taste, flowers in yellow, orange and gold
  • Chive (Allium schoenoprasum) – Onion flavor, flowers in white, pink and lavender
  • Nasturtium (Tropaloum majus) – Peppery flavor, flowers in white, yellow, orange and red
  • Pineapple Sage (Salvia eleagans) – Sage flavor with pineapple undertones, flowers in scarlet
  • Pinks (Dianthus spp.) – Clove-like flavor, flowers in white, pink and red
  • Red Clover (Trifolium pretense) – Sweet tasting, flowers in pink and red
  • Signet Marigold (Tagetes tenufolia) – Citrus taste, flowers in white, yellow, gold and red
  • Viola or Pansy (Viola spp.) – Sweet flavor, flowers in a multitude of colors

Not sure which recipes to try? Flowers make surprising accents to salads or garnishes for cakes, cookies and ice creams. Add flower petals to a favorite drink, or freeze blooms in ice cubes for colorful cooling. There are even recipes available for sauces, salsas, marinades and more, all with more taste and color thanks to edible flowers. Bon appétit!

EdibleFlowers_4EdibleFlowers_1EdibleFlowers_2

Spring Lawn Renovation

Spring is the ideal time to spruce up your lawn. After a long winter, you can easily see where any bald, bare or thin patches exist, as well as where weeds or fungus may be taking over the lawn. Fortunately, there are easy ways to set your lawn to rights!

Seeding

If you are planning to seed a new lawn or overseed an existing lawn, it is best to seed as early as possible. It is important to get seed germinated and growing before trees begin to leaf out, when the trees will be usurping more of the soil’s moisture and nutrition and new leaves will block sunlight from the grass seed. This is especially true in more heavily shaded areas. Keep the area moist at all times until the roots of grass seed become established, then you can gradually decrease the frequency of watering. The new grass can be mowed when it reaches a height of about three inches.

Rejuvenating a Weak Lawn

Your lawn cannot live without air, water and nutrients, but decaying material matted down between grass blades can smother even the healthiest-looking lawn. This decaying material is called thatch, and when a thick layer of thatch builds up, water and fertilizer may run off instead of penetrating the soil. Aerating and dethatching can help rejuvenate a lawn by restoring passageways to the soil. Late spring is an excellent time to dethatch cool-season grasses. Thatching rakes can be used, or you can use a metal rake to remove thatch by hand.

Adusting pH 

The pH of your soil has a direct impact on the health of your lawn. Test your soil to determine the pH (simple kits are available to do this). We recommend a small handful of soil taken from a depth of 3 inches to get the most accurate reading. At a pH of 6.8-7.0 nutrients are most readily available to turf grasses, and beneficial microorganisms are more active to decompose thatch and keep the soil structure healthy. If your pH is too low or too high, consider amending the soil as needed to help bring it to a more desirable level.

Crabgrass Control

On established lawns that you are not overseeding, apply a fertilizer with crabgrass control in early to mid-April. Straight Team products can be applied with separate fertilizers like Espoma Organic 18-8-6 or similar fertilizers. Reapply Team in early to mid-June for the second germination of crabgrass. Remember, crabgrass seeds start to germinate when the soil temperature reaches 50-58 degrees. Use corn gluten as an organic alternative for crabgrass control on an established lawn.

On newly seeded lawns and those seeded in late fall or during the winter months, use a starter fertilizer with crabgrass control. You will need to reapply in four weeks or however the manufacturer’s instructions indicate. Proper applications will keep your new lawn crabgrass-free.

Maintaining your lawn at a higher level, 4 inches, throughout the growing season will allow you to control crabgrass without the use of chemicals. Taller grass will shade out the crabgrass seed preventing it from germinating.

Insect Controls

An early season application of Merit or a similar insecticide will provide effective white grub control for the growing season. This preventative method tends to give better results than applying insecticides when you notice damage as it then may be too late. If you have routinely had problems with other insects, opt for products specifically targeted for those pests to ensure effective control.

A lot goes into having a lush, healthy lawn, but if you take the appropriate steps to rejuvenate your lawn in spring, you’ll be rewarded with thick, healthy, resilient turf to enjoy from early spring until snow flies again.

spring_lawn_3

spring_lawn_1

Grass sprinkler

Azaleas – An American Favorite

Azaleas are true garden favorite and are popular in all types of landscape designs. To keep them blooming prolifically and as beautiful as they can be, however, you will need to follow a few special directions for their best care.

Planting Azaleas

Azaleas need a well-drained location, as they will not thrive in an area that stays overly wet. They prefer afternoon shade, and too much sun can harm their leaves and fade the flowers, depleting their beauty. For their best growth, it is important to shelter azaleas from drying winds. The best locations in the landscape will be along the north, northeast or east side of a building or stand of evergreens or in the filtered shade under tall trees.

Azaleas may be planted any time of the year, even when in full bloom. Spring and early fall are ideal planting times so the plants are not stressed by the heaviest summer heat. Before planting, loosen the matted roots with a hand cultivator so they can spread and establish more easily.

To give azaleas the excellent drainage they require, they should be planted high, with half the root ball above the existing ground level in a hole at least twice as wide as the root ball. Amend the planting soil to provide good nutrition for these hungry plants. Once the plant is set in the planting hole, fill in around it with the planting mix, packing firmly to eliminate air pockets. Mound soil up to top of root ball. Water shrubs thoroughly with a diluted plant starter fertilizer to encourage root growth and help them establish more quickly. Mulch 2-3 inches deep over the planting hole, with mulch pulled away from plant stem to avoid insect infestations and rotting.

Watering Azaleas

Spring and summer plantings should be watered 2-3 times per week until fall the year they are planted, then once a week until Christmas. Plants may need to be watered as often as once a day if they are small or the weather is hot. Always check the soil moisture level before watering. It should be lightly moist several inches down, but if it is drying out more frequent watering may be needed. In following years you will need to water your azaleas about once a week unless there is a good soaking rain. Plants will need more water in hot summers and while in flower to keep their growth and form lush.

The Need for Mulch

Mulching around azaleas is always a good idea, and can help them thrive. A 2-4″ layer of mulch should be maintained at all times over the root area of the plant, but pulled away from the stems. This keeps the soil cool and moist, helps control weeds and protects roots in winter.

Pruning Azaleas

Azaleas rarely need to be pruned. When pruning is required it should be done immediately after blooming, since if you wait to prune until summer you may cut off next year’s blooms and miss an entire flowering season. Azaleas may be sheared, as they will send out new shoots anywhere on a branch, or you may choose hand-pruning to create a neater form.

With a bit of considerate care, azaleas can be a showstopper in your landscape. Stop by today for help choosing the best azaleas and learning all you need to know to keep them gorgeous year after year!

azaleas

Watering: How Much?

Water is critical for a healthy garden and landscape, but how much water is too much, how much isn’t enough and how much is just right? Unfortunately, there isn’t a specific answer that suits every gardener’s needs. All plants have different water requirements, which change depending on the type of soil, amount of sun, temperature, humidity, season, maturity of the plant and overall growing environment.

Initial Watering

All plants, including specimens described as drought tolerant, will require water when first planted. This is because many of the smaller roots responsible for water uptake are usually damaged during shipment and planting. Build a small circular soil wall around the plant to contain water while it percolates into the soil. Watch new plants carefully and keep them well-watered as their roots settle in and they adapt to their new or transplanted location.

Groups Are Good

It’s a good idea to have some knowledge of the plant’s water requirements when determining the location in the garden. It will keep watering simple if you plant a new specimen near other plants with similar water requirements. In this way, there is no need to readjust an irrigation system or watering schedule, since all the plants in the group have similar needs.

Need a Drink?

Because plants’ watering needs can change through the season, how can you tell if a plant needs more water? Most plants will wilt as the soil becomes too dry. The leaves may droop, and if it’s an upright plant, the top ends may become soft and bend over. Glossy plants may begin to look dull, while thick leaves will shrivel. If you notice these signs, it is time to water! Most plants will revive if watered quickly enough, but be sure to water deeply rather than allowing moisture to run off the surface.

How can you tell if you should water? Push your finger into the soil an inch or two from the base of a plant. Perfect soil should feel cool and slightly moist. Some soil should stick to your finger. If none does, it’s too dry. If it’s muddy, don’t water. Overwatering kills plants by depriving the roots of oxygen. Some gardeners use water meters to see the precise amount of moisture. If you’re unsure, this tool can be helpful.

Adjusting Your Watering Schedule

The amount you have to water your plants or landscape can change from day to day. A cool morning will allow more dew to form and drain to the soil, or a sudden afternoon thunderstorm can be enough water to keep your plants hydrated for a few days. An overly hot day, however, can rapidly deplete water resources and extra watering may be required. Check your plants and landscape regularly to be sure they are getting adequate water, and make adjustments as needed to keep them suitably moist without either too much or too little water.

Need help monitoring water? Stop by to see our collection of water gauges, meters and monitors that can help you be sure you are watering your landscape correctly.

watering_1

watering_2

watering_3

Herbs As Companion Plants

Practiced by organic gardeners for years, companion planting has become very popular for all gardeners. The concept is to plant together species that will benefit each other, to help prevent disease and insect infestation without the use of chemicals. In general, herbs and other aromatic plants like tomatoes, marigolds and onions are helpful in warding off insects. Certain colors, like the orange of nasturtium flowers, are thought to repel flying insects. While these practices have not been scientifically proven, many gardeners have been using them for years with positive results. Try it – and see if it works for you!

Best Companion Herbs

The exact herbs you choose to pair with other plants will depend on what you want to grow and what problems you want to eradicate. The most common herbs and their purported benefits include…

  • Basil – Enhances the growth of tomatoes and peppers. Dislikes rue. Repels flies and mosquitoes.
  • Borage – Companion to tomatoes, squash and strawberries. Deters tomato worm.
  • Chamomile – Companion to cabbages and onions. Improves the growth of all garden plants.
  • Chervil – Companion to radishes.
  • Chives – Companion to carrots. Deters Japanese beetles, blackspot on roses, scab on apples and mildew on cucurbits.
  • Dill – Improves the growth of lettuce, cabbage and onions. Dislikes carrots.
  • Fennel – Most plants dislike it – avoid using it as a companion herb and instead plant it away from the garden.
  • Garlic – Plant near roses and raspberries. Deters Japanese beetles.
  • Horseradish – Plant at the corners of your potato patch; deters potato bug.
  • Hyssop – Companion to cabbage and grapes. Deters flea beetles and cabbage moths. Dislikes radishes.
  • Marigolds – Plant throughout the garden as they discourage nematodes and other insects.
  • Mints (esp. Spearmint and Peppermint) – Companion to cabbages and tomatoes. Deters aphids, flea beetles and many types of cabbage pests.
  • Nasturtium – Companion to radishes, cabbage and cucurbits. Plant under fruit trees. Deters aphids and squash bugs.
  • Onion – Repels cabbage loopers, potato beetles, carrot flies and imported cabbage moths.
  • Oregano – Improves the growth of beans.
  • Parsley – Enhances the growth of roses. Repels asparagus beetles.
  • Pot Marigold – Companion to tomatoes, but plant elsewhere, too. Deters tomato worm, asparagus beetles and other pests.
  • Rosemary – Companion to cabbage, bean, carrots and sage. Deters cabbage moth, bean beetles and carrot fly.
  • Rue – Companion to roses and raspberries, dislikes sweet basil. Deters Japanese beetles.
  • Sage – Plant with rosemary, tomatoes, strawberries, cabbage and carrots. Dislikes cucumbers. Deters cabbage moth and carrot fly.
  • Summer Savory – Companion to beans and onions. Deters bean beetles.
  • Tansy – Plant under fruit trees. Companion to roses and raspberries. Deters flying insects, Japanese beetles, striped cucumber beetles, squash bugs and ants.
  • Tarragon (French) – Enhances the growth of all vegetables.
  • Thyme – Improves the growth of tomatoes, potatoes and eggplant. Repels whiteflies and cabbageworms.
  • Wormwood – Use as a border, keeps animals from the garden.
  • Yarrow – Plant along borders, paths and near aromatic herbs. Enhances production of essential oils. Attracts beneficial insects including ladybugs and predatory wasps.

Exactly how much benefit companion plants give to one another will vary; be sure to choose varieties to group that have similar soil, light, water and fertilization needs. Even if their companion benefits may not pan out, you’re sure to enjoy a more diverse and vibrant garden filled with delicious vegetables and herbs!

herbs_companion_3

herbs_companion_1

herbs_companion_2

Heath or Heather

Often mistaken for one another, heath (Erica) and heather (Calluna) look amazingly similar. To confuse things further, heath is frequently referred to as “spring heather” and some landscapers, garden centers and nurseries may use the names interchangeably. Both types of plants belong to the Ericaceae family, and they share many similarities.

Which is Which?

The key difference between these two popular landscaping plants is that heath blooms from winter to early spring while heather blooms from mid-summer to early fall. Heath features slim, needle-like foliage, while heather’s foliage is flatter and more scale-like. Heath generally only grows to 12 inches tall, while different heather cultivars can range from 8-20 inches tall. With their many similarities for location, soil type and sunlight, however, it is easy to grow these two shrubs together for a much longer and more brilliant flowering season.

Heath and Heather in the Landscape

Both heath and heather are low maintenance, low growing, perennial shrubs that love well-drained, acidic soil, but do not plant them too deeply or their shallow root systems may rot or smother. Heath, or spring heather, has tiny, urn shaped flowers in white, rose or fuchsia and is readily available in early spring. Heather will be more popular later in the season and into early summer, and its bell-like mauve, rose or lavender flowers provide lovely color to the landscape later in the season. Depending on the cultivar, heather’s foliage can range from bright green to golden yellow, reddish or even silvery-gray.

Both plants should be watered well, and mulching around the shrubs will help inhibit weeds and conserve moisture without overwatering. Pruning should be done just after blooming is finished to maintain and shape the plant mounds and discourage overgrowth and legginess.

Heath and heather look terrific planted en masse on a sunny hillside or in the shrub border with other acid-loving plants like azaleas and rhododendrons. They are a welcome addition to the rock garden and can brighten up a dwarf conifer grouping or container garden. Their mounding habit makes the plants easily spill over edges for a naturalized, graceful organic look ideal for cottage gardens and flowing landscape design.

It is important to note, however, that deer can be very attracted to both heath and heather. If these backyard visitors are a problem in your garden or pester your landscape, you may want to take a variety of steps to keep them away from your beautiful shrubs.

Planted together, heath and heather will provide you with a succession of dainty blooms to take you through the entire growing season.

Heatherheath

Dealing With Winter Damage

It’s early spring – time to survey the damage that winter has produced. In some areas, shrubs may still be hiding under piles of frozen snow, and could be crushed or compacted. Severed tree limbs may lie scattered across the landscape, and bark may be torn and stripped from trunks. It’s difficult to know what to tackle first, but fortunately, much of the damage is easily correctible.

Repairing Winter-Damaged Trees

When surveying and repairing winter damage, start with your trees – they are generally the most valuable additions to your property. As you survey the damage – broken limbs, torn bark, a tilting trunk – ask yourself “Is this tree salvageable or should it be removed?” If the damage is extensive, or you are unsure about how the damage may affect the tree’s overall health or future growth, hire a professional for a consultation. Replacing a severely damaged tree with a younger one, perhaps a type you like even better, may be the best solution.

If a limb is broken somewhere along its length, or damaged beyond repair, employ good pruning practices and saw off the remaining piece at the branch collar, being careful not to cut into the trunk or leave a stub. Sometimes a fallen limb may strip bark off the tree trunk. To repair this damage, cut the ragged edges of the loose bark away from the stripped area to firmly affixed healthy bark. Nature will take care of the rest. Even if the trunk of the tree is split, the tree may still be saved. For large trees, repairing this type of damage usually requires cabling and bracing done by a professional. If the tree is still young, the crotch may be pulled tightly together and tied or taped until the wound eventually heals.

Repairing Winter-Damaged Shrubs

Shrubs can suffer the same damage as trees, including broken limbs and stripped bark. Heavy snowfall can crush smaller shrubs, and larger varieties may have their trunks or centers split from heavy snow or ice accumulation. Most shrubs are resilient, however, and slowly regain their shape as the weather warms. If branches are bent but not broken, you may tie them together to help them along and prevent further damage from late-season storms. Do not tie tightly and remove twine after about a year. Completely broken branches may be pruned away, but take care to maintain the shrub’s form and balance, keeping in mind its growth pattern so it will not look lopsided or ungainly. Again, if the damage is severe, you may need to replace the plant.

The harder the winter is, the more of a beating trees and shrubs will take. With prompt attention in early spring, however, you can easily undo much of the damage and help your landscape recover with ease.

damage_1damage_2