


Fresh cut herbs are a delight for any cook, and when they are within arm’s reach, fresh herbs are a delight and dream come true! During the coldest months of the year, potted herbs not only offer convenient, fresh seasonings, but also fragrance, color and flowers to truly spice up the kitchen.
Growing Tips for a Kitchen Herb Garden
Growing herbs in your kitchen isn’t much more difficult than growing them in your garden. To make the transition and bring herbs to your kitchen year-round…
- When transplanting, use a soil-less potting mix such as Pro-Mix (remember to pre-moisten the soil mix) to ensure proper drainage in small pots.
- Place on a window sill that gets direct morning sun until noon. If that isn’t possible, opt for another well-lit, sunny window with at least 4-6 hours of bright light.
- Provide adequate air circulation, but avoid a direct draft or chilling breeze. Do not overcrowd plants which would limit air circulation.
- Keep temperatures between 60 and 70 degrees. Bear in mind that oven and stove use will heat up the immediate area in the kitchen.
- Soil should be allowed to dry slightly between watering. Never leave herbs in soggy or wet soil, and drain excess water to prevent rot.
- Group pots on a tray of moist pebbles for increased humidity to keep foliage (the tastiest part of the herbs!) lush.
- Feed with a 20-20-20 fertilizer, but adjust the feeding schedule as needed for individual plants.
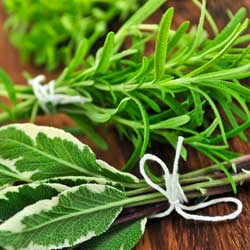
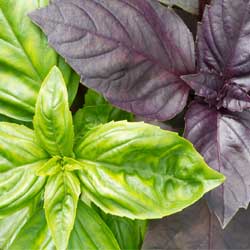
Choosing Kitchen Herbs
Many different herbs are actually easy to grow inside on the sill. You might choose the herbs you use most often, or those that are featured in your favorite recipes for more flavorful results. You can even consider a specialized garden, such as a salad garden with chives, small Bibb lettuce and even pansies (colorful and edible, too!). An Italian garden might include basil, garlic chives, Italian flat parsley and oregano. Customize your kitchen herb garden to any taste!
The most popular, easiest-to-grow-indoors herbs include…
- Basil
- Borage
- Catnip (for your feline friend)
- Chives
- Lemon Balm
- Mint (best choices include apple, wooly, Corsican, curly, orange, peppermint, pineapple, silver and spearmint)
- Oregano
- Parsley
- Rosemary
- Sage
- Bay Laurel
- Sweet Marjoram
- Thyme
- Winter Savory
No matter which herbs you choose, they’re sure to brighten not only your kitchen with their lovely foliage and aromatic fragrances, but they’ll add delectable depth of flavor to all your winter dishes, from soups and stews to roasts, marinades, breads, salads and even desserts. Enjoy those winter herbs, right in your kitchen!


 What’s not to love about a tree? As they grow, their photosynthesis removes and stores carbon dioxide, maintaining a safe oxygen level for us to breathe and cleaning pollutants out of the air. They provide beauty in our gardens and parks. Many provide shade, fruit, syrup, nesting places and animal refuges. They can be a windbreak or a privacy screen. They can be ornamental and practical all at once, and can thrive with little or no care.