Monthly Archives: March 2018

Tooling Around in the Garden: Selecting and Caring for Garden Tools

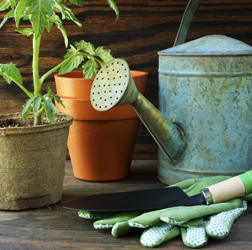
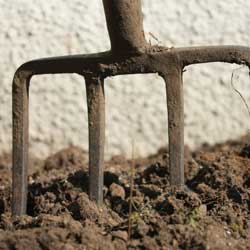
Let’s face it – purchasing a new garden tool is usually not the first thing on your mind when you visit your friendly neighborhood garden center. Most of us tend to gravitate toward the latest and greatest herbaceous eye-candy without considering whether we have all the equipment necessary to prepare and care for it. The right tools, however, are critical to keep all your plants in top condition, and selecting quality garden tools is no simple matter. You want one that meets your needs, is available when needed, is easy on you, is long lasting and is not too expensive or too hard to maintain.

Choosing a New Tool

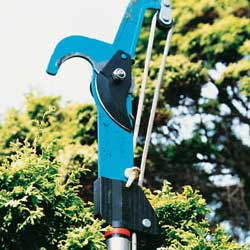
With so many tools on the market, choosing one that meets your needs can be a daunting task. First consider what type of work you will be doing, and what tools are required to accomplish your goal. Choosing the right tool for the job will make the work easier and more efficient. If you’re not sure, ask – our employees will be happy to assist your selection.

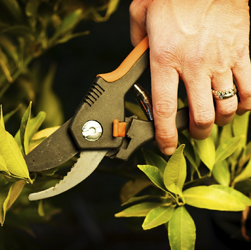
When you find a tool you are interested in, before you buy it, try it! Basic tools in new designs are available to the consumer every year. Those that are ergonomically designed, to align with the natural mechanics of our bodies, are meant to lessen the stress on muscles and joints as we garden. So pick up the tool and see how it feels in your hands. Make sure the weight and size are well suited to your strength and frame. Does it feel comfortable as you simulate the way it will be used? If it feels awkward, you will not be able to use it properly and may be tempted to neglect your garden chores instead.

Caring for New Tools

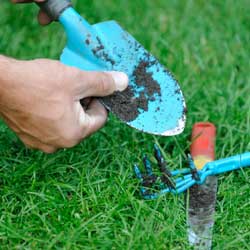
When you find a tool that meets your needs and is comfortable, you will want to have it around for a long time. Plan to purchase the highest quality tools that your budget will allow. If you purchase tools simply because they are the least expensive, chances are they will not last, and you will eventually spend more money to replace them.

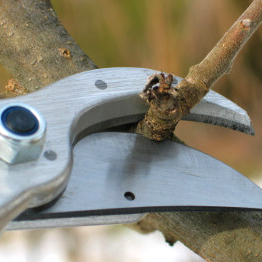
Proper care and storage will add to the longevity of your garden tools. Hose off tools to remove soil and chemicals after every use. Allow tools to dry thoroughly before storing. For hardened soil, use a wire brush. Occasionally cleaning metal surfaces with oil will help to keep tools lubricated and prevent rust. Keep all moving parts oiled as well to enhance performance. Oil wooden handles at least twice a year with linseed oil to help prevent drying and splintering. For ease of use, keep tools with cutting surfaces sharp by filing them as often as needed. Check frequently and tighten any loose screws and bolts. Store all garden tools in a dry place with tool surfaces off the ground.

Every garden tool you own is important to the health, beauty and productivity of your garden and landscape. Be sure you choose the best tools and maintain them well to make the most of all your gardening.

Tomato plant and garden tools

selecting-tools-1

Pruners for the Lefties

Have you wondered why left-handed gardeners have difficulty using “regular” pruners? It’s because of the way the thumb and index finger have to push together to make the cut. It’s hard to control it for detailed work plus incorrect pruners often cause bruises and painful calluses to form.

Fortunately, there is a solution – pruners specially designed for left-handed use. The correct pruners, with the left blade on top, allow the leftie to see what they’re cutting and enjoy pruning. Come on in to check out which of these wonder-tools fits the best.

FELCO

Felco hand tools originated more than 70 years ago when Felix Flisch patented his first hand pruner, the Felco 1. The company’s three core values, ergonomics, interchangeability and durability, haven’t changed and even today, all their products incorporate these values. We carry two left-handed styles of Felco pruners.

  • Felco 9: This is the left-handed version of Felco 8, one of the most popular hand pruners ever. Recommended for up to 1″ cutting capacity, these bypass pruners have forged aluminum handles and hardened steel blades with a screw-mounted anvil blade. They include a lifetime guarantee. The efficient design includes a blade with a wire-cutting notch and a sap groove. The blades have removable dowel pins to allow easy maintenance and replacement. The micrometric adjustment system, using the included adjustment key, promises precision cuts and maximized user comfort.
  • Felco 10: This bypass pruner is the top of the line left-handed version of the Felco 7. Designed for the professional gardener (but enjoyed by all), this pruner requires 30 percent less effort, thereby reducing hand fatigue, tendonitis and carpal tunnel syndrome with its unique rotating handle. The narrow, pointed blade design facilitates close-in pruning. Like the Felco 9, an adjustment key is also included. Also recommended for 1″ diameter cuts.

Replacement parts are available for both styles along with holsters and blade sharpeners.

Bahco

This company, established in 1862, produces very fine gardening tools in addition to their industrial lineup. Although they look a little different, the workmanship and ergonomic design make them among the favorite of garden tools. This company uses the term “Secateurs” as hand pruners and designates the levels as professional or expert.

  • PX-M2-L: This is a left-handed version of the popular PX-M2 bypass model. The composite materials in the handle with an upper section of soft rubber act as a shock absorber. The ergonomic styling and vertical and lateral inclinations of the cutting head allow the wrist to remain straight when cutting. This reduces fatigue and increases comfort and performance. All parts are replaceable.
  • PXR-M2-L: This pruner is the left-handed version of the heavier bypass PXR model designed for frequent professional use. Home gardeners also love them! A rotating handle increases performance and comfort. All parts are replaceable.
  • PG-03-L: This tool is the left-handed version of the home gardener (expert) hand pruner. This model is available in two hand sizes, small and large, and in two pruning widths for 1/2″ or 3/4″ cuts. Fiberglass reinforces the plastic handles and Xylan® coats the blades to reduce friction and protect from rust. As a convenience, it has a one-hand locking mechanism.

Holsters and blade sharpeners are also available.

Corona and The Gardener’s Friend

The Corona BP6340 has aluminum handles and hook with replaceable blades and springs. The steel blades of high carbon steel and the ergonomically angled head result in close, clean and healthier cuts. With less stress to the wrist, it easily cuts up to 1″ branches.

The Gardener’s Friend Ratchet Hand Pruners are designed for gardeners with small hands, or hands weakened by arthritis, carpal tunnel syndrome or tendonitis. The unique ratcheting action easily cuts branches to 1″ thick with less hand strain.

Of course, we have an excellent selection of other specialized hand pruners in our tool department. Whether you are buying for a child, a delicate hand or a large-handed gardener, we have the proper sized tools to reduce strain and make gardening easier and more enjoyable for all. 

pruners

The Winter Landscape

Although the blooms of summer are a distant memory and the splendor of fall is neatly raked into the compost pile, don’t think your yard has to be dreary from now until spring. Background planting, berries, bark and even blooms are the secrets of a colorful and interesting winter landscape.

Background Planting

Evergreens are the mainstay of the winter landscape. When the shade and flowering trees and shrubs of spring and summer have entered their winter sleep, it’s evergreens that take the stage. Spruce, cedar, pine, hemlock, arborvitae, yew and juniper – there are many beautiful varieties suitable for foundation or specimen planting, windbreaks, screens and groundcovers. Some change into their ‘winter wardrobe’ too: “Reingold” Arborvitae takes on a coppery hue, while junipers like “Bar Harbor” and “Prince of Wales” turn bronzy purple. Don’t forget broad-leaved evergreens for texture contrast, plus make use of evergreen perennials like Coral Bells (Heuchera), Thrift (Armeria), Creeping Phlox, Candytuft (Iberis) and varieties of Sedum for groundcover or edging. A few ornamental grasses such as Blue Fescue retain their color in winter and can create interesting and colorful tufts in a barren landscape. The foliage and flowers of others, like Miscanthus and Fountain Grass (Pennisetum), dry to a biscuit color and look particularly effective against a snowy backdrop.

Berries

Berry-bearing plants are a boon for birds and other wildlife, as well as being a decorative addition to the winter landscape. Try prickly Pyracantha, colorful cotoneaster and hardy hollies – a must for holiday decorating. Hollies come in many shapes and sizes for all sorts of landscaping situations. Plant a dwarf grower like “Blue Angel” (Ilex meserveae ‘Blue Angel’) as a foundation plant, a medium grower like “China Girl” (Ilex cornuta ‘China Girl’) as a screen or hedge and a tall grower like “Nellie Stevens” (Ilex) as a specimen. Hollies require a male pollinator for best berry production. Be sure and ask which pollinator you need for the variety you select.

Bark

The beautiful bark which many trees and shrubs exhibit can be seen at its best during winter, when leaves have fallen and surrounding plants are bare. Paperbark Maple (Acer griseum) is a delightful small specimen tree with reddish-brown bark that exfoliates in thin papery sheets. Consider white-barked European or Himalayan Birch or water-loving River Birch with its eye-catching grey-brown to cinnamon colored peeling bark. For attractive mottled trunks, plant Stewartia and Crepe Myrtle. The dazzling stems of Red and Yellow Twig Dogwood brighten as the winter progresses bringing cheer to dreary days. Twig Dogwoods look particularly stunning when planted in groupings in front of evergreen trees.

Blooms

Even in the middle of winter, there are a few plants that will surprise us with flowers. Perennial Christmas Rose (Helleborus niger) has pretty white buttercup-like flowers; its cousin, Lenten Rose (H. orientalis) blooms a little later with flowers ranging from purplish green to white and pink. Both are shade-loving and grow slowly to a loose evergreen clump. Witch Hazel (Hammamelis mollis) is a large, multi-stemmed shrub with fragrant late winter blooms in yellow, orange or red. Other late winter bloomers, all of which are also fragrant, include Leatherleaf Mahonia (Mahonia bealii), Wintersweet (Chimonanthus praecox) and Sweet Box (Sarcoccoca).

Stop by soon and talk to us about planning your landscape to include background plantings, berries, bark and blooms for winter interest. Your yard will never have the winter doldrums again!

winter-landscape-1

winter-landscape-2

winter-landscape-3

Pruning Fundamentals

Pruning is essential to keep your trees and shrubs in good shape, but it can be intimidating if you’ve never pruned before. Once you learn the fundamentals, however, you’ll realize it isn’t as hard as it may seem.

Tree Pruning

The first thing to look for when pruning a tree is broken, diseased or dead branches, all of which should be removed to preserve the overall health of the tree. The next thing to be concerned with are suckers and water sprouts. Suckers can be either bottom suckers coming from the root system or growths originating from the trunk. In either case, they reduce water and nutrient flow to the main portion of the tree and should be removed. Another problem growth is called a water sprout, which is very noticeable because it grows straight up from a branch. Water sprouts also rob water and nutrients from the tree.

After all of these problems have been corrected, a second look at the tree should let you know what other limbs should be removed. Removing large limbs is perhaps the most difficult part of tree pruning. It requires two cuts in which one cut removes the weight of the limb and prevents tearing of the bark. The second cut is made closer to the trunk and removes the remaining stub, but should be no closer than the branch collar. Smaller limbs may also be removed to help preserve the desired shape and size of the tree if needed.

Pruning Deciduous Shrubs

Many deciduous shrubs can really benefit from annual pruning. Pruning not only controls the size of these shrubs, but it can also increase flower production and encourage colorful bark.

Let’s begin with a few of the more common shrubs, such as lilac, forsythia and weigela. These shrubs are most commonly known for their flowers, so we should prune them accordingly. By removing a portion of their oldest stems entirely we can encourage younger growth, which will give us more flowers. Plants such as red and yellow twig dogwood have colorful stems which can be enhanced by removing the older gray stems. Another group of plants that benefit from pruning are the spireas and potentillas. These plants are treated a little differently in that they are cut down to about 4 or 6 inches in the fall or early spring. By pruning them this way, we increase their flowering and yet remove all of their twigginess that would look unsightly throughout the winter and early spring.

There are many other trees and shrubs that require more detailed pruning recommendations and careful guidelines. Please email us your questions or stop by the store, we always have people available to answer your questions whether they involve specific plant recommendations or which pruner is the right one for you and the pruning job you need to do.

pruning-fundamentals-1pruning-fundamentals-2

Easy-to-Grow Indoor Herbs for Winter

Even though it may be miserable weather outside, you don’t have to be stuck buying overpriced fresh herbs at the store or using less flavorful dried herbs. Why not grow your own inside the house? Most common herbs will grow quite happily in a sunny window at any time year, even when the weather outside is less than garden-friendly.

Where to Grow Your Herbs

Any sunny window can be great for growing indoor herbs, but most people prefer to keep their herbs in the kitchen. After all, it’s probably warm and sunny there. Moreover, think how great it would be to just reach over to your indoor herb garden, take a few snips of this and that, and serve “garden fresh” tasting foods to your family and guests.

Best Indoor Herb Choices

Wondering what herbs will do best indoors? The most popular and easily grown herbs for your kitchen garden include…

Basil Oregano
Chives Parsley
Lemon Balm Rosemary
Marjoram Sage
Mint Thyme

Herbs are great, but don’t overlook edible flowers as well! Pansies, marigolds and nasturtiums grow well inside the house when given sufficient light and add whimsical color and texture to salads and other meals.

Easy Tips for Growing Herbs Indoors

Growing herbs is no different than growing most houseplants. Luckily, herbs aren’t as fussy as many other plants. To grow the best, freshest and most flavorful herbs, consider…

  • Light
    Brighter is better. South, southwest or western-facing windows should provide a minimum of four hours of sunlight. If none of your windows provides this, you may want to add indoor grow lights to supplement the sunlight your herbs receive.
  • Soil
    Herbs do not require rich soil nor will they do well in heavy soil. Be sure to use a prepackaged potting mix instead of outdoor garden soil that may contain insects and weeds. Special herb mixtures provide the perfect balance of drainage, water retention and fertility for growing herbs.
  • Fertilizing
    Plan to fertilize more frequently than you would if your herbs were growing outdoors. Fertilize every other week with a weak solution of liquid fertilizer.
  • Watering
    Because some herbs prefer more water than others, it is best to plant different herbs in separate pots. When choosing a pot, remember a smaller pot will dry out sooner than a larger pot and will require more frequent watering. Clay pots dry more quickly than plastic or ceramic. It’s a good idea to give your herbs a quick monthly “rain” shower under the faucet to wash off house oils and dust.
  • Drainage
    Herbs don’t like sitting in wet soil, so pots with drainage holes at the bottom are essential. Be sure to use a saucer or pan to catch the draining water and prevent damage to your windowsill or table, but do not let the pot sit in a puddle for long or it may encourage root rot.
  • Harvesting
    When you’re ready to enjoy your herbs, snip and use the older leaves to encourage more plant growth. Keeping the plant smaller and bushier discourages flowering that changes the taste. Although the plants will be smaller and less lush than those grown outside, their flavor and convenience will make you forget about the winter weather!

When spring returns, you may find yourself addicted to growing your herbs in pots. After all, pots contain unruly herbs such as mint, can be decoratively arranged on your deck or balcony and continue providing delicious and healthful benefits in your cooking for many months. Bon appétit!

EasytoGrowHerbs_1EasytoGrowHerbs_2

EasytoGrowHerbs_3

The Benefits of Plants in the Workplace

Time spent in nature is well known to provide many physical, mental and emotional benefits, but what if your work schedule and career keep you in an office without many opportunities for heading outdoors? You can bring the outdoors in and reap many of the same benefits.

Plants Can Improve Your Workplace

There has been extensive research done regarding the benefits of plants in the workplace. With full time employees spending approximately one-quarter of their lives at work it is important that these buildings provide an environment of beauty, health and comfort. Studies confirm that there are both physiological and psychological benefits to surrounding yourself with nature at work. An eight-month study conducted by a Texas A&M University research team has concluded that plants significantly reduce workplace stress and enhance employee productivity, a win-win situation for both employer and employee. Other studies have verified those findings, as well as expanded the list of benefits plants can provide when used judiciously as part of an indoor workplace.

The presence of plants in the workplace can…

  • Lower blood pressure
  • Reduce stress
  • Increase humidity
  • Reduce illness
  • Purify air
  • Reduce dust
  • Lower energy costs
  • Quicken employee response time
  • Enhance problem solving ability
  • Spark creativity
  • Increase brain activity
  • Provide a positive outlook
  • Act as a mood elevator
  • Have a calming affect
  • Boost learning
  • Contribute to noise reduction
  • Improve office appearance
  • Reduce distractions

With so many obvious benefits just by including plants in office décor, every office – whether it is a large corporation, a simple business or a cozy home office – should include at least a few plants.

Bringing Plants to Work

There are many easy ways to blend plants into office décor. Popular ways to integrate plants into the office include…

  • Larger potted plants or containers in a greeting or reception area.
  • Ferns or hanging pots in broad windows.
  • A ficus tree or other large pot near a water cooler.
  • Pothos or other trailing plants on top of cabinets in a break area.
  • Small plants and flowers on individual desks.
  • Decorating for holidays with seasonal plants.
  • Giving office plants as gifts for work anniversaries, welcomes, etc.

When choosing plants for the office, be sure to opt for plants that will function best in the environment. Take into consideration temperatures, light levels and humidity so the plants will thrive. Selecting low-maintenance plants that can withstand good-natured neglect is also wise, so they will still thrive even when project deadlines, committee meetings and vacation days may make their care sporadic. Fortunately, there are many great plants that can liven up an office, and each one will bring great benefits to the workplace.

workplace-2workplace-3

workplace-1

Year-Round Container Gardens

The best gardens provide interest all twelve months of the year. In the spring and summer, gardens are full of color with bright, cheerful bulbs, pastel spring-flowering trees, vivid, multi-colored bedding plants and striking perennials; fall gives us shades of yellow, gold, orange, red and purple with the changing of the season, as well as abundant fruits and berries. Winter has its attractions as well with evergreens, hardy plants and persistent berries. With a little planning, container gardens can give us color and variety every month of the year.

Planning for Winter Container Gardens

While most gardeners have no trouble creating lush container gardens for spring, summer and fall, winter is more of a challenge, especially if you hope to enjoy the same plants in every season. Fortunately, many plants are suitable for winter container gardening. The best choices include evergreens, shrubs with berries, those with contorted branches or interesting bark and buds or later winter-flowering shrubs. These plants remain in the containers for year-round interest, while bulbs, annuals and perennials can be switched out for colorful seasonal interest. Consider how all the plants will change seasonally so you can create a living tableau that will retain gorgeous shape, form, color and texture throughout the year.

Planting and Care for Year-Round Container Gardens

When planting containers for all-season interest, frost-proof pots should be your choice. This includes fiberglass, polyethylene and structural foam planters. These pots resist winter damage, insulate to help regulate the soil temperature and retain moisture better than porous pots. They are also lightweight, so they can be more easily moved to a sheltered location in poor weather, or shifted to a sunny spot on a warm day.

Plant containers as you normally would, following good horticulture practices – enriching the soil, providing proper drainage and arranging plants for the best visual appeal. Be certain to give your pots shelter from the prevailing winds and water your plants when needed to keep roots from drying out. To water, check the soil moisture when temperatures rise above 40 degrees and add cold water as necessary. You may want to shift the containers’ location each season for the best light and weather protection. In winter, it may also be useful to add an insulating blanket around the pot or to provide more wind protection by stacking hay bales around the container.

Plants for Winter Interest in Year-Round Containers

While some plants are stunning for a season, the following plants are proven winners in winter and will bring great interest to your containers.

Evergreens

  • Buxus (Common Boxwood)
  • Pinus (Dwarf and Semi-Dwarf Pines)
  • Thuja (Dwarf Arborvitaes)
  • Juniperus (Dwarf Junipers)
  • Tsuga (Dwarf Hemlock)
  • Picea (Dwarf Spruces)
  • Taxus baccata (English Yew)
  • Chamaecyparis pisifera ‘Filifera Aurea’ (Golden Japanese False Cypress)
  • Pieris Japonica (Japanese Pieris)
  • Kalmia latifolia (Mountain Laurel)
  • Microbiota (Siberian Cypress)
  • Euonymus fortunei (Wintercreeper)
  • Sciadopitys verticillata (Japanese Umbrella Pine)

Deciduous

  • Amelanchier arboreo (Downy Serviceberry)
  • Fothergilla gardenii (Dwarf Fothergilla)
  • Corylus avellana ‘Contorta’ (Harry Lauder’s Walking Stick)
  • Ilex verticillata ‘Nana’ (Winterberry Holly)
  • Hydrangea paniculata ‘Grandiflora’ (PeeGee Hydrangea)
  • Cotoneaster (Cotoneaster)

Late Winter/Early Spring Accent Plants

  • Helleborus (Christmas and Lenton Rose)
  • Primrose
  • Ajuga
  • Violas or Pansies
  • Crocus*
  • Snowdrops*
  • Dwarf Iris*
  • Ivy

*Plant these bulbs in fall for winter flowering.

No matter what you choose to plant, it’s easier than you think to design delightful containers that will catch everyone’s eye all winter long.

year-round-container-gardening-4

year-round-container-gardening-1

year-round-container-gardening-2

year-round-container-gardening-3

Feeding the Birds

When a bird’s natural plant food has waned or withered away in late winter, a few well-placed feeders can entice a feathered friend to stay nearby. There are four basic types of feeders, but the type of feeder and food it’s filled with will determine which birds will visit. Which do you want in your yard?

Feeder Types and the Birds They Attract

While birds will visit a variety of different feeders, the best options for winter birds are…

  • Tray / Platform Feeders
    A tray or platform feeder with low sides and a wide, open base placed one to three feet above the ground will lure ground-feeding birds like juncos, towhees and mourning doves. Grouse and quail may also visit this type of feeder, and these feeders are ideal for offering food to large flocks of birds.
  • House Hopper Feeders
    Hung from a tree or hook or mounted on a pole, “house” style feeders with seed hoppers and perches on the side will usually entice grosbeaks, cardinals and jays, as well as sparrows and finches. These feeders help keep seed dry and can hold a larger quantity of seed so refills are not as frequent.
  • Tube Feeders
    Long, cylindrical tube feeders suspended in air will bring in an array of small birds, including finches, titmice, nuthatches, siskins, redpolls and chickadees. These feeders may have either mesh-like sides where birds can easily cling, or they may have multiple perches to accommodate more birds. Sock-style feeders are also popular.
  • Suet Feeders
    A cage-like feeder that holds a cake of rich, fatty suet is a bird magnet for woodpeckers, wrens, titmice, nuthatches, titmice, mockingbirds and jays. A standard suet cage can hold just one cake and can be hung from a pole or branch. Larger suet feeders may hold multiple cakes, and some suet feeders are even designed as logs or other shapes to hold suet plugs or balls.

Best Winter Bird Foods

Birds will seldom drop or pick out unwanted seeds if you fill your feeder with only one type of seed rather than a generic mix. Black oil sunflower seeds are the most widely preferred, though white millet is popular for smaller finches, sparrows and ground-feeding birds. A tube feeder containing Nyjer (thistle) seeds will whet the appetite of goldfinches, siskins or redpolls. Jays, chickadees and juncos love peanuts or cracked corn as a treat in a tray feeder. Suet is another fine treat that offers great calories to keep winter birds healthy.

No matter which type of bird feeder you offer or how you fill it, you are sure to enjoy the company of a hungry winter flock. Keep the feeder filled and clean, and the birds will continue to visit all winter long.

Creating Humidity for Houseplant Health

Have your houseplants been looking dingy and dry no matter how much you may water them? Have they lost the lustrous glow their foliage first had when you got them? Poor humidity may be the cause. Many of our houseplants hail from the tropics and grow in humidity of 50-80 percent, considerably more humid than typical homes. The trick is to know your plant’s preferences and be able satisfy it. Putting a cactus in the shower will cause it to rot, while a fern is perfectly happy.

But what can you do if you really want that fern in the family room where the humidity may only be 20 percent in the winter? If your plant has brown leaf tips or margins it probably needs more humidity and is asking you to increase it. Luckily, it’s easier to add humidity than it is to take it away.

Easy Ways to Increase Humidity

There are several ways you can easily increase the humidity around your houseplants. If they only need the air a little more humid, just one technique may be sufficient, but if they are humidity-loving plants, you may want to try several options at once to really give them a humidity boost.

  • Pebble Tray
    Place an inch of small pebbles, marbles, shells or gravel in a 2″ deep tray, half fill the tray with water and set your plant on the pebbles. Don’t set the pot in the water, as the wicking action will saturate the pot soil and could lead to rotting roots and overwatering. As the water in the tray evaporates, it increases the humidity immediately around the plant. When you water the plant, pour out the water from the tray to prevent mineral buildup, algae and insect growth.
  • Plant Grouping
    Rather than spacing plants throughout the room, group them together to take advantage of the moisture each plant produces through transpiration. Grouping plants can increase humidity by as much as 15 percent. Place the entire group on a pebble tray if additional humidity is required. Allow air circulation between the plants by ensuring the plants are not touching each other, and rotate individual plants periodically to encourage straight growth and distribute humidity absorption.
  • Misting
    Use a misting bottle daily to increase humidity and cleanse leaf pores, which tend to clog with dust. However, to prevent leaf rot, do not mist plants with “velvety” leaves such as African violets. Do not over-mist plants to the point where their leaves are dripping wet, or else they may suffer from overwatering.
  • Humidifiers
    Available in a variety of sizes, humidifiers increase the humidity in a larger space. You may also find yourself breathing better when using a humidifier. Our houses become very dry in the winter because of furnaces, heat pumps and fireplaces, and humidifiers can not only help houseplants, but can also help alleviate dry skin, limp hair, chapped lips and hacking coughs.
  • Terrariums
    If your house is just too dry for the plants you would like to grow, try planting them in a terrarium. These nearly enclosed vessels create miniature environments perfect for humidity-loving tropical plants such as ferns, orchids and mosses. You will still need to water your terrarium, but because much of the moisture is trapped, the humidity in the enclosure is much higher.

Keeping your humidity-loving houseplants happy in the winter isn’t difficult. Come in and see us to ask questions, get answers and pick up the simple supplies to make your home a houseplant haven.

HumidityforHouseplant_1

Getting Tools Ready for Spring

Did you clean, sharpen and store your gardening tools properly last fall when you stopped gardening?

Hopefully, you did, but if you didn’t, it’s not too late. Spring is just around the corner, but there’s still time to get these essential chores done and be ready to jump in to all your gardening and landscape work when spring arrives.

  • Assemble Your Tools
    Round up the shovels, hoes, rakes and picks. Gather the hand tools such as pruners, loppers, saws, cultivators, weeders and all those little special gadgets you use. If they are all in one place, you can clean and care for them assembly-line style to make the task easier and less overwhelming.
  • Washing Tools
    Fill a bucket or sink with sudsy water. Combine some elbow grease with some rags, a stiff wire brush, steel wool and small toothbrush and wash off all accumulated mud and dirt. Remove sap from pruners and loppers using rubbing alcohol, turpentine, paint thinner or other solvent. Be sure to clean the handles. Towel dry each tool carefully.
  • Handle Care
    How do the wooden handles look and feel? To prevent splinters, lightly sand and apply a protective coating of boiled linseed oil. (Boiled, not raw, as raw won’t dry.) This is also a good time to apply brightly colored rubberized paint to hand tool handles. Not only will this improve the grip but makes it easier to find the tools when Ieft in the garden. If any handles are so worn or damaged that they need to be completely replaced, this is a good time to do so.
  • Remove Rust
    Get the rust off using sandpaper, steel wool and/or a wire brush. For difficult rust, you may need to attach a wire wheel to your drill. Safety googles are necessary eye protection when using a power tool for cleaning. Afterwards, coat the metal with a thin layer of oil such as WD-40, machine or 3-in-One oil to prevent new rust from forming.
  • TIP: To prevent rust, make an “oil bucket” and keep where you store your tools.
    • Half-fill a 5-gallon bucket with coarse sand such as builder’s sand
    • Pour in a quart of oil (used motor oil is fine)
    • Mix until all of the sand is lightly moistened
    • After using a garden tool, plunge the tool into the bucket several times to thoroughly remove soil and thinly coat the metal surface with oil
  • Sharpen Blades and Edges
    Check the edges and moving parts of the tools. To sharpen shovels, spades and hoes, fasten in a vise and use a hand file to restore the same original bevel angle, usually between 40-70 degrees. Use a fine grit grinding stone along the back edge of the tool to remove the burr created by the file. Wipe the metal surface with machine oil. Don’t forget to sharpen hand pruners and loppers as well, and use machine oil to lubricate the moving parts of different tools. Note: If you aren’t equipped to sharpen your tools yourself, take them to an appropriate expert to be sure they’re sharpened safely and correctly.
  • Check Tool Storage
    Now that you tools are ready for work, where will you keep them until spring arrives? Check hooks, stands, toolboxes and other gear where you keep your tools and be sure they are stored safely and securely while still being easy to find and reach whenever you need them.

Now, you – and your tools – are ready for spring. 

ToolsReadyforSpring_1ToolsReadyforSpring_2

ToolsReadyforSpring_3

ToolsReadyforSpring_4