Monthly Archives: March 2018

Growing Plants Under Artificial Lights

When growing plants indoors it is often difficult to provide the proper amount of light required to maintain a happy and healthy specimen. With the onset of winter, the days are shorter and the nights are longer limiting the amount of available natural sunlight even further. The intensity of the sun is also diminished at this time of year. The addition of artificial lighting to replace or supplement natural sunlight is important for growing healthy, attractive houseplants and necessary to keep flowering plants in bloom during the winter months.

 Light Color and Plant Growth

In order for a plant to grow properly the light it receives must mimic natural sunlight. Sunlight contains all the colors of the spectrum and all are necessary for the process of photosynthesis. Red and blue are two of the most important colors vital to plant growth. Red stimulates vegetative growth and flowering, however, too much red will create a leggy, stretched plant. Blue regulates plant growth for a fuller, stockier plant. For the best results, choose a full-spectrum fluorescent gro-bulb. This is the best lighting choice for optimum houseplant health and vitality.

 Light Intensity

Different types of plants require different light intensities. Some plants thrive in low light, others require bright light. With artificial lighting the intensity of light is determined by the bulb wattage and how close the plant is to the light source. Knowing the light requirements of your plants will benefit you greatly when determining where to place a light and which plants to group together under the fixture. As a general rule of thumb, plants that are grown for fruit and flower usually require more light than those grown strictly for their foliage. Plants under artificial light should be rotated weekly, as light from tube style bulbs is more intense in the center of the bulb than at the ends. Using white trays, mirrors or trays lined with foil will help reflect light to increase the amount of light available to your plants.

 Duration of Light

Most houseplants do well with 12-16 hours of artificial fluorescent light each day. Too little light will result in elongated, spindly growth and too much light will cause a plant to wilt, color to fade, soil to become excessively dry and foliage to burn. Plants also require a rest period each day. Providing your plants with an 8-12 hour period of darkness a day will moderate plant growth rate and provide the rest necessary for setting flower buds. For example, the Christmas cactus needs 13 hours of uninterrupted darkness a day, for six weeks, in order to set flower buds. Without this required time of rest time the Christmas cactus will not flower. The use of an automatic timer is helpful in regulating the amount of time your houseplants are exposed to light and darkness.

Fixtures

When choosing a plant light fixture, the most important feature is that the fixture be adjustable. You should be able to adjust the fixture up and down to account for the growth height and varied light intensity requirements of a variety of plants. If the fixture is not adjustable you will limit the type of plants that you can grow and how much you can use the fixture. Simple shop lights and tabletop light fixtures are both adjustable and good choices for lighting houseplants. Another consideration is the size of the fixture. Size choice is based on the number of plants that you plan to grow under the light. Lighted plant carts provide multi levels of lighted shelves on which to grow plants. Carts are on wheels that make them easy to relocate, while tabletop fixtures are lightweight and easily transported to other locations when necessary.

It may seem intimidating to get started with artificial light sources, but you will be amazed at the difference it will make to all your indoor plants, houseplants and seedlings alike.
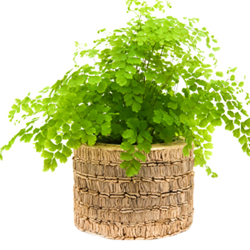
Nephrolepis fern leaf isolated on white

artificial-3

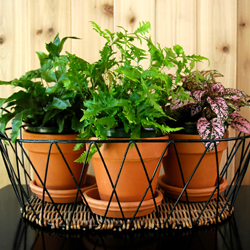
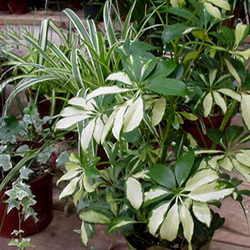
Three pots

Pruning Fundamentals

Pruning is essential to keep your trees and shrubs in good shape, but it can be intimidating if you’ve never pruned before. Once you learn the fundamentals, however, you’ll realize it isn’t as hard as it may seem.

Tree Pruning

The first thing to look for when pruning a tree is broken, diseased or dead branches, all of which should be removed to preserve the overall health of the tree. The next thing to be concerned with are suckers and water sprouts. Suckers can be either bottom suckers coming from the root system or growths originating from the trunk. In either case, they reduce water and nutrient flow to the main portion of the tree and should be removed. Another problem growth is called a water sprout, which is very noticeable because it grows straight up from a branch. Water sprouts also rob water and nutrients from the tree.

After all of these problems have been corrected, a second look at the tree should let you know what other limbs should be removed. Removing large limbs is perhaps the most difficult part of tree pruning. It requires two cuts in which one cut removes the weight of the limb and prevents tearing of the bark. The second cut is made closer to the trunk and removes the remaining stub, but should be no closer than the branch collar. Smaller limbs may also be removed to help preserve the desired shape and size of the tree if needed.

Pruning Deciduous Shrubs

Many deciduous shrubs can really benefit from annual pruning. Pruning not only controls the size of these shrubs, but it can also increase flower production and encourage colorful bark.

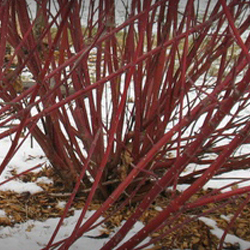
Let’s begin with a few of the more common shrubs, such as lilac, forsythia and weigela. These shrubs are most commonly known for their flowers, so we should prune them accordingly. By removing a portion of their oldest stems entirely we can encourage younger growth, which will give us more flowers. Plants such as red and yellow twig dogwood have colorful stems which can be enhanced by removing the older gray stems. Another group of plants that benefit from pruning are the spireas and potentillas. These plants are treated a little differently in that they are cut down to about 4 or 6 inches in the fall or early spring. By pruning them this way, we increase their flowering and yet remove all of their twigginess that would look unsightly throughout the winter and early spring.

There are many other trees and shrubs that require more detailed pruning recommendations and careful guidelines. Please email us your questions or stop by the store, we always have people available to answer your questions whether they involve specific plant recommendations or which pruner is the right one for you and the pruning job you need to do.

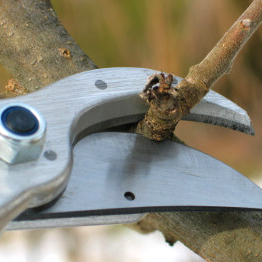
pruning-fundamentals-1pruning-fundamentals-2

Ladybugs: The Good Guys

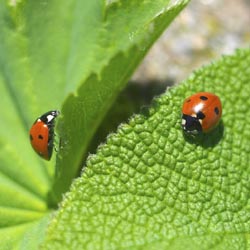
Did you know that a ladybug can devour up to 50 aphids or more in a day? They also attack scale, mealybugs and leaf hopper, but not on your precious garden plants or seedlings. Invite ladybugs to your garden – they dine only on insects and won’t harm your plants in any way.

Ladybug or Lady Beetle?

The different names given to ladybugs are almost as numerous as the number of species. You may call them ladybugs (although they are not really bugs), lady beetles (they are technically beetles), lady birds or in Germany you would say “Marienkafer” (Mary’s beetles). In North America, there are more than 350 species of ladybugs, and more than 4,000 are found around the world. Most species can be identified by the pattern of spots on their elytra (flight wing covers).

Lady beetles are members of the beetle family Coccinellidae, which means “little sphere.” In their life cycle, a lady beetle will go through egg, larval, pupal and adult stages. Lady beetles’ favorite food is the notorious aphid. A female lady bug has huge appetite, eating from 75-100 aphids per day, while the male eats about 40 per day. Most lady beetles are predators, but a few are plant eaters, and can be crop pests.

Lady beetles have some surprisingly innovative ways of protecting themselves. First is their coloring. Most predators know that bright colorings mean that their victim would likely taste bad and may even sting them. Lady beetles also produce a pungent odor when threatened, or may just play dead. Lady beetle larvae is kind of alligator-looking, so not many predators will not mess with it. Lady beetles may live in shrubs, fields, trees and logs.

Releasing Ladybugs

If you want ladybugs or lady beetles in your and – and what gardener wouldn’t? – you can buy them to release in the most needed spots. Ladybugs should always be released after sundown since they only fly in the daytime. During the night, they will search the area for food and stay as long as there is food for them to eat. The more they eat, the more eggs they lay and the more insect-eating larvae you will have. It is best if the area has been recently watered.

Ladybugs tend to crawl up and toward light. Release them in small groups at the base of plants and shrubs or in the lower parts of trees that have aphids or other insects, and they will crawl up the entire plant as they feed, thoroughly eliminating unwanted pests. They may eventually move on and out of your garden or yard, but by the time they do their job is done and you have naturally eliminated many pests while helping ladybugs spread their beauty and helpfulness.

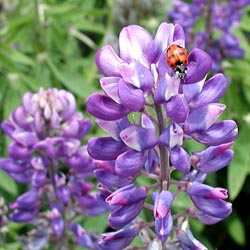
ladybug2
ladybirds (3)

Landscaping the Pond

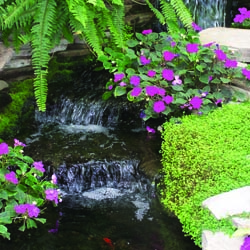
So, you’ve just installed a water garden and you’re wondering how to landscape around it without looking like the pond was a mistake or haphazard addition to your yard. A pond looks best if it appears to “belong” in your landscape. Whether your garden has a natural look or a formal style, the secret is to use plants that look right at home at the water’s edge and blend well with your existing landscape.

Getting Started

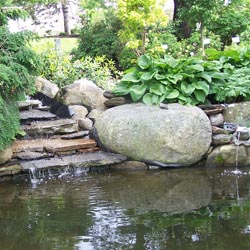
Lining the margins of the pond with small rocks disguises pond liner edges and gives an informal look to the water garden. A larger boulder actually overhanging the pond is an ideal spot for kids (or you!) to watch fish, frogs and dragonflies. Continue the theme in the surrounding landscape with some groupings of larger rocks, creating additional shelves or niches for an uneven, natural look.

Trees

In general, trees should not overhang the pond, as a water garden needs 5 to 6 hours of sun for aquatic plants to thrive and intrusive roots could damage the liner as trees grow. However, a small specimen tree will give your water garden scale and is a good starting point to the planting surround. Select smaller growing trees such as Japanese Maple, River Birch or low-growing flowering trees like Star Magnolia, Crepe Myrtle or Snowbell (Styrax). Position them slightly back from the pond’s edge in a suitable space for their own growth needs.

Shrubs

Shrubs give the landscape substance as well as flower and foliage interest at different times of the year. For winter color, select some evergreen shrubs like pines, spruces or junipers. A water garden located in the corner of your yard might have a backdrop of taller shrubs and smaller growing ones in the foreground. A more centrally-located water garden should have lower-growing shrubs all around so the pond can be viewed from all sides. Azaleas are a favorite for early spring color.

Perennials & Grasses

Perennials and ornamental grasses form the final layer of landscape. Select perennials that bloom at different times or with interesting foliage for color and texture all season long. Some favorites include Siberian iris, coneflower, rudbeckia and daylilies for sunny areas, with astilbe, hosta and ferns for more shaded locations. Plant perennials in large clumps or flowing drifts for the most impact.

Ornamental grasses are a spectacular addition to the water garden. Where a tall-growing grass is needed, use varieties of Miscanthus, Erianthus and Molinia. Graceful Fountain Grass is attractive planted in large groupings, while vibrantly-colored Japanese Blood Grass forms a dense low-growing mass for foreground plantings.

Finishing Touches

Be sure to create a place in your pond landscape where you can sit and enjoy your water garden – an overhanging rock or strategically placed garden bench can be ideal. Lighting, too, is important to bring your water garden to life at night. Create dramatic effects both by spotlights around the pond and submerged lighting if possible.

With thoughtful landscaping, your pond can be an integral, beautiful part of your landscape and a focal point for stunning landscaping design.

landscapingpond2

landscapingpond1

Lighting Up Your Nighttime Garden

Do you work all day in an office, on the road or even in the garden, but never have the time to enjoy the beautiful plants you spend time nurturing? Evening gardens are meant to help us relax, encourage savoring a refreshing evening and wrap us in their brilliance, and one of the best ways to enhance your nighttime garden is with the right lighting to make it shine even in the darkness.

Natural Light in a Nighttime Garden

Extending the pleasure of your garden immensely, moonlight and star shine will illuminate flowers and foliage making the garden at night a different experience, almost surreal and magical. It can be especially enchanting when fireflies gently meander through the air, adding their ethereal glow to the landscape.

At nighttime, the garden develops hidden depths as the colors fade in the dusk. Red takes on a deep mysterious glow until it is lost into darkness when only the palest flowers begin to glimmer. Foliage casts shadows that soften the harsh corners of decks, sheds and structures. Scents are more apparent after a warm day as well as a calm, soothing feeling descends, and pesky biting insects retire as well – this is truly a wonderful time to enjoy your garden.

Artificial Light in the Night Garden

Enhancing the moonlight is a great way to create a spectacular night-time garden. Artificial light, besides serving a practical function, can add more interest to the evening garden, illuminating pathways and highlighting specific features.

Accent lighting creates a dramatic effect. Uplight trees, sculptures, pergolas, arbors, or large shrubs with recessed, understated lighting features to create a luminous glow. Create down-light from above to ‘moonlight’ paths or patios with either tall light fixtures or smaller pathway fixtures.

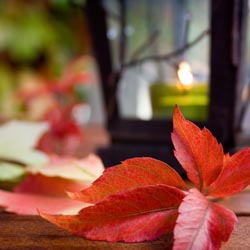
Add portable light with lanterns, torches and simple staked candles. This is great for barbeque areas, decks and entertainment areas, helping increase illumination for better visibility and evening energy. Candles are also nice because their flames flicker in the breeze and create shadows and reflections, but if it is too windy, be sure the flames are protected from vigorous breezes that will blow them out.

For the most dramatic nighttime lighting in your garden, consider specific features that will become showstoppers after dark. An elegant fire pit can be an evening gathering place and just the right spot for roasting marshmallows and chatting with friends. A waterfall or fountain can also be carefully lit to create an elegant, mystical mood with eye-catching sparkles as the light catches every splash.

To make the most of your garden lighting, position lights so they do not shine directly in your eyes as you move through the garden. If you are near a street, make sure your lighting won’t be canceled by streetlights, overwhelmed by passing traffic or distracting to drivers.

You don’t need to stop enjoying your garden when the sun goes down. With the right illumination – making the most of natural nighttime light and enhancing it with carefully chosen lighting – after dark can be when your garden really shines its brightest.

Autumn

nighttime3

nighttime1

Tropical Outdoor Living Room

This year, discover the pleasure of tropical plants by transforming your courtyard, balcony, flat roof or deck into a wonderland oasis. If you haven’t experienced the hot colors and unusual textures of plants like mandevilla, dipladenia, stephanotis, passion vine, bouganvillea, oleander, hibiscus, lantana and Pandora’s vine, you’re in for a treat!

Growing Tropical Plants

Tropical plants can be grown in pots and planters almost anywhere, providing they get at least 6 hours of sun daily. Fertilize them weekly with Jack’s Classic Blossom Booster and keep the soil evenly moist. Spray every 10-14 days with a light concentration of Bonide All-Season Oil Spray to control insects like mealybugs, aphids and scale. Check for each individual plant’s needs for proper fertilization, space and other care, and you’ll discover that tropical plants are no more difficult to care for than any container garden.

Creating Tropical Arrangements

Tropical plants can pack a punch by themselves, but they look even more lush and paradise-like in thoughtful arrangements. Go for the filler-thriller-spiller formula when planning a tropical container, and choose plants with good contrasting colors and unique foliage to make the most of every combination. To help the plants “pop” in the arrangements, opt for more understated, neutral pot or container colors, and let the vibrancy of the plants shine through.

More Tips for a Tropical Outdoor Living Room

To give your outdoor living space a truly tropical feel…

  • Use wicker, bamboo or similar tropical materials for outdoor furniture, topping chairs and loungers with bold patterns and bright colors for a tropical vibe.
  • Use louvered shutters to enclose a shady spot but still catch breezes, and go for a beachy look with driftwood-esque stains and finishes.
  • Add torches or lanterns for ambient lighting, or add a touch of whimsy with a string of lights with tropical themes, such as palm trees or flip flops.
  • Add cute tropical flair to the yard with a lawn flamingo, seashell fountain, teal gazing ball or similar decorative accents. Pineapple, flamingo, nautical and beach themes are popular.
  • Include a water feature if possible for that splashing wave sound. A tabletop fountain or even a sound machine can create a similar tropical ambiance to enjoy.
  • Serve up the tropics with beachy beverages, fresh fruit and themed appetizers whenever you entertain in your tropical outdoor living space.

No matter where your garden may be, you can add a touch of the tropics when you plan a fun and inviting tropical outdoor living room.

tropicaloutdoor1

tropicaloutdoor2

Family Gardening: Attracting Wildlife to the Garden

Attracting wildlife to the home garden is an enjoyable and creative way to teach children about nature, evoke their respect for the environment and provide meaningful family together time. Many things that are good for wildlife are equally good for a wholesome, thoughtful garden – win-win!

 Covering the Basics

 All wildlife – butterflies, birds, squirrels, snakes, deer, etc. – requires three things for survival: food, water and cover. When you meet these basic needs in the garden, you can expect a variety of visitors.

  • Food
    Native trees, shrubs, vines and wildflowers provide the foliage, nectar, pollen, berries, seeds and nuts that wildlife requires to survive and thrive. As an added advantage, natives are well adapted to their particular geographic area and therefore are more disease and pest-resistant and generally require little extra fertilization, supplemental watering or other maintenance.

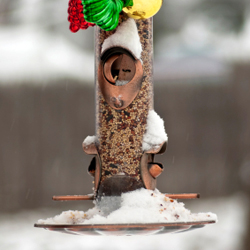
    There will be times when natural food sources are not readily available, especially in late winter when many stores of food are exhausted or early spring before natural supplies are replenished. This is when it is most important to provide supplemental sources of food using bird, squirrel and butterfly feeders to add to the native food sources for resident and migrating wildlife.

  • Water
    All wildlife requires a source of clean water for drinking and bathing. Many of us do not have a natural water source on our properties but this situation is easily remedied by adding a garden bird bath or water dish. With larger landscapes, adding a pond, fountain or pondless waterfall is an ambitious and rewarding project that will greatly enhance your efforts to increase the wildlife population. If space and your budget permits, you might even consider a tiered stream or other extensive feature.
  • Cover
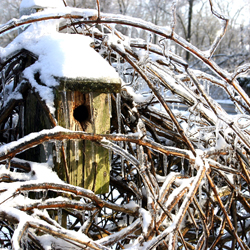
    Wildlife requires a place to hide from predators, shelter in inclement weather and a secluded place to birth their young. Trees, both dead and alive, are perfect for hiding, nesting and perching. Leafy and thorny shrubs also provide wildlife protection and a suitable hiding place. Tiers of plants are most desirable, and thicker, denser plantings such as thickets or groves will be very attractive. Even if you have plenty of vegetation already, the addition of bird and bat houses will increase areas of wildlife safety in your landscape.

Native Plants to Benefit Wildlife

All types of plants, from trees to vines to shrubs to flowers, can provide food, water and cover to wildlife, but some plants are more useful than others. These handy lists can help you choose the best options for your landscape and the type of help you want to give backyard birds, butterflies, squirrels, deer and other visitors.

Note: “Seed” denotes abundant seeds that are attractive and nourishing for wildlife; “Nectar” denotes blooms butterflies and hummingbirds will sip from; “Fruit” denotes berries or other small fruits to feed wildlife; “Host” denotes a nourishing host plant for butterfly larvae.

wildlife-chart

Still not sure about the best plants for your backyard wildlife? Come on in and we’ll help you select just the plants you need for the wildlife you want to welcome to your yard!

wildlife-2

wildlife-3

http://www.istockphoto.com/ggustin

Seed Starting

Starting seeds indoors is a rewarding gardening experience and can help extend your growing season to include more plant varieties than your outdoor season may permit. Furthermore, a larger selection of seed varieties doesn’t limit your opportunities to growing only those transplants that are available at planting time. The key to success in growing seedlings is in creating the proper environment.

What Seeds Need

Seeds are generally hardy, but to start them properly they do need gentle nurturing so they can produce healthy, vibrant plants. In general, seeds should be started 4-6 weeks before the recommended planting time so the seedlings will be large and strong enough to withstand the stresses of transplanting. Use a sterile growing mix which is light enough to encourage rich root growth. Sow the seeds thinly and cover lightly with sphagnum peat moss. Water using a fine spray but do not soak the seeds – they also need oxygen to germinate, and if they are overwatered they will drown. Cover the container with clear plastic to hold the moisture and increase humidity. Place the containers in a warm (70-80 degrees) spot and watch daily for germination. The top of the refrigerator is often an ideal location. When the first seeds germinate, place the seedlings in bright light or under artificial lights (tube lights should be 2-3” from seedling tops) for several hours each day, since late winter sunlight will not usually be sufficient to prevent weak, leggy seedlings. Daytime temperatures should range from 70-75 degrees. Night time temperatures should range from 60-65 degrees.

As Seeds Grow

When the seedlings develop their first true sets of leaves, add half-strength water soluble fertilizer to their water – organic fish emulsion or seaweed fertilizers are great to use. Repeat every second week to provide good nourishment. Thin the seedlings or transplant them to larger containers as they grow. Before planting outdoors, harden-off the plants at least one week before the planting date. Take the transplants outdoors in the daytime and bring them in at night if frost is likely. Gradually expose them to lower temperatures and more sunlight. The use of hotcaps and frost blankets to cover early plantings will also aid in the hardening off process so the seedlings can adjust well to their new outdoor environment.

Transplanting Seeds

Transplant seedlings into the garden after the safe planting date on a calm, overcast day. Pack the soil around the transplant with as little root disturbance as possible. Sprinkle the plants with water, keeping the soil moist until the plants become established.

Popular Indoor Seed Start Dates

The exact dates you want to start seeds will vary depending on your local growing season, the varieties of plants you choose and what their needs are. In general, dates for the most popular produce include…

Vegetable Seed Starting Dates

  • February – Asparagus, celery, onion
  • March 1 – Broccoli, Brussels sprouts, cabbage, cauliflower, collards, kale, lettuce
  • March 15 – Eggplant, peppers, tomatoes
  • April 1 – Summer squash
  • April 15 – Cantaloupes, cucumbers, winter squash

Flower Seed Starting Dates

  • January/February – Begonia, carnation, geranium, impatiens, nicotiana, pansy, rudbeckia, salvia, snapdragon, verbena, vinca
  • March 1 – Ageratum, dahlia, dianthus, petunia
  • April 15 – Aster, calendula, celosia, marigold, zinnia

Use seed starting dates as a general guide to ensure your seeds have plenty of time to reach their full harvest potential before the weather turns in autumn. At the same time, consider staggering seed starting every few days to lengthen your harvest and keep your favorite vegetables and flowers coming even longer during the growing season. As you gain more experience with starting seeds, you’ll be able to carefully plan your seed calendar to ensure a lush, rich, long harvest season.

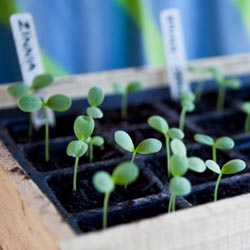
Old wooden seed tray with plant seedlings of various kinds (Zinnia and Pea).

Winter Vegetables on the Table

Winter marks a seasonal change. Our bodies seem to crave deeper, more tantalizing, richer tastes rather than light, bright, fruity flavors of summer. Harvesting vegetables in the late fall, and sometimes into the winter, presents us with bounty for slow, simple and savory cooking. All winter vegetables may be boiled, roasted, grilled, stewed, sautéed, steamed or eaten raw.

Which Vegetables Are Winter Vegetables?

Winter vegetables are generally considered those that are either harvested late in the season or have the capability of being kept for several weeks or months without losing their flavor, texture and nutritional value. Which of these will grace your table?

The cole, or cruciferous, vegetables such as broccoli, Brussels sprouts, cabbage, cauliflower, turnips and kohlrabi rank highly for many nutrients including vitamin C, soluble fiber and other nutrients with anticancer properties. Interestingly, boiling seems to reduce the potency of these nutrients, but other cooking methods don’t.

Root crops, including beets and carrots, sustain life around the world. Beets provide folate, nitrates and manganese in dishes such as borscht and pickled beets. Carrots contain diverse vitamins including A, C, K and B6 and antioxidants from carotenoids. Interestingly, recent research suggests many people prefer the flavor of steamed carrots to boiled.

Fennel, with its anise flavor, jazzes up meals throughout the world but is a favorite in Mediterranean and Italian cuisine. It tops nutritional lists with its antioxidant benefits. Try some raw in salads and appetizers.

Celery, related to fennel, adds a distinctive crunch when used in salads as a raw ingredient or a stronger flavor to soups and stews. With a mild taste, celery is versatile in a wide range of dishes, including mashes, stuffings and roasts.

Potatoes and sweet potatoes, long associated with the typical American holiday meal, contain many healthful benefits. According to research, boiling or steaming sweet potato provides the most health benefits; the phytochemicals in them rival that of broccoli. Roasting or baking potatoes is a healthy way to enjoy them, provided you are sparing with the toppings.

Winter squashes, from acorn to pumpkins, also serve as healthy sources of carbohydrates. Because 90 percent of the calories are starch-related, people are surprised at recent studies proving the antioxidant, anti-inflammatory and insulin-regulating effects of winter squash. Additionally, the roasted seeds make a delicious and healthful snack.

Winter Vegetable Recipes to Savor

Have you ever wondered how to roast vegetables? It’s easy! Just wash the vegetables, cut into 1″x1″ cubes, and place in mixing bowl. Drizzle over a few tablespoons extra virgin olive oil and mix to cover all pieces. Place as a single layer in a cookie or roasting pan. Sprinkle with salt and pepper and cook at 375⁰ Fahrenheit for approximately 45 minutes or until the desired texture is reached. Jazz it up with cinnamon, garlic, curry, rosemary or any other favorite spice or seasoning mix.

Here are some other recipes to bring these wonderful winter vegetables to your table. Bon appétit!

Roasted Winter Squash Seed and Cheese Ball Appetizer

Step 1: Roast winter squash seeds by cutting the winter squash in half and removing the seeds and stringy “gunk.” Put into a bowl half filled with water and rub between your hands to separate the seeds from the strings. Rinse the seeds again and spread out on a cookie sheet. Use a hair dryer or place in 150⁰ Fahrenheit oven to dry. Stirring every 10 minutes reduces drying time and ensures even drying.

Step 2: When dry, place seeds in bowl and combine with choice of seasonings. Mix thoroughly. Return to cookie sheet. Place in 275⁰ Fahrenheit oven for 10-20 minutes. Watch closely to prevent burning. When cool, chop finely to coat cheese ball.

Seasoning ideas

  1. Latino: 4 Tbs. melted butter, 2 tsp. chili powder, 1 tsp. oregano
  2. Asian: 4 Tbs. melted butter, 2 tsp. ground ginger, 1 tsp. hot mustard, 1 tsp. honey
  3. Holiday: 4 Tbs. melted butter, 2 tsp. cinnamon, 1 tsp. nutmeg, 2 tsp. sugar
  4. Use your imagination!

Step 3: Make cheese ball.

Ingredients:

2 pkg. (8 oz. each) softened Neufchatel cheese

1/2 cup shredded sharp cheddar cheese (Low fat)

Directions:

Beat Neufchatel and cheddar in small bowl with mixer until well blended. Refrigerate 1 hour. Shape into ball. Press seasoned winter squash seeds onto cheese ball.

Serve with complimentary crackers, tortilla chips, pretzels or flatbread.

Winter Squash Casserole

(serves 2)

Ingredients:

2 Cups winter squash, peeled and cut into 1-inch cubes

3 Tbs. extra virgin olive or macadamia nut oil

1 tsp. orange juice

1 tsp. lemon juice

Directions:

Steam squash chunks, covered, for 7-8 minutes, until just tender

Mix remaining ingredients, pour over squash in bowl

Toss while still warm. Serve.

Other Ideas:

  • Cook 1/2 C chopped onion with squash, or
  • Add fresh herbs such as basil or rosemary to liquid dressing, or
  • Sweeten with 1 tsp. cinnamon and 2 tsp. honey, or
  • For Asian flavoring, add 1 Tbs. minced fresh ginger, 2 tsp. soy sauce

Super Easy Grilled (or Baked) Cauliflower

  1. Remove the leaves. Cut the head in two, core the stem. Place both on large piece of heavy-duty foil.
  2. Melt 1/2 Cup butter with 2 tsp. garlic salt and 2 tsp. lemon pepper.
  3. Drizzle half of butter mixture over each half and sprinkle each with 3 Tbs. parmesan cheese
  4. Rejoin the two halves and drizzle remaining butter mixture on the outside.
  5. Fold foil around, creating a ball.

Cook at 350⁰ Fahrenheit for approximately an hour or until soft. Delicious!

Lyme Disease

For those of us who work and play outdoors in deer tick-infested areas, Lyme disease is a reality. If caught early, the disease is usually cured with antibiotics. If not detected and treated early, Lyme disease can be a debilitating condition that may linger for months or years.

Lyme disease is transmitted through the bite of a deer tick. The tick becomes infected with the disease by biting an animal that is carrying the bacteria. The main culprits in our area are the white-tailed deer and white-footed mouse. Not every deer tick is a carrier of Lyme disease but it is wise to always take precautions to prevent potential infections.

Protect yourself and your family by:

  • Wearing light-colored clothes to help spot and identify deer ticks before they attach to spread the infection.
  • Wearing long sleeves and pants to minimize exposed skin that can attract deer ticks. Tuck your pants into your boots or socks. Include a hat for added protection.
  • Spraying exposed skin with a product that contains at least 20 percent DEET and spraying clothing, and all other cloth gear, with a product containing Permethrin. Always follow the product label when applying repellents.
  • Removing clothing and immediately laundering it when coming back indoors. Dry clothing at a high temperature for at least 30 minutes, since ticks are sensitive to dryness and will die quickly without appropriate moisture.
  • Showering immediately and thoroughly after being in a tick-prone area. Inspect all skin surfaces, especially hard-to-see areas like behind the knees, the back of the neck and in arm pits. Ticks that carry Lyme disease are very small and therefore hard to see. Ticks must be attached for at least 18 hours in order to transmit Lyme disease.
  • Protecting pets from ticks with appropriate collars, drops, powders or dips, and inspecting pets’ fur regularly for ticks or other pests.

Protect your yard by:

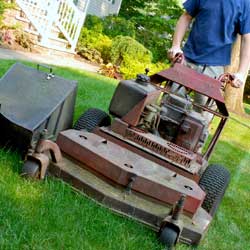
  • Mowing the grass regularly. Ticks thrive in longer grasses with moist soils, but are not as abundant in groomed areas.
  • Keeping leaves raked and keeping the yard free of refuse that can create moist patches in the soil where ticks will thrive.
  • Creating a protective barrier, at least 3-4 feet wide of mulch or stone, between yard and wooded area. Ticks are not easily able to cross these open areas.
  • Stacking wood neatly in a dry area where it is less likely to harbor a tick infestation.
  • Spraying your yard with a tick control product like bifenthin. Always follow the product label when applying pesticides.
  • Taking steps to discourage deer and mice in your yard, such as choosing deer-resistant plants and using traps responsibly to eliminate rodents.

By taking appropriate precautions to protect you, your family and your yard, you can minimize any risk of contracting Lyme disease.

mow