Monthly Archives: March 2018

Growing Veggies in Containers

Do you dream of a delicious, homegrown harvest but don’t have the land to use? No longer should a shortage of garden space prevent you from growing your own fresh vegetables. As long as you have a sunny location you can have your own mini-farm on your porch, patio, deck, balcony, roof-top or doorstep!

Why Use Containers?

The benefits of growing containerized vegetables go beyond the issue of space. There are plenty of other compelling reasons to plant your veggies in pots, including…

  1. Vegetables are amazingly ornamental and can be just as decorative as any other container plants or flowers.
  2. There are fewer problems with pests such as groundhogs, deer and rabbits and soil borne diseases.
  3. The soil in pots warms up more quickly in the spring allowing for earlier planting and an extended growing season.
  4. Less bending, squatting and kneeling is required for gardeners with limited mobility.

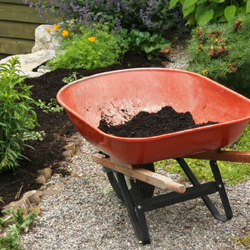
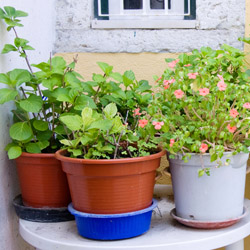
Vegetables can be grown in any vessel that can hold soil, has adequate drainage and is large enough to hold a plant. There are endless options available on the market or you may recycle items that you already have as long as they meet these requirements. Use your imagination – try a wheelbarrow, wine barrel or just a plastic bin, and you’re ready to plant!

Best Vegetables for Containers

While all veggies can be grown in containers, some are better suited than others. Plants that grow particularly large, that sprawl or that must be grown in large numbers to ensure an adequate yield may take more effort and careful site planning with an adequate container. Similarly, vining plants need not be avoided. Trellis these plants up against a wall or fence or allow them to cascade down from a taller pot or a container placed up high like on a stone wall. For smaller selections, a hanging basket or window box may be used. Many sprawling and vining vegetables are now available by seed in dwarf, compact or bush varieties. These are bred specifically for small spaces and containers and are worth seeking out.

Tips for Container Vegetable Gardens

Growing vegetables in containers does take some unique thought and isn’t quite the same as planting in a traditional garden. When planning your delicious container garden, consider…

  • Containers: Size matters when planting in containers. The bigger the container, the more soil it can hold. More soil more and more moisture means less watering. Take note that porous containers like terra cotta dry out more quickly and will therefore require more frequent watering.
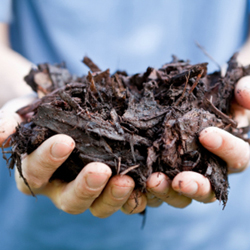
  • Soil: When planting, choose a good quality potting mix. Soil from the ground may contain insects or disease or may be too heavy. Add an all-purpose balanced fertilizer at time of planting. It is also good idea to mix water absorbing polymers into the soil. These granules can hold up to 400 times their weight in water and help reduce watering from 30-50 percent.
  • Plants: Some of the vegetables that you select may be directly seeded into your container; these would include peas, beans, radishes and corn. With most vegetables you may wish to transplant seedlings into your container, either home-grown or garden center purchased. You will generally find a wider selection of vegetable varieties and unique options available in seed as opposed to purchased seedlings, if you want to use your containers experimentally.
  • Supports: Supports should be placed at time of planting for large or vining plants. This will ensure the young plants are not disturbed or damaged with supports added at a later time. If the supports are outside the container, however, they can be added only when they are needed.
  • Location: Your vegetables will require at least 6 hours of direct sun a day. If this is not possible you may try placing your pots on dollies or carts and moving them to a sunnier location as the sun moves throughout the day. Note that good air circulation is important for disease control.
  • Watering: Test soil frequently for water to make sure that you keep it evenly moist. Water the soil, not the plants, to avoid the spread of disease. Check soil moisture more frequently during the summer months when evaporation is faster. Mulching your containers with salt hay or grass clippings will help keep soil cool during the summer months and reduce the frequency of watering. If possible, a drip system can be a great option for keeping containers watered.
  • Fertilization: Fertilizer leaches through pots quickly. Fertilize containerized vegetables at least once a week with a water soluble fertilizer. Always be careful to follow the directions on the fertilizer package and follow the recommended rate. Too much fertilizer may burn or kill your plants, but too little will result in undernourished, underperforming plants.

With appropriate care that caters to the needs of containers, your small-scale vegetable garden can be just as lush and productive as any larger, more intensive space, and you’ll soon have a bountiful harvest to enjoy.

Winter Pond Prep Checklist

Your pond can be an attractive and valuable focal point of your landscaping, but it can also be a delicate one. As winter approaches, certain steps should be taken to ensure plant and fish survival so your pond will still be at its best next spring.

  1. Clean Out Debris
    Use a netted scooper, a rake, your hands and, if possible, a pond vacuum to clean out pond debris. Rotting vegetation produces gas under winter ice that can be fatal to fish, frogs or other aquatic wildlife. This is also a good time to reduce any mud coverage over the pond’s bottom.
  2. Trim Pond Plants
    Trim and move hardy pond plants to the deep end of the pond (minimum 18” depth) to prevent them from freezing. Cut their vegetative growth back to about one inch above the soil line. Extra foliage will be more delicate and could rot over the winter. Especially be sure to trim any foliage that is already broken, wilting or damaged.
  3. Remove Tropical Plants
    Tropical plants or any delicate vegetation should be removed from the pond and placed in a basement or garage where they will not freeze. Keep plants moist throughout the fall and winter months until it is time to return them to the pond.
  4. Disassemble Summer Equipment
    Remove and clean the pond pump and waterfall or fountain feature (if applicable). Store them inside for the winter. See your maintenance guidelines for proper storage recommendations to keep the equipment in peak condition.
  5. Clean Pond Filter
    Thoroughly clean the pond filter and inspect it for any damage. If necessary, repair or replace the filter.
  6. Change Fish Diet
    Feed fish with spring/autumn food mixtures to provide good nutrition for their slowing metabolism. Stop feeding them completely when temperatures drop consistently below 50 degrees Fahrenheit. Avoid overfeeding, which would contribute to excess debris and decay in the pond over the winter.
  7. Set Up Pond Heater
    If needed, set up your pond heater for winter use. Test the equipment to be sure it is functioning properly and make any repairs or adjustments as needed.
  8. Cover the Pond
    Cover your pond with netting, screening or a shade cloth to minimize debris that will fall into the water throughout the winter. Secure the perimeter with sod staples or rocks to prevent the covering from blowing away. This will make spring cleanup and restarting your pond much easier.
  9. Relax until spring!
    Your pond will be ready for warmer temperatures when you are.

pond_250x250_2

pond_250x250_1

Get Started Composting

Fall is an excellent time to start a compost pile with all of the leaves falling, and if you develop compost now, you will have a rich source of organic material for your garden and flowerbeds in spring. Getting started with compost is fairly simple if you keep in mind the following…

  • Size Matters
    Smaller particles break down faster than larger chunks. Shredding or mulching garden wastes will help speed up the process and develop usable compost faster. Chop up larger pieces of household materials before adding them to your compost pile to speed up their decomposition.
  • Take a Turn for the Better
    Turning helps aerate the pile and shifts outer parts closer to the center where they can heat and decompose more effectively. A well-mixed pile will also have better consistency and more evenly distributed nutrients. Use a pitchfork, spade or rake to gently turn your pile periodically, such as once every 1-2 weeks or whenever you add a large amount of new material to the pile.
  • Know What to Compost
    Materials that can be composted are sod, grass clippings, leaves, hay, straw, manure, chopped corncobs, corn stalks, sawdust, shredded newspaper, wood ashes, hedge clippings and many kinds of plant refuse from the garden. Some household waste, such as coffee grounds, banana peels, eggshells and vegetable peelings are also ideal for a compost pile and will reduce the trash you accumulate.
  • Avoid Unwanted Materials
    Materials to avoid composting are large amounts of weeds, grease, fat, meat scraps and bones, cheese, coal ashes, diseased plants, cut weeds and charcoal. These materials do not decompose readily and can create poor quality compost. For example, meat, grease or dairy products in your compost will begin to smell strongly, which could attract rats, raccoons or other unwanted visitors. Diseased plants or weeds can survive in a compost pile, contaminating your garden when you add the compost to the soil in spring.
  • Cover as Needed
    Covering your compost pile with a tarp or large piece of carpet can help preserve the heat and moisture essential to promote appropriate decomposition. The cover can also keep the pile from freezing or getting too wet in winter conditions, and it can easily be removed to add new material or turn the pile as needed.

Before you toss out your next bag of trash, check for compost material and start your pile today! Your garden will thank you tomorrow.

compost_2

compost_1

Gardener Holding Tree Bark Mulch

Bringing Your Tropical Plants Indoors for the Winter

As the summer comes to an end and autumn approaches, the days get shorter and cooler temperatures signal the time to ready your plants for winter. How can you protect your treasured tropicals from winter damage?

Overwintering Tropical Plants

Don’t wait until frost warnings or freezes occur to bring tropical plants inside, especially since these plants are more susceptible to dropping temperatures. Try to have all of your plants acclimated to the new indoor environment by the end of October. Avoid the temptation to move your tropicals back outside if it suddenly gets warm, because they will have to re-acclimate when you bring them back inside again. With a little extra care even exotic hibiscus can be over-wintered inside the house.

First, it’s a good idea to prune approximately one-eighth to one-fourth off the total height of the plant’s foliage. This helps reduce the shock that the plant receives with the change of conditions when bringing them indoors. Check the plants for signs of insects and treat them with insecticidal soap or pyrethrin spray as well as a systemic insecticide that will provide protection for up to six weeks.

Position indoor tropical plants in a very bright location that receives no less than 6 hours of light per day. If the winter is very cloudy, supplement your plants with an artificial light source. Be sure the room is warm, but avoid putting the plants too close to a heating vent, which can dry them out drastically.

Because they are tropical plants, they will need good humidity which can be achieved by using a humidity tray. Use a saucer that is at least 3-4 inches larger than the pot and fill it with an inch of stones. Pour water over the stones until they are half covered, then place the pot on top of the stones. The humidity immediately around the plant will be increased, but avoid setting the pot directly in any water, which can lead to fungus and rotting. Grouping several plants close together can also help them preserve humidity for more luxuriant growth.

Fertilizing should be continued throughout the winter, but at a rate of once per week. You will find the plant will not utilize as much water in the winter because its growth has slowed. Generally, plants should be watered every 4-7 days depending on location, pot size, soil type and plant type.

If you have any questions about winter care of your plants, our staff will be glad to help you keep your tropicals in good condition all winter long.

tropical-2

tropical-1

Japanese Beetle Reduction Methods

Japanese beetles can be a scourge of the garden and landscape, but what can you do to keep these pests at bay?

About Japanese Beetles

Japanese beetles (Popillia japonica) spend their early lives as underground grubs eating turf grass roots. They prefer well-watered, healthy perennial ryegrass and hard fescues in full sun. Emerging as adult beetles in mid-June through July, they begin feeding on over 200 varieties of plants, including shade and fruit trees, shrubs and ornamentals. They also mate and the females lay 50-70 eggs in the soil.

The eggs hatch in the fall and white C-shaped grubs begin eating roots. Autumn is the best time to check your lawn to see if the grubs are present. Dig several one-foot squares 6″ deep in your lawn, turning over the turf and looking for these distinctive grubs. If you find them, taking action immediately can help control the infestation.

Reducing Japanese Beetle Populations

Non-chemical preventative treatments include spraying beneficial nematodes such as Heterorhabditis or Steinernema onto moist lawns and soil in September. Nematodes, naturally occurring soil organisms, are parasitic to soil grubs and many insect larvae, including Japanese beetles. Spray in the evening and ensure the soil is moist to at least 6″ deep. One product, Lawn Guardian, contains two types of nematodes; one lives deeper in the ground to give a “double whammy” to the feeding grubs.

Natural predators include ground beetles, ants and Tiphia, a parasitoid. Applying Bacillus popilliae Dutky to the soil causes “Milky Spore Disease” to the grub. Chemicals to control the grubs include trichlorfon, imidacloprid, halofenozide or thiamethoxam, so look for pesticides that include these compounds to help eliminate Japanese beetles. Neem oil can also be helpful to control these pests. As always, read and follow the directions carefully when using any type of chemical pesticide.

In the garden, row covers can help minimize Japanese beetle populations during the growing season, but this can also reduce crop productivity as fewer flowers are pollinated. Still, if an area is heavily infested with Japanese beetles, a smaller crop may be a better alternative than accidentally nurturing these pests. If only a few beetles are present, hand-picking them off plants and killing and disposing of the insects – toss them in a bucket of soapy water – can keep the populations manageable.

For the latest information and updates on Japanese beetles, as well as more control tips, contact your favorite garden center or County Agent.

beetle_1JapaneseBeetle_2

Repotting Houseplants

Fall is an excellent time to repot many houseplants. Potted plants that have been growing outdoors during the summer have probably grown quite vigorously due to the high light levels and greater humidity. If the top growth of the plant has increased in size by 20 percent or more, it probably should be transplanted into a larger container so the roots can stretch and settle comfortably.

Before You Repot

Before repotting, check the plant and the soil carefully for insects.  Add systemic granules to the soil and spray the leaves with an insecticidal soap to remove any unwanted pests. If an insect infestation is particularly bad, it may be necessary to remove most of the plant’s soil and replace it with fresh potting soil. Avoid using soil from the garden, however, which will harbor insect larvae and eggs as well as weed seeds and other material you do not want in your houseplants.

Acclimating Plants

Bring your plants indoors well before any danger of frost for proper acclimation to the indoor environment. The change in light levels and humidity could shock more delicate plants, and they may wilt temporarily or drop leaves before they adjust to the new conditions. If possible, bring them in just a few minutes at a time for several days, gradually increasing their indoor time to several hours before keeping them indoors all the time. Flowering tropicals will also benefit from cutting back some of their foliage to avoid shock before being brought indoors.

To help houseplants overcome the transition from outdoors to indoors, position them in a bright, sunny area and consider adjusting indoor temperature and humidity controls to more closely mimic outdoor conditions. Make adjustments slowly and gradually, and the plants will adjust.

Time to Repot

Once your houseplants are adjusted to their indoor fall and winter environment, they can be safely repotted without adding to their stress. Repot the plants early in the day, and move them to a slightly larger pot. Avoid jumping several pot sizes, which could lead to excessive root growth while the foliage is neglected. Be sure to fertilize and water the plants appropriately to provide them proper nourishment as they settle into new pots. Do not expect luxuriant foliage growth right away, however, as it will take some time for the plants to begin growing again, especially in fall and winter when most houseplants are entering a dormant, slow growth period.

By repotting your houseplants in fall, you can help healthy, vigorously growing plants adjust to a new environment and continue their growth with ease in a new, larger, more comfortable pot.

Repotting_1

Bird Feeding Basics

Winter is the perfect time to think about attracting bird visitors to your yard. Bird watching is a great hobby that can be enjoyed by both younger and older members of the family and getting started is both easy and inexpensive.

Bird Feeders

The type of bird feeders you select will depend on where you want to observe your feathered friends, as well as the kinds of foods you are offering and the types of birds you want to attract.

Hanging feeders, suitable for smaller birds, can be hung from a tree, pole or hook. Platform feeders can be mounted on a pole/post, deck railing or fence, or even just set on the ground. There are also window feeders that can be mounted directly to a window for enjoyment close at hand plus suet feeders or cages which hold suet cakes – a must for attracting insect-eating woodpeckers and nuthatches.

Feeders should be located in a sheltered place where they are not exposed to strong winds or vulnerable to attack from predators such as hawks and cats. Try grouping several different feeders together to attract the maximum number of different birds. All feeders should be kept clean and in good repair.

Bird Seeds

Just like us, birds have certain food preferences. Black oil sunflower seed is one of the most popular seeds, attracting a large variety of different birds. Some seeds such as Nyjer (thistle) are very specific – if you want to attract colorful goldfinches, then this one is for you. Mixes containing sunflower, thistle, cracked corn, millet and other seeds are also available, to tempt many bird visitors. Larger birds that feed on the ground, such as doves, quail and wild turkeys, will love cracked corn.

Natural Food Sources

If you are serious about attracting birds to your yard throughout the year, then think about planting trees, shrubs, perennials and even annuals that will provide natural foods at different times. Birds love berry-producers such as crabapples, hollies, hawthorns and viburnums. Perennial favorites for seed eaters include members of the black-eyed susan family (Rudbeckia), coneflowers (Echinacea), goldenrod (Solidago) and coreopsis. Seed heads of ornamental grasses are also highly sought after. Of the annuals, sunflower (of course!), marigolds and cosmos are popular. Just be sure to leave seed heads on the plants so birds can take advantage of them.

Don’t Forget Water!

Water for bathing and drinking is one of the basic requirements for all birds, even for species that won’t visit feeders. If you already have a bird bath, be sure to keep it filled with clear, fresh water. A bird bath heater will keep water available even during freezing weather. A mister, dripper or bubbler will move the water around and attract even more birds with sparkling splashes.

From feeders and seeds to plants and water sources, we have everything you need to get started attracting birds. Come on in today and you’ll be able to enjoy your feathered friends this fall and winter!

bird-feeding-1

bird-feeding-2

bird-feeding-3

The Winter Landscape

Although the blooms of summer are a distant memory and the splendor of fall is neatly raked into the compost pile, don’t think your yard has to be dreary from now until spring. Background planting, berries, bark and even blooms are the secrets of a colorful and interesting winter landscape.

Background Planting

Evergreens are the mainstay of the winter landscape. When the shade and flowering trees and shrubs of spring and summer have entered their winter sleep, it’s evergreens that take the stage. Spruce, cedar, pine, hemlock, arborvitae, yew and juniper – there are many beautiful varieties suitable for foundation or specimen planting, windbreaks, screens and groundcovers. Some change into their ‘winter wardrobe’ too: “Reingold” Arborvitae takes on a coppery hue, while junipers like “Bar Harbor” and “Prince of Wales” turn bronzy purple. Don’t forget broad-leaved evergreens for texture contrast, plus make use of evergreen perennials like Coral Bells (Heuchera), Thrift (Armeria), Creeping Phlox, Candytuft (Iberis) and varieties of Sedum for groundcover or edging. A few ornamental grasses such as Blue Fescue retain their color in winter and can create interesting and colorful tufts in a barren landscape. The foliage and flowers of others, like Miscanthus and Fountain Grass (Pennisetum), dry to a biscuit color and look particularly effective against a snowy backdrop.

Berries

Berry-bearing plants are a boon for birds and other wildlife, as well as being a decorative addition to the winter landscape. Try prickly Pyracantha, colorful cotoneaster and hardy hollies – a must for holiday decorating. Hollies come in many shapes and sizes for all sorts of landscaping situations. Plant a dwarf grower like “Blue Angel” (Ilex meserveae ‘Blue Angel’) as a foundation plant, a medium grower like “China Girl” (Ilex cornuta ‘China Girl’) as a screen or hedge and a tall grower like “Nellie Stevens” (Ilex) as a specimen. Hollies require a male pollinator for best berry production. Be sure and ask which pollinator you need for the variety you select.

Bark

The beautiful bark which many trees and shrubs exhibit can be seen at its best during winter, when leaves have fallen and surrounding plants are bare. Paperbark Maple (Acer griseum) is a delightful small specimen tree with reddish-brown bark that exfoliates in thin papery sheets. Consider white-barked European or Himalayan Birch or water-loving River Birch with its eye-catching grey-brown to cinnamon colored peeling bark. For attractive mottled trunks, plant Stewartia and Crepe Myrtle. The dazzling stems of Red and Yellow Twig Dogwood brighten as the winter progresses bringing cheer to dreary days. Twig Dogwoods look particularly stunning when planted in groupings in front of evergreen trees.

Blooms

Even in the middle of winter, there are a few plants that will surprise us with flowers. Perennial Christmas Rose (Helleborus niger) has pretty white buttercup-like flowers; its cousin, Lenten Rose (H. orientalis) blooms a little later with flowers ranging from purplish green to white and pink. Both are shade-loving and grow slowly to a loose evergreen clump. Witch Hazel (Hammamelis mollis) is a large, multi-stemmed shrub with fragrant late winter blooms in yellow, orange or red. Other late winter bloomers, all of which are also fragrant, include Leatherleaf Mahonia (Mahonia bealii), Wintersweet (Chimonanthus praecox) and Sweet Box (Sarcoccoca).

Stop by soon and talk to us about planning your landscape to include background plantings, berries, bark and blooms for winter interest. Your yard will never have the winter doldrums again!

winter-landscape-1

winter-landscape-2

winter-landscape-3

Size Up Your Site: A First Step in Planning Your Landscape

Whether you plan your garden from start to finish or use a professional designer, a few simple steps can help you assess your property’s potential to develop the landscape of your dreams. By getting involved in the landscape design process, you can address practical problems, structure your outdoor living space and develop a plan that will reflect your taste and lifestyle.

Surveying Your Site

Every yard, garden and landscape site will have differing light conditions, grade changes, varying soil conditions and existing plants and structures to consider when planning changes and expansions. Using a loose-leaf binder, take notes on each of the following:

Overall:

  1. What are your favorite spots in your yard and why? What your least favorite and why?
  2. In landscapes, do you generally prefer open on enclosed spaces?
  3. What existing plants do you want to preserve, and which do you want to remove?
  4. What is the architectural style of your home? What is your decorating style?
  5. Are you planning any additions to your home that may take away yard space?
  6. Do you want special areas for children, entertaining, pets, recreation, vegetable gardening, water features or composting?
  7. What is your time frame? Do you want a short-term or long-range plan?
  8. Which building materials do you like – brick, wood, stone, pavers, etc.?
  9. Is your outdoor lighting adequate for your use?
  10. Do you need to screen an area for wind, noise or an unwanted view?
  11. What is you landscaping budget (both short- and long-term)?
  12. How will your landscape use change over time, such as when children grow up?

Specific Areas:

  1. What is the light condition of the area? How does it change seasonally?
  2. How is the soil – well-drained, poor, heavy clay, poorly drained, etc?
  3. What are the dimensions of a confined area that could affect plant size?
  4. What are your favorite plants or types of plants?
  5. Would you like a garden accent or other feature in this area (trellis, arbor, sculpture, bench, pond, etc)?
  6. What is the pH and general condition of the soil?

Once you have taken adequate notes, you’ll have a much better understanding about the overall layout of your landscaping site. This can help you plan the best options without making costly or time-consuming mistakes, such as planting the wrong tree that will outgrow a corner in a few years, or choosing building materials that won’t stand up to your climate.

More Tips for Landscape Surveying

You can never have too much information at your fingertips when you are surveying your site for landscaping changes. More techniques that can give you all the information you need include…

  • Photographing your property. Snapshots can reveal what the eye may overlook, and can be useful to show others to get their unique perspectives. Take views from your house and various areas of your property. Include photos from different times of day.
  • Measure everything and mark it on a map. You can use graph paper to create a simple sketch that will show dimensions so you can properly size your landscaping plans.
  • Make a sketch that shows what is existing (plants & structures) and where it is located. This will help you figure out what features you want to preserve, what you may want to expand and what you would rather remove and how the space will change.

Still need help? Bring your information in – we can help you choose the best plants, accents and accessories suitable to your needs, style and budget for the landscape of your dreams!

size-up-your-site

Tooling Around in the Garden: Selecting and Caring for Garden Tools

Let’s face it – purchasing a new garden tool is usually not the first thing on your mind when you visit your friendly neighborhood garden center. Most of us tend to gravitate toward the latest and greatest herbaceous eye-candy without considering whether we have all the equipment necessary to prepare and care for it. The right tools, however, are critical to keep all your plants in top condition, and selecting quality garden tools is no simple matter. You want one that meets your needs, is available when needed, is easy on you, is long lasting and is not too expensive or too hard to maintain.

Choosing a New Tool

With so many tools on the market, choosing one that meets your needs can be a daunting task. First consider what type of work you will be doing, and what tools are required to accomplish your goal. Choosing the right tool for the job will make the work easier and more efficient. If you’re not sure, ask – our employees will be happy to assist your selection.

When you find a tool you are interested in, before you buy it, try it! Basic tools in new designs are available to the consumer every year. Those that are ergonomically designed, to align with the natural mechanics of our bodies, are meant to lessen the stress on muscles and joints as we garden. So pick up the tool and see how it feels in your hands. Make sure the weight and size are well suited to your strength and frame. Does it feel comfortable as you simulate the way it will be used? If it feels awkward, you will not be able to use it properly and may be tempted to neglect your garden chores instead.

Caring for New Tools

When you find a tool that meets your needs and is comfortable, you will want to have it around for a long time. Plan to purchase the highest quality tools that your budget will allow. If you purchase tools simply because they are the least expensive, chances are they will not last, and you will eventually spend more money to replace them.

Proper care and storage will add to the longevity of your garden tools. Hose off tools to remove soil and chemicals after every use. Allow tools to dry thoroughly before storing. For hardened soil, use a wire brush. Occasionally cleaning metal surfaces with oil will help to keep tools lubricated and prevent rust. Keep all moving parts oiled as well to enhance performance. Oil wooden handles at least twice a year with linseed oil to help prevent drying and splintering. For ease of use, keep tools with cutting surfaces sharp by filing them as often as needed. Check frequently and tighten any loose screws and bolts. Store all garden tools in a dry place with tool surfaces off the ground.

Every garden tool you own is important to the health, beauty and productivity of your garden and landscape. Be sure you choose the best tools and maintain them well to make the most of all your gardening.

Tomato plant and garden tools

selecting-tools-1