Author Archives: Chestnut Hill Nursery

Bird Feeding Basics

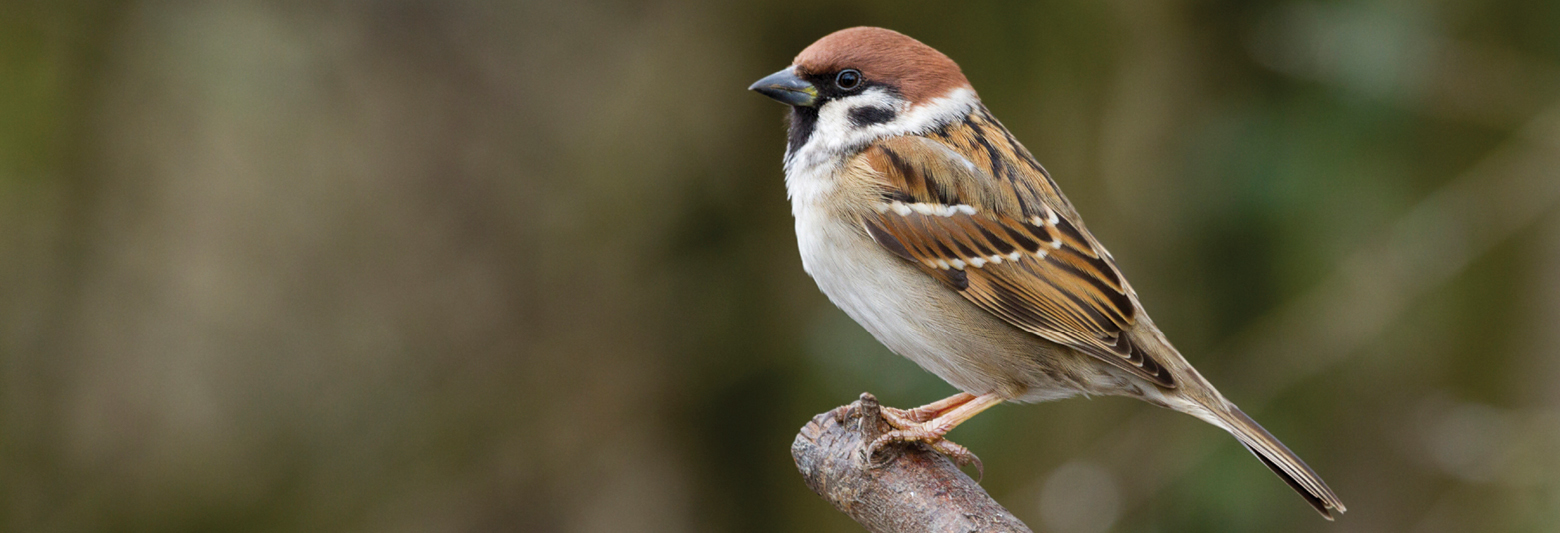
Winter is the perfect time to think about attracting bird visitors to your yard. Bird watching is a great hobby that can be enjoyed by both younger and older members of the family and getting started is both easy and inexpensive.

Bird Feeders

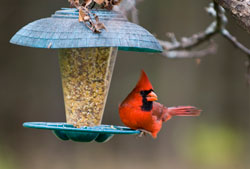
The type of bird feeders you select will depend on where you want to observe your feathered friends, as well as the kinds of foods you are offering and the types of birds you want to attract.

Hanging feeders, suitable for smaller birds, can be hung from a tree, pole or hook. Platform feeders can be mounted on a pole/post, deck railing or fence, or even just set on the ground. There are also window feeders that can be mounted directly to a window for enjoyment close at hand plus suet feeders or cages which hold suet cakes – a must for attracting insect-eating woodpeckers and nuthatches.

Feeders should be located in a sheltered place where they are not exposed to strong winds or vulnerable to attack from predators such as hawks and cats. Try grouping several different feeders together to attract the maximum number of different birds. All feeders should be kept clean and in good repair.
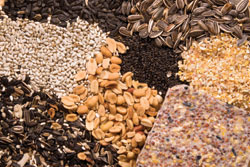
Bird Seeds

Just like us, birds have certain food preferences. Black oil sunflower seed is one of the most popular seeds, attracting a large variety of different birds. Some seeds such as Nyjer (thistle) are very specific – if you want to attract colorful goldfinches, then this one is for you. Mixes containing sunflower, thistle, cracked corn, millet and other seeds are also available, to tempt many bird visitors. Larger birds that feed on the ground, such as doves, quail and wild turkeys, will love cracked corn.

Natural Food Sources

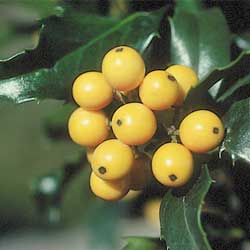
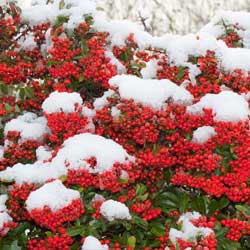
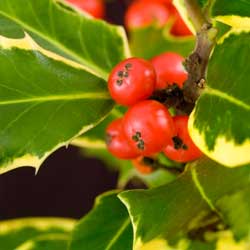
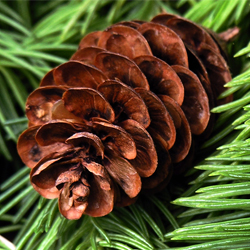
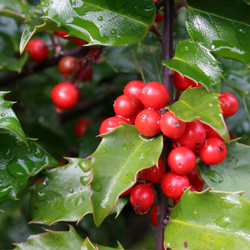
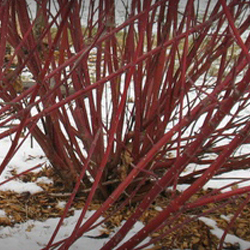
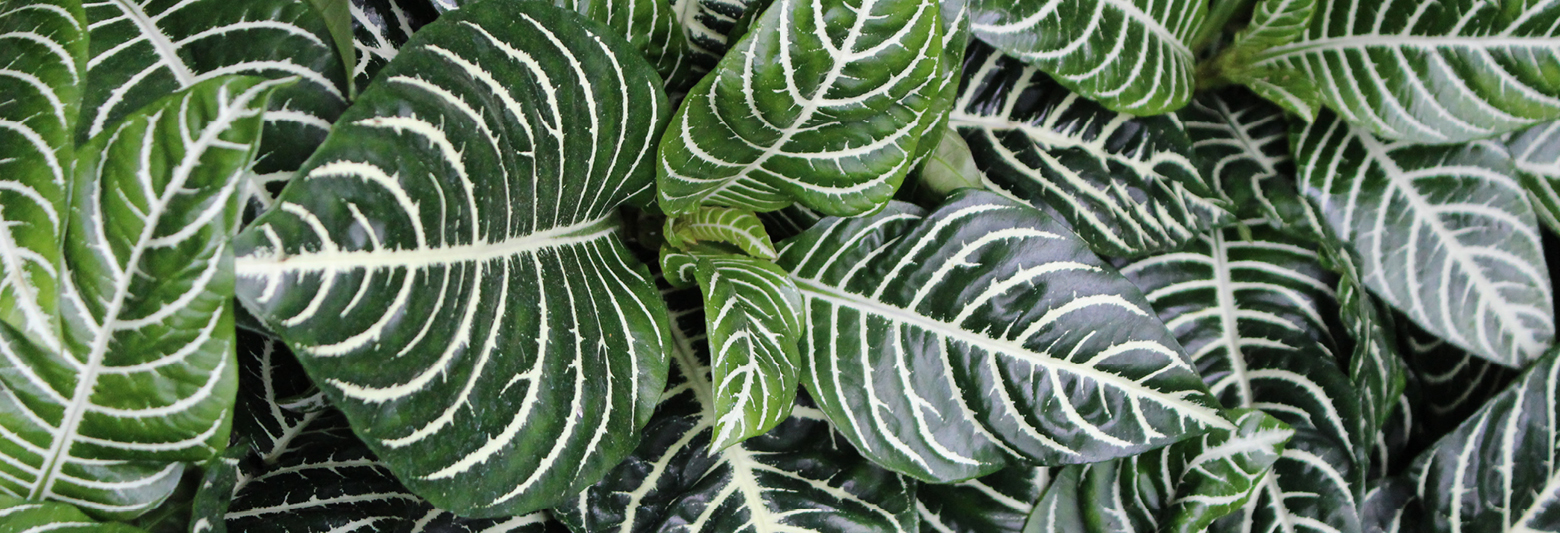
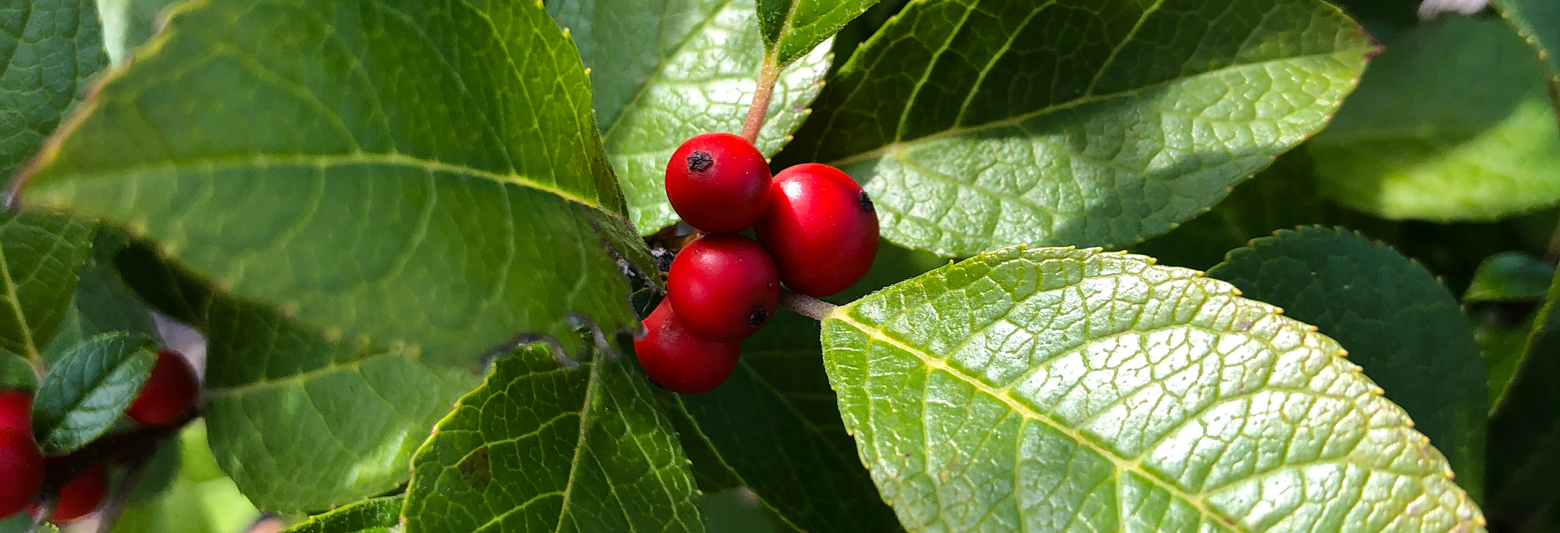
If you are serious about attracting birds to your yard throughout the year, then think about planting trees, shrubs, perennials and even annuals that will provide natural foods at different times. Birds love berry-producers such as crabapples, hollies, hawthorns and viburnums. Perennial favorites for seed eaters include members of the black-eyed susan family (Rudbeckia), coneflowers (Echinacea), goldenrod (Solidago) and coreopsis. Seed heads of ornamental grasses are also highly sought after. Of the annuals, sunflower (of course!), marigolds and cosmos are popular. Just be sure to leave seed heads on the plants so birds can take advantage of them.
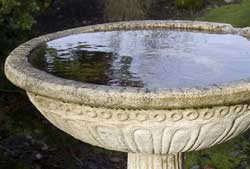
Don’t Forget Water!

Water for bathing and drinking is one of the basic requirements for all birds, even for species that won’t visit feeders. If you already have a bird bath, be sure to keep it filled with clear, fresh water. A bird bath heater will keep water available even during freezing weather. A mister, dripper or bubbler will move the water around and attract even more birds with sparkling splashes.

From feeders and seeds to plants and water sources, we have everything you need to get started attracting birds. Come on in today and you’ll be able to enjoy your feathered friends this fall and winter!

bird-feeding-1

bird-feeding-2

bird-feeding-3

Healthy Soil, Healthy Plants

The key to successful gardening is healthy soil. This basic principle of organic gardening applies to all plants, whether it is anchor trees in your landscape, flowers adoring a bed or a garden full of vegetables. Quite simply, when you feed the soil the proper nutrients, you let the soil feed the plants. But how do you feed your soil? First, you need to understand some basic principles about soil and why it is so important, then you can take steps to improve it.

Soil Texture

To start, you should determine the soil texture by moistening the soil and rubbing it between your thumb and fingers to determine its feel. Sands are gritty and will barely hold together, clay can be squeezed into a firm, dense shape and silt will act in a way to allow particles to cling together. Sandy soils tend to dry out quickly because they contain high amounts of soil air. Clay soils, on the other hand have a tendency to pack together, shutting out air and water and minimizing evaporation. The best garden soil, loam, has moderate amounts of sand, silt and clay that balance together to provide good amounts of water and air.

If your soil is mostly clay, you will need to add sand or other aerating materials to help loosen the soil. For sandy soils, humus should be added to help retain moisture and nutrients.

Soil Structure

Next, you must evaluate the soil structure. Soil structure is affected by soil pH, the amount of humus and the combination of minerals in the soil. Ideal soils allow particles to clump together with air spaces between them for water drainage as well as oxygen consumption and carbon dioxide release from plant roots. The best way to improve soil structure is to add high amounts of organic matter like humus, dehydrated manure, composted manure, mushroom compost, alfalfa meal, peat moss or worm castings. These materials should be mixed in with your soil and allowed to decay further, both for seasonal maintenance and whenever you are planting new items in your garden or landscape.

Soil Nutrition

A soil sample is needed to measure the pH and amounts of nitrogen, phosphorus and potassium in the soil as well as other nutrients. This will help determine exactly what the soil needs to provide the best nutrition to your plants. Our staff will help you read the results and determine what to add to your soil and how much. Generally, a pH of 6.0-7.0 is acceptable for most plants and landscaping. If your pH is lower than this, your soil is too acidic and requires lime to be added. If your soil is low in organic matter, it will often have a higher pH level. All plants require a proper balance of nutrients – nitrogen (N), phosphorus (P) and potassium (K). Soils lacking any one of these elements will not produce healthy plants.

When dealing with poor or improperly balanced soils, obtaining healthy, ideal soil may take 2-5 years of dedicated work. The best thing you can do to supplement your soil program in the meantime is to use various organic fertilizers to meet your plants’ needs and regularly add organic matter. This will continue to help improve the soil structure as well as create biological activity that is also a vital part to developing productive soil.

Want to know what to add to your soil to nourish your landscape? This handy chart can help!

fertilizer_chart

healthy_1healthy_2

A Buffet of Berries for Winter Birds

Plants with berries add winter interest to the garden and also attract many different types of birds. But which berries are best for your yard, and how can you ensure a bountiful buffet for your feathered friends to enjoy?

Caring for Berries

No matter which berries you choose to add to your landscape, opt for varieties native to your region. When berries are native, they are more readily adapted to the local climate changes, including the temperature extremes of winter. Furthermore, regional birds will recognize the berries more easily and will enjoy them as a safe and familiar food source.

Plant berry bushes as early as possible so the plants have plenty of time to become established in your landscape and bear copious amounts of fruit for the winter. Water them well throughout the summer and fall to encourage a good crop of plump, rich berries. Avoid pruning the bushes in autumn, and instead leave the branches intact, complete with their tasty treats. Not only will winter wildlife enjoy the feast, but the extra shelter from unpruned bushes will also be appreciated.

Best Winter Berries

There are many different types of berries that can attract winter birds, but two standouts are top picks for winter interest, not only for the birds but for their beauty in the garden.

  • Hollies
    Offering long-lasting bird forage, this group of plants provides great cover and nesting sites as well as edible berries in shades of red, orange and yellow. And, because the berries ripen at different rates even on the same bush, hollies provide food for several months. Winterberry and American holly are easily pruned as shrubs or small trees and are almost always within pollinating range because they are natives. Birds that seek holly berries include robins, blue jays, eastern bluebirds, red-bellied woodpeckers and more, including grouse and quail. The sharp-edged foliage is also a deterrent to predators, and cut branches can be stunning holiday decorations if desired.
  • Pyracantha
    This easy to grow plant has a huge feathered following. In addition to different thrushes, bluebirds, woodpeckers, grouse and quail, pyracantha, or firethorn, also attracts cardinals and purple finches. The dense clusters of orange, yellow and red berries look like a blaze of fire in the winter landscape, and the thorny branches provide superior protection from predators as well as shelter from winter storms.

Winter birds will love the berries they can find in your yard, and you will love the visual interest and seasonal color these beneficial plants provide.

berry-buffet-2

berry-buffet-3

berry-buffet-1

Tooling Around in the Garden: Selecting and Caring for Garden Tools

Let’s face it – purchasing a new garden tool is usually not the first thing on your mind when you visit your friendly neighborhood garden center. Most of us tend to gravitate toward the latest and greatest herbaceous eye-candy without considering whether we have all the equipment necessary to prepare and care for it. The right tools, however, are critical to keep all your plants in top condition, and selecting quality garden tools is no simple matter. You want one that meets your needs, is available when needed, is easy on you, is long lasting and is not too expensive or too hard to maintain.

Choosing a New Tool

With so many tools on the market, choosing one that meets your needs can be a daunting task. First consider what type of work you will be doing, and what tools are required to accomplish your goal. Choosing the right tool for the job will make the work easier and more efficient. If you’re not sure, ask – our employees will be happy to assist your selection.

When you find a tool you are interested in, before you buy it, try it! Basic tools in new designs are available to the consumer every year. Those that are ergonomically designed, to align with the natural mechanics of our bodies, are meant to lessen the stress on muscles and joints as we garden. So pick up the tool and see how it feels in your hands. Make sure the weight and size are well suited to your strength and frame. Does it feel comfortable as you simulate the way it will be used? If it feels awkward, you will not be able to use it properly and may be tempted to neglect your garden chores instead.

Caring for New Tools

When you find a tool that meets your needs and is comfortable, you will want to have it around for a long time. Plan to purchase the highest quality tools that your budget will allow. If you purchase tools simply because they are the least expensive, chances are they will not last, and you will eventually spend more money to replace them.

Proper care and storage will add to the longevity of your garden tools. Hose off tools to remove soil and chemicals after every use. Allow tools to dry thoroughly before storing. For hardened soil, use a wire brush. Occasionally cleaning metal surfaces with oil will help to keep tools lubricated and prevent rust. Keep all moving parts oiled as well to enhance performance. Oil wooden handles at least twice a year with linseed oil to help prevent drying and splintering. For ease of use, keep tools with cutting surfaces sharp by filing them as often as needed. Check frequently and tighten any loose screws and bolts. Store all garden tools in a dry place with tool surfaces off the ground.

Every garden tool you own is important to the health, beauty and productivity of your garden and landscape. Be sure you choose the best tools and maintain them well to make the most of all your gardening.

Tomato plant and garden tools

selecting-tools-1

Size Up Your Site: A First Step in Planning Your Landscape

Whether you plan your garden from start to finish or use a professional designer, a few simple steps can help you assess your property’s potential to develop the landscape of your dreams. By getting involved in the landscape design process, you can address practical problems, structure your outdoor living space and develop a plan that will reflect your taste and lifestyle.

Surveying Your Site

Every yard, garden and landscape site will have differing light conditions, grade changes, varying soil conditions and existing plants and structures to consider when planning changes and expansions. Using a loose-leaf binder, take notes on each of the following:

Overall:

  1. What are your favorite spots in your yard and why? What your least favorite and why?
  2. In landscapes, do you generally prefer open on enclosed spaces?
  3. What existing plants do you want to preserve, and which do you want to remove?
  4. What is the architectural style of your home? What is your decorating style?
  5. Are you planning any additions to your home that may take away yard space?
  6. Do you want special areas for children, entertaining, pets, recreation, vegetable gardening, water features or composting?
  7. What is your time frame? Do you want a short-term or long-range plan?
  8. Which building materials do you like – brick, wood, stone, pavers, etc.?
  9. Is your outdoor lighting adequate for your use?
  10. Do you need to screen an area for wind, noise or an unwanted view?
  11. What is you landscaping budget (both short- and long-term)?
  12. How will your landscape use change over time, such as when children grow up?

Specific Areas:

  1. What is the light condition of the area? How does it change seasonally?
  2. How is the soil – well-drained, poor, heavy clay, poorly drained, etc?
  3. What are the dimensions of a confined area that could affect plant size?
  4. What are your favorite plants or types of plants?
  5. Would you like a garden accent or other feature in this area (trellis, arbor, sculpture, bench, pond, etc)?
  6. What is the pH and general condition of the soil?

Once you have taken adequate notes, you’ll have a much better understanding about the overall layout of your landscaping site. This can help you plan the best options without making costly or time-consuming mistakes, such as planting the wrong tree that will outgrow a corner in a few years, or choosing building materials that won’t stand up to your climate.

More Tips for Landscape Surveying

You can never have too much information at your fingertips when you are surveying your site for landscaping changes. More techniques that can give you all the information you need include…

  • Photographing your property. Snapshots can reveal what the eye may overlook, and can be useful to show others to get their unique perspectives. Take views from your house and various areas of your property. Include photos from different times of day.
  • Measure everything and mark it on a map. You can use graph paper to create a simple sketch that will show dimensions so you can properly size your landscaping plans.
  • Make a sketch that shows what is existing (plants & structures) and where it is located. This will help you figure out what features you want to preserve, what you may want to expand and what you would rather remove and how the space will change.

Still need help? Bring your information in – we can help you choose the best plants, accents and accessories suitable to your needs, style and budget for the landscape of your dreams!

size-up-your-site

The Winter Landscape

Although the blooms of summer are a distant memory and the splendor of fall is neatly raked into the compost pile, don’t think your yard has to be dreary from now until spring. Background planting, berries, bark and even blooms are the secrets of a colorful and interesting winter landscape.

Background Planting

Evergreens are the mainstay of the winter landscape. When the shade and flowering trees and shrubs of spring and summer have entered their winter sleep, it’s evergreens that take the stage. Spruce, cedar, pine, hemlock, arborvitae, yew and juniper – there are many beautiful varieties suitable for foundation or specimen planting, windbreaks, screens and groundcovers. Some change into their ‘winter wardrobe’ too: “Reingold” Arborvitae takes on a coppery hue, while junipers like “Bar Harbor” and “Prince of Wales” turn bronzy purple. Don’t forget broad-leaved evergreens for texture contrast, plus make use of evergreen perennials like Coral Bells (Heuchera), Thrift (Armeria), Creeping Phlox, Candytuft (Iberis) and varieties of Sedum for groundcover or edging. A few ornamental grasses such as Blue Fescue retain their color in winter and can create interesting and colorful tufts in a barren landscape. The foliage and flowers of others, like Miscanthus and Fountain Grass (Pennisetum), dry to a biscuit color and look particularly effective against a snowy backdrop.

Berries

Berry-bearing plants are a boon for birds and other wildlife, as well as being a decorative addition to the winter landscape. Try prickly Pyracantha, colorful cotoneaster and hardy hollies – a must for holiday decorating. Hollies come in many shapes and sizes for all sorts of landscaping situations. Plant a dwarf grower like “Blue Angel” (Ilex meserveae ‘Blue Angel’) as a foundation plant, a medium grower like “China Girl” (Ilex cornuta ‘China Girl’) as a screen or hedge and a tall grower like “Nellie Stevens” (Ilex) as a specimen. Hollies require a male pollinator for best berry production. Be sure and ask which pollinator you need for the variety you select.

Bark

The beautiful bark which many trees and shrubs exhibit can be seen at its best during winter, when leaves have fallen and surrounding plants are bare. Paperbark Maple (Acer griseum) is a delightful small specimen tree with reddish-brown bark that exfoliates in thin papery sheets. Consider white-barked European or Himalayan Birch or water-loving River Birch with its eye-catching grey-brown to cinnamon colored peeling bark. For attractive mottled trunks, plant Stewartia and Crepe Myrtle. The dazzling stems of Red and Yellow Twig Dogwood brighten as the winter progresses bringing cheer to dreary days. Twig Dogwoods look particularly stunning when planted in groupings in front of evergreen trees.

Blooms

Even in the middle of winter, there are a few plants that will surprise us with flowers. Perennial Christmas Rose (Helleborus niger) has pretty white buttercup-like flowers; its cousin, Lenten Rose (H. orientalis) blooms a little later with flowers ranging from purplish green to white and pink. Both are shade-loving and grow slowly to a loose evergreen clump. Witch Hazel (Hammamelis mollis) is a large, multi-stemmed shrub with fragrant late winter blooms in yellow, orange or red. Other late winter bloomers, all of which are also fragrant, include Leatherleaf Mahonia (Mahonia bealii), Wintersweet (Chimonanthus praecox) and Sweet Box (Sarcoccoca).

Stop by soon and talk to us about planning your landscape to include background plantings, berries, bark and blooms for winter interest. Your yard will never have the winter doldrums again!

winter-landscape-1

winter-landscape-2

winter-landscape-3

Pruners for the Lefties

Have you wondered why left-handed gardeners have difficulty using “regular” pruners? It’s because of the way the thumb and index finger have to push together to make the cut. It’s hard to control it for detailed work plus incorrect pruners often cause bruises and painful calluses to form.

Fortunately, there is a solution – pruners specially designed for left-handed use. The correct pruners, with the left blade on top, allow the leftie to see what they’re cutting and enjoy pruning. Come on in to check out which of these wonder-tools fits the best.

FELCO

Felco hand tools originated more than 70 years ago when Felix Flisch patented his first hand pruner, the Felco 1. The company’s three core values, ergonomics, interchangeability and durability, haven’t changed and even today, all their products incorporate these values. We carry two left-handed styles of Felco pruners.

  • Felco 9: This is the left-handed version of Felco 8, one of the most popular hand pruners ever. Recommended for up to 1″ cutting capacity, these bypass pruners have forged aluminum handles and hardened steel blades with a screw-mounted anvil blade. They include a lifetime guarantee. The efficient design includes a blade with a wire-cutting notch and a sap groove. The blades have removable dowel pins to allow easy maintenance and replacement. The micrometric adjustment system, using the included adjustment key, promises precision cuts and maximized user comfort.
  • Felco 10: This bypass pruner is the top of the line left-handed version of the Felco 7. Designed for the professional gardener (but enjoyed by all), this pruner requires 30 percent less effort, thereby reducing hand fatigue, tendonitis and carpal tunnel syndrome with its unique rotating handle. The narrow, pointed blade design facilitates close-in pruning. Like the Felco 9, an adjustment key is also included. Also recommended for 1″ diameter cuts.

Replacement parts are available for both styles along with holsters and blade sharpeners.

Bahco

This company, established in 1862, produces very fine gardening tools in addition to their industrial lineup. Although they look a little different, the workmanship and ergonomic design make them among the favorite of garden tools. This company uses the term “Secateurs” as hand pruners and designates the levels as professional or expert.

  • PX-M2-L: This is a left-handed version of the popular PX-M2 bypass model. The composite materials in the handle with an upper section of soft rubber act as a shock absorber. The ergonomic styling and vertical and lateral inclinations of the cutting head allow the wrist to remain straight when cutting. This reduces fatigue and increases comfort and performance. All parts are replaceable.
  • PXR-M2-L: This pruner is the left-handed version of the heavier bypass PXR model designed for frequent professional use. Home gardeners also love them! A rotating handle increases performance and comfort. All parts are replaceable.
  • PG-03-L: This tool is the left-handed version of the home gardener (expert) hand pruner. This model is available in two hand sizes, small and large, and in two pruning widths for 1/2″ or 3/4″ cuts. Fiberglass reinforces the plastic handles and Xylan® coats the blades to reduce friction and protect from rust. As a convenience, it has a one-hand locking mechanism.

Holsters and blade sharpeners are also available.

Corona and The Gardener’s Friend

The Corona BP6340 has aluminum handles and hook with replaceable blades and springs. The steel blades of high carbon steel and the ergonomically angled head result in close, clean and healthier cuts. With less stress to the wrist, it easily cuts up to 1″ branches.

The Gardener’s Friend Ratchet Hand Pruners are designed for gardeners with small hands, or hands weakened by arthritis, carpal tunnel syndrome or tendonitis. The unique ratcheting action easily cuts branches to 1″ thick with less hand strain.

Of course, we have an excellent selection of other specialized hand pruners in our tool department. Whether you are buying for a child, a delicate hand or a large-handed gardener, we have the proper sized tools to reduce strain and make gardening easier and more enjoyable for all. 

pruners

Pruning Fundamentals

Pruning is essential to keep your trees and shrubs in good shape, but it can be intimidating if you’ve never pruned before. Once you learn the fundamentals, however, you’ll realize it isn’t as hard as it may seem.

Tree Pruning

The first thing to look for when pruning a tree is broken, diseased or dead branches, all of which should be removed to preserve the overall health of the tree. The next thing to be concerned with are suckers and water sprouts. Suckers can be either bottom suckers coming from the root system or growths originating from the trunk. In either case, they reduce water and nutrient flow to the main portion of the tree and should be removed. Another problem growth is called a water sprout, which is very noticeable because it grows straight up from a branch. Water sprouts also rob water and nutrients from the tree.

After all of these problems have been corrected, a second look at the tree should let you know what other limbs should be removed. Removing large limbs is perhaps the most difficult part of tree pruning. It requires two cuts in which one cut removes the weight of the limb and prevents tearing of the bark. The second cut is made closer to the trunk and removes the remaining stub, but should be no closer than the branch collar. Smaller limbs may also be removed to help preserve the desired shape and size of the tree if needed.

Pruning Deciduous Shrubs

Many deciduous shrubs can really benefit from annual pruning. Pruning not only controls the size of these shrubs, but it can also increase flower production and encourage colorful bark.

Let’s begin with a few of the more common shrubs, such as lilac, forsythia and weigela. These shrubs are most commonly known for their flowers, so we should prune them accordingly. By removing a portion of their oldest stems entirely we can encourage younger growth, which will give us more flowers. Plants such as red and yellow twig dogwood have colorful stems which can be enhanced by removing the older gray stems. Another group of plants that benefit from pruning are the spireas and potentillas. These plants are treated a little differently in that they are cut down to about 4 or 6 inches in the fall or early spring. By pruning them this way, we increase their flowering and yet remove all of their twigginess that would look unsightly throughout the winter and early spring.

There are many other trees and shrubs that require more detailed pruning recommendations and careful guidelines. Please email us your questions or stop by the store, we always have people available to answer your questions whether they involve specific plant recommendations or which pruner is the right one for you and the pruning job you need to do.

pruning-fundamentals-1pruning-fundamentals-2

Growing Plants Under Artificial Lights

When growing plants indoors it is often difficult to provide the proper amount of light required to maintain a happy and healthy specimen. With the onset of winter, the days are shorter and the nights are longer limiting the amount of available natural sunlight even further. The intensity of the sun is also diminished at this time of year. The addition of artificial lighting to replace or supplement natural sunlight is important for growing healthy, attractive houseplants and necessary to keep flowering plants in bloom during the winter months.

 Light Color and Plant Growth

In order for a plant to grow properly the light it receives must mimic natural sunlight. Sunlight contains all the colors of the spectrum and all are necessary for the process of photosynthesis. Red and blue are two of the most important colors vital to plant growth. Red stimulates vegetative growth and flowering, however, too much red will create a leggy, stretched plant. Blue regulates plant growth for a fuller, stockier plant. For the best results, choose a full-spectrum fluorescent gro-bulb. This is the best lighting choice for optimum houseplant health and vitality.

 Light Intensity

Different types of plants require different light intensities. Some plants thrive in low light, others require bright light. With artificial lighting the intensity of light is determined by the bulb wattage and how close the plant is to the light source. Knowing the light requirements of your plants will benefit you greatly when determining where to place a light and which plants to group together under the fixture. As a general rule of thumb, plants that are grown for fruit and flower usually require more light than those grown strictly for their foliage. Plants under artificial light should be rotated weekly, as light from tube style bulbs is more intense in the center of the bulb than at the ends. Using white trays, mirrors or trays lined with foil will help reflect light to increase the amount of light available to your plants.

 Duration of Light

Most houseplants do well with 12-16 hours of artificial fluorescent light each day. Too little light will result in elongated, spindly growth and too much light will cause a plant to wilt, color to fade, soil to become excessively dry and foliage to burn. Plants also require a rest period each day. Providing your plants with an 8-12 hour period of darkness a day will moderate plant growth rate and provide the rest necessary for setting flower buds. For example, the Christmas cactus needs 13 hours of uninterrupted darkness a day, for six weeks, in order to set flower buds. Without this required time of rest time the Christmas cactus will not flower. The use of an automatic timer is helpful in regulating the amount of time your houseplants are exposed to light and darkness.

Fixtures

When choosing a plant light fixture, the most important feature is that the fixture be adjustable. You should be able to adjust the fixture up and down to account for the growth height and varied light intensity requirements of a variety of plants. If the fixture is not adjustable you will limit the type of plants that you can grow and how much you can use the fixture. Simple shop lights and tabletop light fixtures are both adjustable and good choices for lighting houseplants. Another consideration is the size of the fixture. Size choice is based on the number of plants that you plan to grow under the light. Lighted plant carts provide multi levels of lighted shelves on which to grow plants. Carts are on wheels that make them easy to relocate, while tabletop fixtures are lightweight and easily transported to other locations when necessary.

It may seem intimidating to get started with artificial light sources, but you will be amazed at the difference it will make to all your indoor plants, houseplants and seedlings alike.

Nephrolepis fern leaf isolated on white

artificial-3

Three pots

Getting Tools Ready for Spring

Did you clean, sharpen and store your gardening tools properly last fall when you stopped gardening?

Hopefully, you did, but if you didn’t, it’s not too late. Spring is just around the corner, but there’s still time to get these essential chores done and be ready to jump in to all your gardening and landscape work when spring arrives.

  • Assemble Your Tools
    Round up the shovels, hoes, rakes and picks. Gather the hand tools such as pruners, loppers, saws, cultivators, weeders and all those little special gadgets you use. If they are all in one place, you can clean and care for them assembly-line style to make the task easier and less overwhelming.
  • Washing Tools
    Fill a bucket or sink with sudsy water. Combine some elbow grease with some rags, a stiff wire brush, steel wool and small toothbrush and wash off all accumulated mud and dirt. Remove sap from pruners and loppers using rubbing alcohol, turpentine, paint thinner or other solvent. Be sure to clean the handles. Towel dry each tool carefully.
  • Handle Care
    How do the wooden handles look and feel? To prevent splinters, lightly sand and apply a protective coating of boiled linseed oil. (Boiled, not raw, as raw won’t dry.) This is also a good time to apply brightly colored rubberized paint to hand tool handles. Not only will this improve the grip but makes it easier to find the tools when Ieft in the garden. If any handles are so worn or damaged that they need to be completely replaced, this is a good time to do so.
  • Remove Rust
    Get the rust off using sandpaper, steel wool and/or a wire brush. For difficult rust, you may need to attach a wire wheel to your drill. Safety googles are necessary eye protection when using a power tool for cleaning. Afterwards, coat the metal with a thin layer of oil such as WD-40, machine or 3-in-One oil to prevent new rust from forming.
  • TIP: To prevent rust, make an “oil bucket” and keep where you store your tools.
    • Half-fill a 5-gallon bucket with coarse sand such as builder’s sand
    • Pour in a quart of oil (used motor oil is fine)
    • Mix until all of the sand is lightly moistened
    • After using a garden tool, plunge the tool into the bucket several times to thoroughly remove soil and thinly coat the metal surface with oil
  • Sharpen Blades and Edges
    Check the edges and moving parts of the tools. To sharpen shovels, spades and hoes, fasten in a vise and use a hand file to restore the same original bevel angle, usually between 40-70 degrees. Use a fine grit grinding stone along the back edge of the tool to remove the burr created by the file. Wipe the metal surface with machine oil. Don’t forget to sharpen hand pruners and loppers as well, and use machine oil to lubricate the moving parts of different tools. Note: If you aren’t equipped to sharpen your tools yourself, take them to an appropriate expert to be sure they’re sharpened safely and correctly.
  • Check Tool Storage
    Now that you tools are ready for work, where will you keep them until spring arrives? Check hooks, stands, toolboxes and other gear where you keep your tools and be sure they are stored safely and securely while still being easy to find and reach whenever you need them.

Now, you – and your tools – are ready for spring. 

ToolsReadyforSpring_1ToolsReadyforSpring_2

ToolsReadyforSpring_3

ToolsReadyforSpring_4