Author Archives: Chestnut Hill Nursery

Winter Gardener’s Calendar

A perfect time to plan! Curl up with your gardening books and the gardening magazines and catalogs you’ve received in the mail. Get out the gardening journal and start dreaming…

General Landscape

  • Clean up when you get a break in the weather. Remove fallen branches and downed evergreen clumps. Rake leaves to prevent stains on concrete and dead patches on lawn. If freezing weather is still in the forecast, leave the mulch in place.
  • If your Christmas tree is still around, set it where the dropping needles will provide mulch, use the branches as additional insulation for perennials, or get together with neighbors to rent a chipper and create wood chips for larger mulch.

Houseplants

  • Perk up tired houseplants by removing dead and dying leaves. Wash under a soft shower in the sink or tub.
  • Spider mites love living in warm dry winter homes. Check for mites by looking for tiny speckles on leaves.
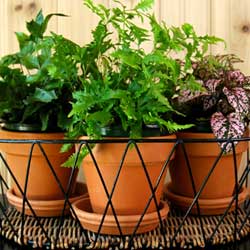
  • Transplant if roots are growing through the drainage holes or over the pot edge. Pick up some new larger trend-setting colored pots to perk up your décor. Or, if you don’t want to move into a larger pot, untangle the roots and cut back by 1/3, scour the pots and replant with new soil.
  • Remember to turn your plants each week as they begin to grow towards the weaker window light.
  • Plant a terrarium or miniature garden. If you can’t play in the dirt outside, bring the fun indoors!
  • Pick up Valentine flowers. We have a fragrant and beautiful assortment of red, pink or white flowers. Come in and choose from cyclamen, miniature roses, orchids, and other colorful flowers that are the perfect “I love you!”
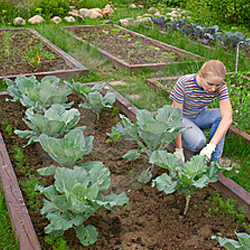
Vegetables:

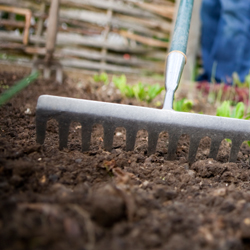
  • Plant short-term cover crop such as Fava beans when soil becomes workable.
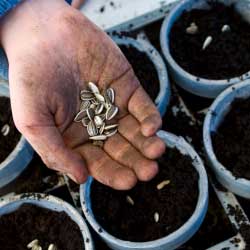
  • February: Start vegetable and herb seeds indoors:
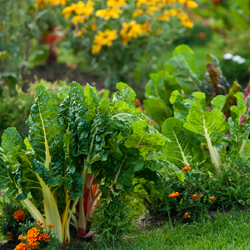
Broccoli
Cabbage
Celery
Chard
Eggplant
Kale
Kohlrabi
Leeks
Lettuce
Onions, bulb
Peppers
Radicchio
Scallion
Spinach
Tomatoes
Turnip

General:

If you just need a breath of aromatic fresh garden air, stop by and smell ours! The humidity is perfect and will instantly transport you to spring. While here, check out the latest trends in gardening colors, containers, new plant varieties and tools. Of course, we also have a wide selection of books to provide ideas. If you have any questions or need suggestions, we’re here to help. We’d love to see you!

Edging and Trimming

Edging and trimming the lawn is like having a manicure after cutting your fingernails. It smooths out any roughness and adds an elegant finishing touch to your landscape, and everything is just more perfect! But which lawn care activity is which, and how do you do them properly to give your lawn that manicured look?

Edging or Trimming – Which is Which?

Before you pull out the lawn tools, it’s important to know which activity you need to do to create the look you want.

  • Edging
    When you are edging, you define the line between a hard surface (sidewalks, driveways and curbing) and a growing area such as a flower bed, garden or lawn. To achieve this, a vertical cut is made between the two using a spade or edging tool. Some have mastered the art of using the string trimmer to do this. This creates a crease-like separation between the organic (growing) and inorganic (non-growing) surfaces. Properly done, edging will help minimize weed growth in these cracks and crevices and gives the landscaping a smooth, formal appearance.
  • Trimming
    Trimming removes the grass, weeds and other plants from areas a lawnmower can’t reach. Long wisps of grass along the side of the house, fence or other structure aren’t very attractive, and trimming them away will give a finished, uniform look to the landscaping. Most people use a string-trimmer or bladed trimmer for this work, but hand shears also do the job. Trimming is also often done around trees or in tight corners where a lawnmower is less effective.

When to Do Edging and Trimming

How often should trimming and edging be done? This depends upon your own personality. Some people feel edging and trimming is a requirement of every mowing. Others do edging and trimming every third or fourth time they mow, or whenever it may look necessary to give the lawn and landscape a uniform look.

Edging and Trimming Tips

No matter how often you choose to do edging and trimming, it is important to do it effectively!

  • Use only the proper tools for these landscaping tasks. This will help prevent injuries or strain on your hands, wrists and elbows, and will get the job done more quickly and efficiently.
  • Check edgers and trimmers regularly to be sure they are sharp, well-oiled and in good functioning condition. Keep extra string for a trimmer on hand so you can quickly replace the spool when it runs out.
  • Always practice good safety measures when edging and trimming. Wear safety goggles if there is risk of flying debris (as there often is), and keep the tools away from children and pets.

For many people, edging and trimming is all part of good lawn maintenance. Once you know the differences between them and how to do them well, you’ll be amazed at the difference these tasks make to the beauty of your lawn.

A Feast for the Eyes

Traditionally, when planning a vegetable garden, the focus has been primarily on function with aesthetics as an afterthought – a productive harvest has usually been more important than any visual appeal. This year, why not try a new approach? Thoughtfully combine beauty and performance to create an edible garden that will explode with a variety of color and an abundance of produce. It can truly be a feast for the eyes as well as the table!

Planning a Beautiful Vegetable Garden

Color, texture and form are characteristics we keep in mind when combining plants in the flower garden. We plan flowerbeds so that plants enhance each other, repeating colors and shapes for continuity and flow. We add a variety of texture and form for diversity and interest. Vegetables, herbs and fruits can be just as vibrant, exciting, diverse and easy to combine as annual and perennial flowering plants are.

To begin, provide structure. Placing a picket fence around your garden offers instant structure and visually sets it apart from the rest of the landscape. If you plan on planting along the outside of the perimeter, you will create the allure of a garden within a garden, with a hint of secret places. Place a straight pathway through the center, starting at the entrance. Divide the larger garden into smaller square planting beds using pathways to separate the beds. This will enhance the structure of, and provide easy access to, the garden beds as well as lead your eye through the garden. If desired, you can also used raised beds for this formal structure.

Next, focus on plant selection. Begin with a plant plan or layout. Initially, base your selections on what is pleasing to your individual tastes. Consider unusual varieties of vegetables and herbs that come in unique colors. Repeat colors, both horizontally and vertically, to add depth and dimension to the garden. Don’t forget to add brightly flowering annuals such as zinnias and marigolds to mingle amongst the edibles. Another consideration is edible flowers like nasturtium and calendula. Contrast colors for a striking, eye-catching effect. Keep in mind, also, texture and form. Bold textures add drama and are often combined with fine-foliaged plants for a softening contrast. Short, stout plants anchor the garden bed while tall, willowy plants raise the eye and lead you farther down the garden path. Take all these characteristics into account when planning and place plants in geometric patterns to create a quilt-like garden tapestry.

Finally, your spring edible garden will emerge invoking a feeling of calm, displaying a variety of cool greens, purples and blues found in peas, lettuce, cabbage and broccoli. Shortly after, the summer edible garden will be completely transformed at harvest time with an explosion of vibrant shades of red, purple, orange and yellow. With so many stunning options to combine, you can truly create a feast for the eyes that will be beautiful in every season!

EdiblePlants-1024x457

Feast-2Feast-3

Feast-1

Nurturing Spring Bulbs

Spring bulbs faithfully reappear at the most advantageous time – after a long, cold winter, just when we’re longing for bright colors to relieve the monotony of winter snow and ice. Most spring bulbs are perennial and multiply in number every year, bringing more beauty to the flowerbeds each spring, but some problems can destroy a carefully planted bulb bed. Seemingly carefree, bulbs do require a bit of nurturing to ensure they perform their very best for years to come.

Tips for Bulb Care

  1. Good soil drainage is important to prevent bulbs from rotting so plan your site accordingly. Do not plant bulbs near areas where downspouts let out or large snow piles may build up and spring melt can drown bulbs.
  2. When planting bulbs in the fall, add a high phosphorus fertilizer to the planting hole for the development of strong roots. This will help the bulbs establish well so they can renew themselves each year.
  3. Bulb foliage will often break through the soil after a few warm winter days. This vegetation is hardy and its exposure to the cold will not damage your plants or prevent them from blooming. There is no need to cover, wrap or otherwise protect this initial foliage.
  4. Fertilize bulbs as plants are emerging from the ground. Do not fertilize once flowers appear. Use a 5-10-5 granular fertilizer to assist in foliage and flower development, ideally one that is formulated especially for bulbs.
  5. After blooming, cut back the flower stalk. This will force the plant to put its energy into the bulb for next year’s flowers and not into seed production that would dampen the strength of the bulb.
  6. Allow the leaves to die back naturally. The leaves are vital for producing food that is stored in the bulb for next year’s growth. Cut leaves, never pull, once they have turned yellow – pulling can damage the bulb. Do not tie leaves as this reduces the leaf surface required for adequate food production.
  7. When the foliage has completely died back the bulb is dormant, and this is the proper time to dig and separate bulbs if necessary. Flowering will often be reduced when bulb beds become over-crowded. If division is needed, bulbs should be dug and stored in a cool, dry, well-ventilated place and replanted in the fall.
  8. Fertilize bulbs again in the fall with a high-phosphorus, granular fertilizer.

With thoughtful care, you can easily help your bulbs reach their full potential and they will thrive for many years.

SONY DSCbulbs_5


Mowing. Do It Right

If you have a lawn then you need to mow. If you need to mow then you may as well do it right, or else you risk weak, thin turf that is more susceptible to weeds, insect infestations and diseases. Fortunately, it’s easy to mow your lawn the right way!

8 Simple Steps for a Well-Mowed Lawn

  1. Put Your Mower to Bed in Fall
    Service your lawn mower in the fall, after your last cut, so that you start the next mowing season right. For a gas mower, this means change the oil, drain the gas, replace the spark plug, change the air filter and lubricate the throttle cord. Maintenance is similar for electric and battery-powered mowers – be sure all the moving parts are properly lubricated, batteries are operating efficiently and cords are in good condition without snags, rips or bare wires. All types of mowers should have their blades sharpened in fall so they are ready for swift spring cuts.
  2. Know How High to Cut Your Spring Grass
    Before your first cut of the spring season, fill your tank with gas (or fully charge batteries) and adjust your wheel height. Cool-season grasses should generally be cut at a height of 3 to 3 ½ inches. Never remove more than 1/3 of the plant. This longer height will require that you mow more frequently but it will ensure a stronger root system, help maintain soil moisture and will greatly reduce weed competition.
  3. Only Mow When Dry
    Mowing a wet lawn is a sure way to spread disease and tear grass blades for a ragged look, plus wet clippings will clog blades and make mowers less efficient. The best time of day to mow is in the evening. Early in the morning, after the dew has dried is the second best time. Mowing in the heat of the day will cause your turf grass to go into shock.
  4. Clear the Lawn
    Before you start your mower, clear all objects from the lawn. This includes toys, lawn furniture, trash, fallen branches, stones and anything that would cause you to stop and restart the mower. Keep your eye out for anything that is a hazard, including items that may get jammed in the mower or thrown by the mower.
  5. Keep the Clippings
    Grass clippings are loaded with nitrogen, just what your lawn needs to stay healthy. Leaving the clippings on the lawn can reduce your fertilizer use by as much as 25 percent or more. Spread them out so that they don’t become anaerobic. Using a mulching mower will ensure the clippings are finely chopped and will decay more quickly, releasing their nutrition back into the lawn.
  6. Stay Sharp
    Always keep your mower blades sharp. You may need to resharpen your blades during the growing season. Unsharpened blades rip and tear at the grass. This creates an environment conducive to the spread of turf disease. Dull blades will also cut unevenly, creating a ragged look even on a newly mowed lawn.
  7. Change Directions
    Change directions each time you mow. Mowing causes the grass to lie over. Alternating your direction each time you mow will correct this problem and help strengthen your turf. You might even use multiple directions, including diagonal rows, and rotate through the pattern with each successive mowing.
  8. Clean Up Afterwards
    Dirt and debris are the main causes of lawn mower engine failure. Always take a few moments after mowing for some preventative maintenance. Grab an old rag and wipe down your mower including air vent grates, blades and wheels to be sure your mower is ready to go each time you need it.

With the proper care, preparation and techniques, you can mow your lawn the right way every time, and you’ll be amazed at the different proper mowing can make to the healthy and vigorousness of your turf.

mowing_2mowing_1

Endless Summer® Hydrangeas

Do you love the look of large, stunning hydrangeas? Do they evoke wistful images of summer and floral nostalgia? Don’t you wish they would last longer in the landscape? Unfortunately, many hydrangeas have relatively short bloom cycles, but there are amazing cultivars you can investigate that provide longer lasting blooms without losing any of their beauty or richness as the season progresses.

Endless Blooms, Color and Summer Luxury

Endless Summer® The Original and Endless Summer® and Blushing Bride® are the first mophead (large, ball-shaped flower) hydrangeas that bloom on both old and new growth, providing you with beautiful flowers and gorgeous color all season long. Young plants produce blooms that are 4-6 inches wide, while mature plants can have blooms as large as 8-10 inches wide, making these massive hydrangeas real show stoppers in your landscape or garden. Flower color for Endless Summer® The Original ranges from shades of blue through shades of pink, depending upon the pH level of your soil. Pink blossoms are the result of alkaline soils (pH 6-7), while more acidic soils (pH 5-5.8) will cause the plant to produce blue flowers. Adding Master Nursery Hydra Blue or other acidifying agents to the soil can help produce the lovely blue colors if your soil is initially alkaline, or you can adjust bloom color throughout the season for a vibrantly changing show. Endless Summer® Blushing Bride, as its name implies, initially offers pure white blossoms that mature to a sweet, pink blush or pale blue tinge, again depending on the soil pH.

Large, deep green leaves provide a lovely background for these spectacular flowers, which are excellent for cutting for fresh arrangements and for drying. Endless Summer® hydrangeas mature at 3-5 feet in height and width and are perfect used as standalone specimens, planted in borders or as hedges, massed under deep-rooted trees or even set in large containers. These plants perform best in partial shade with moist soil. Another big plus for Endless Summer® hydrangeas is the fact that they are cold hardy to Zone 4, giving northern gardeners a beautiful plant that will bloom well year after year.

Perfect for Mother’s Day, Father’s Day, weddings and house warming celebrations, potted Endless Summer® hydrangeas make beautiful gifts that will provide years of beauty and enjoyment. If you already have these stunning blooms in your yard, consider cutting a few for a bouquet and share the joy with friends, neighbors, family members, coworkers and acquaintances, and the interest in these amazing hydrangeas will continue to spread until the world is blooming all summer long.

endless-summer-hydrangeas-2

endless-summer-hydrangeas-3

endless-summer-hydrangeas-1

Pruning Evergreens

When choosing an evergreen for your landscape project, it is always best to select a plant that will not outgrow its designated space, crowding out nearby plants or distorting its own shape without enough room to shine. Proper research can help you choose – you should know the ultimate height, width and growth rate of your selection before committing to what may be one of the more costly additions to your landscape. Always choose naturally slow-growing or dwarf conifers for small spaces, bearing in mind how nearby plants and structures may limit available space over time. Fortunately, just about every genus of evergreen is available in a dwarf variety.

That being said, what if the mistake has already been made? We’ve all made it! It is easy to fall in love with a sweet little plant in the garden center that, within a few years in the ground, looks like it could swallow your house. Fear not, there are ways to rectify the situation with proper pruning.

You will need the right tools to accomplish the job:

  • Loppers
  • Bypass pruners
  • Safety goggles
  • Leather gloves

Pruning should begin in the early spring before the plant’s soft new growth hardens off. Take a close look at your evergreen to determine its branching habit. Pine, spruce and fir trees all have layers of branches that are whorled around the trunk. Arborvitae, juniper, yew and false cypress have limbs that are produced randomly along the trunk.

Conifers with a random branching habit are able to grow new limbs from old, foliage-bearing wood. You may prune this type of evergreen back to this older wood to encourage a more compactly branched habit and keep size down, or to create the desired shape. Whorled branching evergreens are pruned differently, however. They have new growth called “candles” at the tip of their branches, and they really do look like candles with lighter coloration. To promote a more densely branched, compact habit, pinch the candles back by up to half their length before the needles harden off. Never cut into the older wood below the candle, as this type of evergreen does not have dormant buds on the stem that will become new growth. Pruning into old wood will leave a hole in your plant and distort its overall appearance.

As always, we are eager to assist you with selecting the proper plant for any landscape project you undertake and to advise you on proper pruning to keep it healthy and beautiful for many years.

prune2Pine with Cones natural backgroundprune1

Plants for Wet Soil

More water is always good for plants, right? Wrong! When water stands in the soil, air is displaced, which in turn smothers the plant roots. Once the roots are damaged many symptoms appear on leaves and shoots including wilting, marginal and inter-veinal browning of leaves (scorch), poor color and stunted growth. But the excess water isn’t always coming from overwatering, it may be the result of poor draining soil.

Poor drainage is often produced in disturbed sites when heavy clay soil is compacted by construction machinery or other excessive use, such as yards where several children are often playing. Areas cultivated for plantings, such as flowerbed or borders, then collect water running off the compacted ground – this is called the teacup effect. Wet areas may also be the result of swales, drain spout runoff and low areas even when soil percolation is adequate in most of the site but when general moisture levels are routinely high.

To check for a potential drainage problem, dig a hole at least 2 feet deep, fill it with water and note how long the water remains. If it doesn’t drain completely away within 24 hours a severe drainage problem exists.

Fortunately, you can correct drainage problems in different ways. Easy options include…

  • Divert water past plantings using drainage pipes, splash blocks or rain chains.
  • Plant in mounds or raised beds so water will run off and away from the plants.
  • Install drain tiles in saturated areas or use French drains to contain excess water.
  • Amend the soil with organic matter such as compost to improve its structure.

An even easier solution is to simply select plants that tolerate wet sites. The following trees and shrubs tolerate wet sites and flooding better than most. Few tolerate standing water for long periods (those that grow in truly swampy conditions are marked *), but all will do better in wet areas.

Shade Trees

  • *Acer rubrum/Red Maple
  • *Betula nigra/River Birch
  • Liquidambar styraciflua/Sweet Gum
  • Alyssa sylvatica/Sour Gum
  • Platanus occidentalis/Sycamore
  • Quercus phellos/Willow Oak
  • *Salix spp./Willow
  • *Taxodium distichum/Bald Cypress

Flowering Trees

  • Amelanchier Canadensis/Serviceberry
  • Magnolia virginiana/Sweetbay Magnolia

Evergreen Trees

  • Calocedrus decurrens/Incense Cedar
  • Ilex opaca/American Holly
  • Thuja occidentalis/Pyramidal Arborvitae

Deciduous Shrubs

  • *Aronia arbutifolia/Chokeberry
  • Clethra alnifolia/Summersweet
  • *Cornus spp./Twig Dogwoods
  • Enkianthus campanulatus/Enkianthus
  • Ilex verticillata/Winterberry
  • *ltea virginica/Virginia Sweetspire
  • Lindera benzoin/Spicebush
  • Myrica pennsylvanica/Bayberry
  • *Rhododendron viscosum/Swamp Azalea
  • *Salix spp./Pussy Willow
  • Viburnum spp./Viburnums

Evergreen Shrubs

  • *Andromeda polifolia/Bog Rosemary
  • *Chamaecyparis thyoides/White Atlantic Cedar
  • *llex glabra/Inkberry
  • Kalmia atifolia/Mountain Laurel
  • Leucothoe spp./Leucothoe

Perennials

  • *Arundo donax/Giant Reed Grass
  • Aster nova-angliae/Asters
  • Astilbe spp./Astilbe
  • Chelone/Turtlehead
  • Cimicifuga racemose/Snakeroot
  • Helenium autumnale/Helen’s Flower
  • Hibiscus moscheutos/Hardy Hisbiscus
  • *Iris kaempferi/Japanese Iris
  • Iris siberica/Siberian Iris
  • *Lobelia cardinalis/Cardinal Flower
  • Lobelia syphilitca/Blue Lobelia
  • Monarda didyma/Bee Balm
  • Myosotis scorpiodes/Forget-me-nots
  • Tiarella cordifolia/Foam Flower
  • Trollius europaeus/Globe Flowers
  • Viola spp./Violets

Ground Covers

  • Gallium odoratum/Sweet Woodruff
  • Gaultheria procumbers/Wintergreen
  • Hosta spp./Hosta
  • Mentha spp./Mint
  • Parthenocissus quinquifolia/Virginia Creeper

Annuals

  • Cleome hosslerana/Spider Flower
  • Myosotis sylvatica/Forget-me-nots
  • Torenia fournien/Wishbone Flower
  • Viola wittrockiana/Pansies

Not sure which water-loving plants to choose? We’d be happy to help you evaluate your landscape moisture and other conditions to help you choose the very best plants for your yard!

Two feet wearing rain boots standing in the mud

Cold-Tolerant Flowering Plants

Cold doesn’t have to kill your dreams for beautiful flowerbeds overflowing with vibrant color and stupendous blooms. While the deepest freezes of winter will put a stop to any flowering plant, there are beautiful plants that can chill out without damage or difficulty. The trick is recognizing which of these cold-tolerant flowering plants will work best in your climate and garden, and we’re here to help with that.

Freeze Tolerant Annuals

These are annuals that can withstand freezing temperatures and hard frosts for short periods with little or no injury. The best options include…

  • Marguerite Daisy (Argyranthemum frutescens)
  • Swan River Daisy (Brachycomb iberidifolia)
  • Million Bells (Calibrachoa x hybrida)
  • Dracaena Spike (Cordyline australis)
  • Dusty Miller (Scenecio cineraria)
  • Gazania (Gazania rigens)
  • Nemesia (Nemesia fruticans)
  • Cape Daisy (Osteospermum spp.)
  • Petunia (Petunia x hybrida)
  • Sweet Pea (Lathyrus odoratus)
  • Verbena (Verbena x hybrida)

Semi-Hardy Annuals

These are annuals that are perennials in warmer zones and can actually overwinter in cooler areas during mild winters of if they are located in a warm, sunny, protected spot. These are very frost and freeze tolerant annuals…

  • Annual Carnation (Dianthus caryophyllus)
  • Annual Pinks (Dianthus chinensis)
  • Pansy (Viola x wittrockiana)
  • Purple Fountain Grass (Pennisetum setaceum ‘Rubrum’)
  • Mealycup Sage (Salvia farinacea)
  • Variegated Vinca Vine (Vinca major ‘Variegata’)

Perennials

Perennials are plants with roots that survive through the winter months, sending out new growth each spring. Appearing in your garden year after year, they become old and treasured friends. Perennials come in many sizes, shapes and colors with various bloom times and periods. It is best to plan your garden by the bloom time of the plant along with its cultural needs (sun/shade and drought-tolerant/water-lovers, etc.) to be sure you have a good, healthy balance of plants that will keep your garden and landscaping lush for months. Because these plants have evolved to survive the winter’s cold, they are all cold-tolerant to at least some measure. Popular favorites include…

  • Dicentra ‘Luxuriant’ – No garden is complete without a patch of Bleeding Hearts. This fringed variety is longer blooming than the old-fashioned selections. Rose-pink flowers are borne gracefully above soft green foliage with a slight blue cast that looks fresh all summer. 18-24” tall. Plant in part shade.
  • Bergenia – Spikes of delicate pink blooms soften the bold evergreen foliage of this early blooming perennial in March or April.
  • Armeria (Sea Pink) – Another evergreen perennial, this bloomer sends out masses of papery pink or white flowers above grass-like clumps of foliage.
  • Basket of Gold (Aurinia) – Charming yellow flowers float above dense mats of attractive gray foliage on this old-fashioned favorite. Plant in full sun. Excellent for a rock garden.
  • Candytuft (Iberis) – Flat-topped clusters of white flowers cover this evergreen perennial in early spring. Excellent as an edging in a border or to use in a rock garden.
  • Columbine (Aquilegia) – Beloved by hummingbirds and butterflies, columbine is also a great cut flower. Available in many color shades and bi-color combinations, columbine is perfect in any border or landscape situation.
  • Coralbell (Heuchera) – Tiny bell flowers on 1-2’ slender stems bloom from spring into summer. Shades of foliage vary from green to pink to deep burgundy. Plant in sun or shade.

Not sure which plants are best for the cold in your yard? Stop in and see our landscaping experts today for help choosing just which blooms will heat up even on cold days!

cold_tolerant-3

cold_tolerant

cold_tolerant_1

cold_tolerant-2

Soil 101

How well do you understand your soil? It’s more than just dirt, and the more you learn about soil, the better you’ll be able to care for it to ensure a stunning landscape, healthy lawn and productive garden.

All About Soil

The four elements of soil are minerals, water, air and organic matter. Different combinations of the four elements create the four main categories of soil: sand, silt, clay and loam. Of course, we all want loam – that rich, vibrant soil thriving with beneficial bacteria and with a smooth but crumbly texture ideal for root growth. Unfortunately, true loam soils are rare, especially around homes where topsoil was removed and heavy machines compacted the remaining soil during construction or renovation. Most of us have clay soil, which has finer particles that compact easily into a dense mass. Clay soils also retain more water and can easily become too soggy or waterlogged for healthy plants. But just because your soil may be clay, it doesn’t have to stay that way!

Improving Soil

Improving soil is actually quite easy. All soils are improved by adding minerals and organic material that help balance out the overall components of the soil’s structure.

Before adding minerals, test the soil to determine its pH (acidity or alkalinity) and determine any mineral deficiencies. Lime decreases soil acidity, gypsum adds calcium and helps break up heavy clay and sulfur increases acidity. Other soil amendments to add to a clay soil include sand, cottonseed meal and peat moss, all of which will help improve the drainage and structure.

Organic matter refers to plant or animal materials decomposed into compost or “humus.” This residue comes from leaves and other plant materials, as well as certain animal wastes. Grass clippings, paper and certain types of decomposing food can also be ideal compost. The quality depends on the origin of the original biodegradable matter. Many people make their own compost using bins in which materials are mixed until they decompose. Others purchase finished compost. When compost is added to soil, it releases nutrients that are vital for healthy plants, and healthy bacteria and microbes will thrive in organically-rich soil.

The Magic of Mulch

Mulching is a simple way to add biodegradable materials to the soil. Evergreen needles, tree leaves, lawn clippings, chicken manure, etc., can be worked into the soil to decompose. This process improves the air spaces between the soil particles and rearranges the sand, silt and clay to produce optimum soil structure, improving the water retention and drainage balance and making nutrients available to plants.

When soil has proper structure and sufficient nutrients for healthy plants, optimum health has been achieved, and great soil will lead to great landscaping, turf and gardens. Congratulations and keep on growing!

soil_2

soil_4

soil_1

soil_3