Monthly Archives: March 2018

Pruning Evergreens

When choosing an evergreen for your landscape project, it is always best to select a plant that will not outgrow its designated space, crowding out nearby plants or distorting its own shape without enough room to shine. Proper research can help you choose – you should know the ultimate height, width and growth rate of your selection before committing to what may be one of the more costly additions to your landscape. Always choose naturally slow-growing or dwarf conifers for small spaces, bearing in mind how nearby plants and structures may limit available space over time. Fortunately, just about every genus of evergreen is available in a dwarf variety.

That being said, what if the mistake has already been made? We’ve all made it! It is easy to fall in love with a sweet little plant in the garden center that, within a few years in the ground, looks like it could swallow your house. Fear not, there are ways to rectify the situation with proper pruning.

You will need the right tools to accomplish the job:

  • Loppers
  • Bypass pruners
  • Safety goggles
  • Leather gloves

Pruning should begin in the early spring before the plant’s soft new growth hardens off. Take a close look at your evergreen to determine its branching habit. Pine, spruce and fir trees all have layers of branches that are whorled around the trunk. Arborvitae, juniper, yew and false cypress have limbs that are produced randomly along the trunk.

Conifers with a random branching habit are able to grow new limbs from old, foliage-bearing wood. You may prune this type of evergreen back to this older wood to encourage a more compactly branched habit and keep size down, or to create the desired shape. Whorled branching evergreens are pruned differently, however. They have new growth called “candles” at the tip of their branches, and they really do look like candles with lighter coloration. To promote a more densely branched, compact habit, pinch the candles back by up to half their length before the needles harden off. Never cut into the older wood below the candle, as this type of evergreen does not have dormant buds on the stem that will become new growth. Pruning into old wood will leave a hole in your plant and distort its overall appearance.

As always, we are eager to assist you with selecting the proper plant for any landscape project you undertake and to advise you on proper pruning to keep it healthy and beautiful for many years.

prune2Pine with Cones natural backgroundprune1

Endless Summer® Hydrangeas

Do you love the look of large, stunning hydrangeas? Do they evoke wistful images of summer and floral nostalgia? Don’t you wish they would last longer in the landscape? Unfortunately, many hydrangeas have relatively short bloom cycles, but there are amazing cultivars you can investigate that provide longer lasting blooms without losing any of their beauty or richness as the season progresses.

Endless Blooms, Color and Summer Luxury

Endless Summer® The Original and Endless Summer® and Blushing Bride® are the first mophead (large, ball-shaped flower) hydrangeas that bloom on both old and new growth, providing you with beautiful flowers and gorgeous color all season long. Young plants produce blooms that are 4-6 inches wide, while mature plants can have blooms as large as 8-10 inches wide, making these massive hydrangeas real show stoppers in your landscape or garden. Flower color for Endless Summer® The Original ranges from shades of blue through shades of pink, depending upon the pH level of your soil. Pink blossoms are the result of alkaline soils (pH 6-7), while more acidic soils (pH 5-5.8) will cause the plant to produce blue flowers. Adding Master Nursery Hydra Blue or other acidifying agents to the soil can help produce the lovely blue colors if your soil is initially alkaline, or you can adjust bloom color throughout the season for a vibrantly changing show. Endless Summer® Blushing Bride, as its name implies, initially offers pure white blossoms that mature to a sweet, pink blush or pale blue tinge, again depending on the soil pH.

Large, deep green leaves provide a lovely background for these spectacular flowers, which are excellent for cutting for fresh arrangements and for drying. Endless Summer® hydrangeas mature at 3-5 feet in height and width and are perfect used as standalone specimens, planted in borders or as hedges, massed under deep-rooted trees or even set in large containers. These plants perform best in partial shade with moist soil. Another big plus for Endless Summer® hydrangeas is the fact that they are cold hardy to Zone 4, giving northern gardeners a beautiful plant that will bloom well year after year.

Perfect for Mother’s Day, Father’s Day, weddings and house warming celebrations, potted Endless Summer® hydrangeas make beautiful gifts that will provide years of beauty and enjoyment. If you already have these stunning blooms in your yard, consider cutting a few for a bouquet and share the joy with friends, neighbors, family members, coworkers and acquaintances, and the interest in these amazing hydrangeas will continue to spread until the world is blooming all summer long.

endless-summer-hydrangeas-2

endless-summer-hydrangeas-3

endless-summer-hydrangeas-1

Acid-Loving Plants

Soil pH is a critical factor for gardening success. Some plants thrive in neutral soil while other plants prefer soil on the acidic side. The difference lies in the plant’s ability to use nutrients present in the soil. For plants that prefer an acidic soil a critical nutrient is iron. Iron is most easily available in soil with a pH of around 5.5. Without iron, acid-loving plants will turn yellow and suffer stunted growth.

What is pH?

pH stands for “potential hydrogen ions” and is the measure of acidity or alkalinity. The pH scale ranges from 0 to 14. pH less than 7 indicates acidity, pH greater than 7 indicates alkalinity and 7 is neutral. Soil pH directly affects nutrient availability. Plants grown in soil with pH above or below their optimum range will be less vigorous, more susceptible to disease, less able to fight off insects and may even be weakened to the point of death.

How pH Affects Plants

Nutrients necessary for healthy plants are divided into three categories: primary nutrients, secondary nutrients and micronutrients. Primary nutrients are (N) nitrogen, (P) phosphorus and (K) potassium. These nutrients requited in the largest amounts for plant growth and health and are represented in numbers found on every fertilizer container (for example, 20-20-20). (Ca) Calcium, (Mg) magnesium and (S) sulfur are secondary nutrients that are also required by plants. These are required in lesser amounts than N-P-K but are also essential for good plant growth. (Zn) zinc and (Mn) manganese are examples of micronutrients. Micronutrients are required by plants in very small amounts. Most secondary and micronutrient deficiencies are easily corrected by keeping the soil at the optimum pH value.

Because pH directly affects nutrient availability, acid-loving plants develop iron chlorosis when grown in soils that are too alkaline. Iron chlorosis is often misdiagnosed as a nitrogen deficiency because both present with a yellowing leaf. Chlorosis of young leaves is the first symptom of iron deficiency, while a magnesium deficiency results in yellowing of older leaves first. Nitrogen-deficient plants will not only have yellow leaves but also weak stems, underdeveloped leaves and reduced root development.

What Causes Soil Acidity

Soil pH is influenced by the kind of parent material from which the soil was formed. Rainfall also affects pH. As water passes through soil it leaches basic nutrients such as calcium and magnesium from the soil, which are replaced with acidic elements such as aluminum and iron. For this reason, soils formed under high rainfall conditions are more acidic than those formed under dry conditions. Caused by pollution, acid rain also has an influence in soil pH. The application of fertilizers containing ammonium or urea speed up the rate at which acidity develops in the soil. The decomposition of organic matter will also add to soil acidity.

Testing and Adjusting Soil pH

Before planting any plant it is best to know the optimum pH range that plant will thrive in and the pH of the soil in which you will be planting. “The right plant in the right place” is always the best policy. Purchase a pH test kit or meter. These are available at most garden centers, or you may also send a soil sample to your county extension service. This will give you a more in-depth soil analysis along with the pH. To correct soil pH it is imperative that you know the soil pH before you attempt to change it.

Adding shredded pine needles, composted oak leaves or peat moss will assist in lowering soil pH over time. A quicker fix is the addition of two materials commonly used for this purpose: aluminum sulfate or garden sulfur. Aluminum sulfate will change the soil pH instantly because the aluminum produces the acidity as soon as it dissolves in the soil. Garden sulfur requires some time for the conversion to sulfuric acid with the aid of soil bacteria. The conversion rate is based on the fineness of the sulfur, the amount of soil moisture, soil temperature and the presence of bacteria. Based on these factors, the conversion rate of sulfur may be very slow and could take several months for a full effect. Acidifiers should be worked into the soil after application to be effective. Do not apply to leaf surface or burn may result. Read and abide by manufacturer instructions when applying.

Keep in mind that it takes time to alter soil pH and your soil will tend to revert to its old pH over time, necessitating repeated treatment. Attempting to change soil pH too quickly may shock and kill a plant. A good rule of thumb is to adjust no more than one point per season. It is also important to note that fertilizers recommended for acid-loving plants do not assist in adjusting the soil pH, but are instead formulated to work well in already acidic soil.

Acid-Loving Trees and Shrubs

Want to add gorgeous plants to your landscape without worrying about acidic soil? These plants thrive in soils with low pH, or come in for an expert consultation on your soil’s pH and what plants will do best in your garden, flowerbeds and landscape.

  • Azalea
  • Bayberry
  • Blueberry
  • Camelia
  • Cranberry
  • Dogwood
  • Fir
  • Fothergilla
  • Gardenia
  • Heath
  • Heather
  • Hemlock
  • Holly
  • Hydrangea
  • Itea
  • Leucothoe
  • Magnolia
  • Mountain Ash
  • Mountain Laurel
  • Oak
  • Pieris
  • Pine
  • Raspberry
  • Rhododendron
  • Spruce
  • White Cedar
acidlovingplant3

acidlovingplant

acidlovingplant2

Mowing. Do It Right

If you have a lawn then you need to mow. If you need to mow then you may as well do it right, or else you risk weak, thin turf that is more susceptible to weeds, insect infestations and diseases. Fortunately, it’s easy to mow your lawn the right way!

8 Simple Steps for a Well-Mowed Lawn

  1. Put Your Mower to Bed in Fall
    Service your lawn mower in the fall, after your last cut, so that you start the next mowing season right. For a gas mower, this means change the oil, drain the gas, replace the spark plug, change the air filter and lubricate the throttle cord. Maintenance is similar for electric and battery-powered mowers – be sure all the moving parts are properly lubricated, batteries are operating efficiently and cords are in good condition without snags, rips or bare wires. All types of mowers should have their blades sharpened in fall so they are ready for swift spring cuts.
  2. Know How High to Cut Your Spring Grass
    Before your first cut of the spring season, fill your tank with gas (or fully charge batteries) and adjust your wheel height. Cool-season grasses should generally be cut at a height of 3 to 3 ½ inches. Never remove more than 1/3 of the plant. This longer height will require that you mow more frequently but it will ensure a stronger root system, help maintain soil moisture and will greatly reduce weed competition.
  3. Only Mow When Dry
    Mowing a wet lawn is a sure way to spread disease and tear grass blades for a ragged look, plus wet clippings will clog blades and make mowers less efficient. The best time of day to mow is in the evening. Early in the morning, after the dew has dried is the second best time. Mowing in the heat of the day will cause your turf grass to go into shock.
  4. Clear the Lawn
    Before you start your mower, clear all objects from the lawn. This includes toys, lawn furniture, trash, fallen branches, stones and anything that would cause you to stop and restart the mower. Keep your eye out for anything that is a hazard, including items that may get jammed in the mower or thrown by the mower.
  5. Keep the Clippings
    Grass clippings are loaded with nitrogen, just what your lawn needs to stay healthy. Leaving the clippings on the lawn can reduce your fertilizer use by as much as 25 percent or more. Spread them out so that they don’t become anaerobic. Using a mulching mower will ensure the clippings are finely chopped and will decay more quickly, releasing their nutrition back into the lawn.
  6. Stay Sharp
    Always keep your mower blades sharp. You may need to resharpen your blades during the growing season. Unsharpened blades rip and tear at the grass. This creates an environment conducive to the spread of turf disease. Dull blades will also cut unevenly, creating a ragged look even on a newly mowed lawn.
  7. Change Directions
    Change directions each time you mow. Mowing causes the grass to lie over. Alternating your direction each time you mow will correct this problem and help strengthen your turf. You might even use multiple directions, including diagonal rows, and rotate through the pattern with each successive mowing.
  8. Clean Up Afterwards
    Dirt and debris are the main causes of lawn mower engine failure. Always take a few moments after mowing for some preventative maintenance. Grab an old rag and wipe down your mower including air vent grates, blades and wheels to be sure your mower is ready to go each time you need it.

With the proper care, preparation and techniques, you can mow your lawn the right way every time, and you’ll be amazed at the different proper mowing can make to the healthy and vigorousness of your turf.

mowing_2mowing_1

Protecting Our Pollinators

Every garden requires pollinators, and bees are among the finest. Without them there would be limited flowers and far fewer fruits and vegetables. Did you know that about 30 percent of the food we eat depends on the pollination of bees, including onions, cashews, coffee, carrots, chocolate and vanilla? If we don’t protect these prolific pollinators, our landscapes, gardens and diets will be irrevocably changed.

About Bees

Although there are many bees that are great pollinators, like carpenter, mining, sweat and cellophane bees, some of the most well known and easily identified bees are the honeybee and bumblebee. Both of these bees live in social colonies and are cavity nesters. Because these bees are active all summer long, they require a constant supply of floral nectar close to their hive and they thrive in flower gardens, orchards and other areas with abundant blooms.

Unfortunately, both these types of bees – along with many others – are disappearing rapidly, and two key threats are to blame.

  • Habitat Loss: As more natural habitat is lost to development, there are fewer nesting locations and inadequate food supplies for bees. While meadows developed into resorts and parks disappearing for strip malls are obvious examples of development, other less visible developments that can hurt bees include widespread use of flower cultivars that do not produce adequate nectar, eliminating critical bee food sources.
  • Pesticide Drift: Widespread, abundant spraying of pesticides to protect crops, lawns and parks can inadvertently hurt bees. Stronger pesticides can kill bees directly, while less potent toxins can contaminate nectar and will gradually build up to fatal levels in bees’ systems. Even if pesticides are not sprayed in areas where bees are abundant, high level spraying can easily be spread by wind patterns into critical bee habitats.

Inviting Bees to Your Garden

Fortunately, it is easy to bring more bees to your garden and encourage healthy bee populations. To support local bees…

  • Planting a variety of flowers that will bloom throughout the entire summer to provide ongoing food supplies.
  • Opt for native flower varieties that will be more easily recognized and used by bees, instead of introduced flowers that are less familiar.
  • Eliminate chemical use in your yard, as much as possible, including on your lawn, garden and trees, especially while plants are in flower.
  • Provide bees a safe place for shelter and to lay their eggs. A wood pile is suitable, or you can invest in a specialized bee house.
  • Make sure that there is an available water source for your bees. A bird bath or any simple water basin works just fine.

Want to bring bees to your yard and help them feel at home? Start with this list of native plants bees love, and ask our experts for more tips about keeping your lawn and garden bee-friendly!

Native Plants That Attract Bees

  • Apple (Malus)
  • Aster (Aster)
  • Blackberry & Raspberry (Rubis)
  • Black-Eyed Susan (Rudbeckia)
  • Blueberries (Vaccinium)
  • Currant (Ribes)
  • Elder (Sambucus)
  • Goldenrod (Solidago)
  • Highbush Cranberry (Viburnum)
  • Joe-Pye Weed (Eupatorium)
  • Lupine (Lupinus)
  • Penstemon (Penstemon)
  • Purple Coneflower (Echinacea)
  • Redbud (Cercis)
  • Rhododendron (Rhododendron)
  • Sage (Salvia)
  • Stonecrop (Sedum)
  • Sunflower (Helianthus)
  • Willow (Salix)

bee_2bee_3

bee_1

How To Succeed At Seed-Starting

It’s easy to buy seedlings, but there are many reasons why you may wish to start your own plants. By starting your own seeds, you have a much greater selection of flowers, vegetables and herbs to choose from. For example, old favorites like hollyhocks and less common varieties of herbs and perennials as well as heirloom vegetables might not be available as plants, or stocks may be limited. Plants with fine seeds should also be started indoors because they can easily wash away in the rain and they may have a difficult time competing with weeds. Starting your own seeds can also help you extend the growing season so you can enjoy a longer, more productive harvest. So why not get started today?

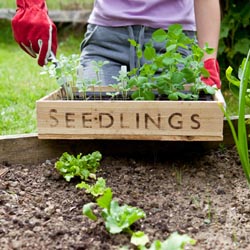
Containers for Starting Seeds

Traditionally, seeds are started in flats or peat pots. There are various sizes of plastic trays, cedar flats, peat pots and the popular Jiffy-7, a flat, peat-moss wafer, available. When moistened, the Jiffy-7 expands to form a small, self-contained pot of soil into which a seed is sown directly. This is an excellent choice when sowing seed of plants that do not like their roots disturbed during transplanting. You might also use eggshells or folded newspaper pots to start your seeds.

Seed-Friendly Soil

It is best to use a light, soilless mix when starting seeds. These mixes are sterile, meaning young seeds do not have any weed seeds to compete with, and there are no harmful bacteria, insects or other pests in the soil right away. Good seed mixes also contain adequate nutrients to carry seedlings through until transplanting. Do not use garden soil, as seeds will not germinate well in the heavy soil, and a fungus disease called damping off is common.

Temperatures for Seeds

Most seeds require warm soil in order to germinate. You will need to heat the soil of the seedling flats with a heat mat, heat tray or heating cable. Seed trays can also be placed on top the refrigerator or hot water heater. Do not put seed-starting trays on a windowsill; nighttime temperatures are too cool to allow for good germination. Seeds need consistent warm temperatures of 75 degrees or warmer for optimum germination.

Seed Watering Needs

Seeds need to be kept constantly moist in order to germinate. Moisten the soil thoroughly before planting. Water when the surface is dry with a misting nozzle or plastic spray bottle until the soil is saturated. The medium should be constantly moist, but not soggy. It is important not to overwater, which could drown the seeds and tender seedlings, but also not to permit the flat to dry out.
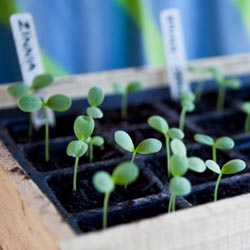
Sowing Seeds

Seeds should be sown 2-10 weeks before the last spring frost date. Your seed packet will provide this information as sowing dates can vary for different plant varieties or even cultivars of the same plants. Fill your containers almost to the top with moist growing mix. Tamp it down gently and smooth it out. Gently press the seeds into the mix or simply set them on the surface of the soil and place milled sphagnum moss over the top to prevent damping off. Cover the container loosely with plastic wrap or a clear dome, which will help preserve moisture and warmth. Be sure to label your containers with plastic or wood plant stakes and write the plant name and the date sowed. Set trays in a warm spot and check daily to keep evenly moist.
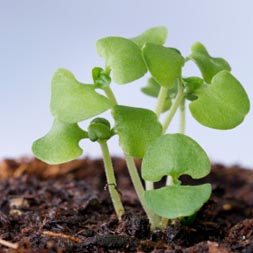
Seedling Care

Once seedlings have grown a half-inch or so, you should water less frequently. Let the soil dry slightly between watering, which will help the seedlings stretch and develop a strong root system. Seedlings will also need light and the best method is to use the traditional fluorescent fixtures or the new energy-saving LEDs. Suspend lights just an inch or two away from the plants. Lights must be on at least 14-16 hours a day. As your seedlings grow, raise the lights accordingly so they do not bump into the lighting fixture. If your seedlings do not get enough light, they will become weak and spindly. Fertilize seedlings weekly with half-strength, balanced, organic fertilizer. A fish and seaweed blend works well. Thin seedlings if they become overcrowded, choosing the healthiest, strongest seedlings to save.

Hardening Off and Planting Out

When the weather is warm, move your seed trays outside gradually over a 5-7 day period. Start by putting them out just for a few hours during the late morning to mid-afternoon, and then gradually increase until they are left out all day and night. Keep them in a lightly shaded, protected spot during the day to prevent sunburn. After a week or two of this transition, gently transplant seedlings into the garden. Try not to handle the root ball too much, as they are quite fragile. Water thoroughly after transplanting and again every day for about a week. Newly set out plants will look sparse at first, but they will grow and fill in quickly, leading to bumper crops and a lush, delicious harvest!

Gardener With Seedling Tray

Seedling Box Tray in Greenhouse

seed_starting_3

A Feast for the Eyes

Traditionally, when planning a vegetable garden, the focus has been primarily on function with aesthetics as an afterthought – a productive harvest has usually been more important than any visual appeal. This year, why not try a new approach? Thoughtfully combine beauty and performance to create an edible garden that will explode with a variety of color and an abundance of produce. It can truly be a feast for the eyes as well as the table!

Planning a Beautiful Vegetable Garden

Color, texture and form are characteristics we keep in mind when combining plants in the flower garden. We plan flowerbeds so that plants enhance each other, repeating colors and shapes for continuity and flow. We add a variety of texture and form for diversity and interest. Vegetables, herbs and fruits can be just as vibrant, exciting, diverse and easy to combine as annual and perennial flowering plants are.

To begin, provide structure. Placing a picket fence around your garden offers instant structure and visually sets it apart from the rest of the landscape. If you plan on planting along the outside of the perimeter, you will create the allure of a garden within a garden, with a hint of secret places. Place a straight pathway through the center, starting at the entrance. Divide the larger garden into smaller square planting beds using pathways to separate the beds. This will enhance the structure of, and provide easy access to, the garden beds as well as lead your eye through the garden. If desired, you can also used raised beds for this formal structure.

Next, focus on plant selection. Begin with a plant plan or layout. Initially, base your selections on what is pleasing to your individual tastes. Consider unusual varieties of vegetables and herbs that come in unique colors. Repeat colors, both horizontally and vertically, to add depth and dimension to the garden. Don’t forget to add brightly flowering annuals such as zinnias and marigolds to mingle amongst the edibles. Another consideration is edible flowers like nasturtium and calendula. Contrast colors for a striking, eye-catching effect. Keep in mind, also, texture and form. Bold textures add drama and are often combined with fine-foliaged plants for a softening contrast. Short, stout plants anchor the garden bed while tall, willowy plants raise the eye and lead you farther down the garden path. Take all these characteristics into account when planning and place plants in geometric patterns to create a quilt-like garden tapestry.

Finally, your spring edible garden will emerge invoking a feeling of calm, displaying a variety of cool greens, purples and blues found in peas, lettuce, cabbage and broccoli. Shortly after, the summer edible garden will be completely transformed at harvest time with an explosion of vibrant shades of red, purple, orange and yellow. With so many stunning options to combine, you can truly create a feast for the eyes that will be beautiful in every season!

EdiblePlants-1024x457

Feast-2Feast-3

Feast-1

Nurturing Spring Bulbs

Spring bulbs faithfully reappear at the most advantageous time – after a long, cold winter, just when we’re longing for bright colors to relieve the monotony of winter snow and ice. Most spring bulbs are perennial and multiply in number every year, bringing more beauty to the flowerbeds each spring, but some problems can destroy a carefully planted bulb bed. Seemingly carefree, bulbs do require a bit of nurturing to ensure they perform their very best for years to come.

Tips for Bulb Care

  1. Good soil drainage is important to prevent bulbs from rotting so plan your site accordingly. Do not plant bulbs near areas where downspouts let out or large snow piles may build up and spring melt can drown bulbs.
  2. When planting bulbs in the fall, add a high phosphorus fertilizer to the planting hole for the development of strong roots. This will help the bulbs establish well so they can renew themselves each year.
  3. Bulb foliage will often break through the soil after a few warm winter days. This vegetation is hardy and its exposure to the cold will not damage your plants or prevent them from blooming. There is no need to cover, wrap or otherwise protect this initial foliage.
  4. Fertilize bulbs as plants are emerging from the ground. Do not fertilize once flowers appear. Use a 5-10-5 granular fertilizer to assist in foliage and flower development, ideally one that is formulated especially for bulbs.
  5. After blooming, cut back the flower stalk. This will force the plant to put its energy into the bulb for next year’s flowers and not into seed production that would dampen the strength of the bulb.
  6. Allow the leaves to die back naturally. The leaves are vital for producing food that is stored in the bulb for next year’s growth. Cut leaves, never pull, once they have turned yellow – pulling can damage the bulb. Do not tie leaves as this reduces the leaf surface required for adequate food production.
  7. When the foliage has completely died back the bulb is dormant, and this is the proper time to dig and separate bulbs if necessary. Flowering will often be reduced when bulb beds become over-crowded. If division is needed, bulbs should be dug and stored in a cool, dry, well-ventilated place and replanted in the fall.
  8. Fertilize bulbs again in the fall with a high-phosphorus, granular fertilizer.

With thoughtful care, you can easily help your bulbs reach their full potential and they will thrive for many years.

SONY DSCbulbs_5


Cool Wave Pansy

Make way for Cool Wave Pansy! New and improved, bigger and brighter, the familiar little monkey-faced pansy is the new garden darling. These flowers are even more versatile and easier than ever, and ideal for so many beautiful landscaping options.

New Pansies

Cool Wave Pansy is a relatively new cultivar that has so much to offer. These flowers are ideal in beds among other plants and shrubs as a colorful vigorous filler, planted en masse as a blooming groundcover or planted to create amazing baskets and container arrangements with 30” of cascading floral beauty. Standing 6-8 inches tall and covered with three times as many blossoms as regular pansies, Cool Wave Pansies have flowers that glow in four new colors.

  • Frost: White with light blue “frost” edging along the petal margins
  • Violet Wing: Front lower petals are white edged with lavender or darker purples, backed with dark burgundy or purple on upper rear petals
  • Yellow: Bright lemony or sunny yellow blooms
  • White: Bright white petals with slight color variations for elegant interest

Growing Tips

Easy to grow, Cool Wave Pansy is much more vigorous than ever. Choose plants with an overall deep green color with plenty of buds for the best results and fastest blooming. Plant in fertile soil where the plant will receive 6 hours of daily sunlight. Use a liquid fertilizer when planting and fertilize every two weeks to maintain vigor and color. Replace with wave petunias in the summer when it becomes too warm for pansies.

Cool Wave Pansy grows well in rain or cold. In fact, it easily overwinters in many areas. This three-season performer may be planted for fall color, overwinter, and then perk up again in early spring providing an early punch of pizzazz. If it becomes too leggy, just cut back the foliage back to 3 inches tall and fertilize. In a couple of weeks, it will be smiling up at you.

When planting in containers, consider the flower and container colors to maximize the visual effect. Interplant with other textures and colors for an eclectic rainbow of vibrance. When planting in fall, add spring blooming bulbs, as they’ll easily grow through the pansies to create a riot of spring color. Spiky grasses provide a tall and contrasting effect to the pansy’s trailing tendrils, especially in larger containers.

With so many stunning options and new colors to embrace, there’s sure to be a Cool Wave Pansy perfect for all your flower planting desires!

pansy_3

pansy_1

Plants for Wet Soil

More water is always good for plants, right? Wrong! When water stands in the soil, air is displaced, which in turn smothers the plant roots. Once the roots are damaged many symptoms appear on leaves and shoots including wilting, marginal and inter-veinal browning of leaves (scorch), poor color and stunted growth. But the excess water isn’t always coming from overwatering, it may be the result of poor draining soil.

Poor drainage is often produced in disturbed sites when heavy clay soil is compacted by construction machinery or other excessive use, such as yards where several children are often playing. Areas cultivated for plantings, such as flowerbed or borders, then collect water running off the compacted ground – this is called the teacup effect. Wet areas may also be the result of swales, drain spout runoff and low areas even when soil percolation is adequate in most of the site but when general moisture levels are routinely high.

To check for a potential drainage problem, dig a hole at least 2 feet deep, fill it with water and note how long the water remains. If it doesn’t drain completely away within 24 hours a severe drainage problem exists.

Fortunately, you can correct drainage problems in different ways. Easy options include…

  • Divert water past plantings using drainage pipes, splash blocks or rain chains.
  • Plant in mounds or raised beds so water will run off and away from the plants.
  • Install drain tiles in saturated areas or use French drains to contain excess water.
  • Amend the soil with organic matter such as compost to improve its structure.

An even easier solution is to simply select plants that tolerate wet sites. The following trees and shrubs tolerate wet sites and flooding better than most. Few tolerate standing water for long periods (those that grow in truly swampy conditions are marked *), but all will do better in wet areas.

Shade Trees

  • *Acer rubrum/Red Maple
  • *Betula nigra/River Birch
  • Liquidambar styraciflua/Sweet Gum
  • Alyssa sylvatica/Sour Gum
  • Platanus occidentalis/Sycamore
  • Quercus phellos/Willow Oak
  • *Salix spp./Willow
  • *Taxodium distichum/Bald Cypress

Flowering Trees

  • Amelanchier Canadensis/Serviceberry
  • Magnolia virginiana/Sweetbay Magnolia

Evergreen Trees

  • Calocedrus decurrens/Incense Cedar
  • Ilex opaca/American Holly
  • Thuja occidentalis/Pyramidal Arborvitae

Deciduous Shrubs

  • *Aronia arbutifolia/Chokeberry
  • Clethra alnifolia/Summersweet
  • *Cornus spp./Twig Dogwoods
  • Enkianthus campanulatus/Enkianthus
  • Ilex verticillata/Winterberry
  • *ltea virginica/Virginia Sweetspire
  • Lindera benzoin/Spicebush
  • Myrica pennsylvanica/Bayberry
  • *Rhododendron viscosum/Swamp Azalea
  • *Salix spp./Pussy Willow
  • Viburnum spp./Viburnums

Evergreen Shrubs

  • *Andromeda polifolia/Bog Rosemary
  • *Chamaecyparis thyoides/White Atlantic Cedar
  • *llex glabra/Inkberry
  • Kalmia atifolia/Mountain Laurel
  • Leucothoe spp./Leucothoe

Perennials

  • *Arundo donax/Giant Reed Grass
  • Aster nova-angliae/Asters
  • Astilbe spp./Astilbe
  • Chelone/Turtlehead
  • Cimicifuga racemose/Snakeroot
  • Helenium autumnale/Helen’s Flower
  • Hibiscus moscheutos/Hardy Hisbiscus
  • *Iris kaempferi/Japanese Iris
  • Iris siberica/Siberian Iris
  • *Lobelia cardinalis/Cardinal Flower
  • Lobelia syphilitca/Blue Lobelia
  • Monarda didyma/Bee Balm
  • Myosotis scorpiodes/Forget-me-nots
  • Tiarella cordifolia/Foam Flower
  • Trollius europaeus/Globe Flowers
  • Viola spp./Violets

Ground Covers

  • Gallium odoratum/Sweet Woodruff
  • Gaultheria procumbers/Wintergreen
  • Hosta spp./Hosta
  • Mentha spp./Mint
  • Parthenocissus quinquifolia/Virginia Creeper

Annuals

  • Cleome hosslerana/Spider Flower
  • Myosotis sylvatica/Forget-me-nots
  • Torenia fournien/Wishbone Flower
  • Viola wittrockiana/Pansies

Not sure which water-loving plants to choose? We’d be happy to help you evaluate your landscape moisture and other conditions to help you choose the very best plants for your yard!

Two feet wearing rain boots standing in the mud